How to Do Your Own Porcelain Bathtub Refinishing in 5 Steps
Are you tired of looking at your dingy, outdated porcelain bathtub? You’re not alone—many homeowners wish they could give their bathroom a fresh new look without the hassle and expense of a full remodel.
The good news is, refinishing your porcelain bathtub is entirely doable with a little know-how and the right tools.
To refinish your porcelain bathtub in five steps, start by gathering supplies like paint, primer, sandpaper, and safety gear. Then, prepare your bathroom for ventilation and protection.
Next, clean and sand the surface to guarantee good adhesion. Apply a primer followed by thin coats of refinishing paint, letting each dry properly.
Inspect for imperfections, then cure the surface fully. To keep the finish looking its best, follow simple maintenance tips.
Keep going to find detailed tips for a perfect DIY transformation.
Key Takeaways
- Start by cleaning and sanding the bathtub surface really well to remove any residue and make sure the paint will stick properly.
- Then, apply a compatible primer evenly over the surface, making sure to cover every area before it dries.
- Next, use thin, even coats of porcelain refinishing paint or coating. Wait for each layer to dry completely before applying the next.
- After finishing the coats, check for any imperfections and touch them up. Allow the surface to cure fully before using the tub again.
- Finally, take care of the finish by cleaning gently and avoiding abrasive tools so it stays looking good and lasts longer.
Gather Supplies and Prepare Your Bathroom
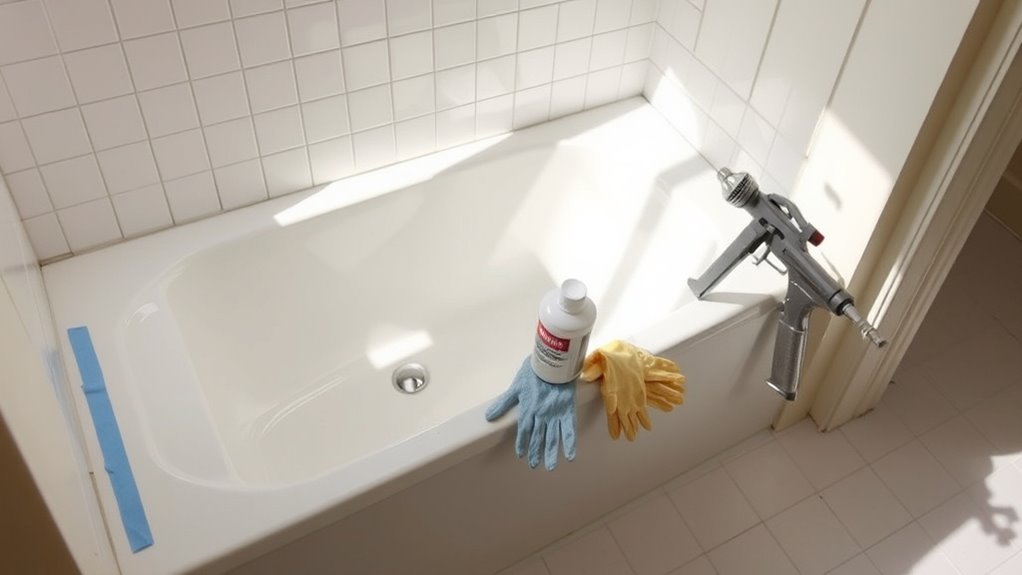
Before starting the refinishing process, gather all the supplies you’ll need and prepare your bathroom. First, find the right paint color that closely matches your original bathtub or your desired new shade. This helps ensure a smooth, professional look.
Start by choosing a paint color that matches your bathtub or suits your style for a flawless finish.
Next, collect essential tools like painter’s tape, sandpaper, cleaning supplies, masks, and gloves for safety. Make sure to prioritize ventilation by opening windows and turning on fans, and always wear a mask and goggles to protect yourself from fumes and dust.
Check your workspace for any hazards or disruptions. Cover nearby surfaces with old sheets or plastic to prevent overspray and keep things clean. Organizing everything beforehand makes the whole process easier and faster.
Proper preparation not only helps you get a clean, even finish but also keeps you safe throughout the project. Once everything’s ready, you can move forward confidently, knowing you’re all set.
Clean and Sand Your Bathtub Surface Effectively
To guarantee a smooth and durable finish, it’s essential to thoroughly clean and sand your bathtub surface. Proper surface preparation ensures the refinishing coat adheres well and lasts longer.
Start by removing soap scum, grime, and soap residue with a non-abrasive cleaner. Use a gentle scrub brush to reach all areas. Once clean, rinse thoroughly and let the surface dry completely.
Next, sand the entire surface using fine-grit sandpaper or a sanding pad. This creates a rough texture that helps the paint stick better. Be careful not to over-sand, which can damage the porcelain.
Make sure to pick cleaning and sanding products that are chemically compatible with your surface to avoid damage or discoloration.
Proper cleaning and sanding remove oils, dirt, and smooth out imperfections. This step is key for the primer and topcoat to bond well.
Following these steps will give you a professional-looking, long-lasting refinishing job.
Apply Primer and Refinishing Coat for a Smooth Finish
Once your bathtub surface is properly cleaned and prepped, apply a high-quality primer to ensure the refinishing coat adheres smoothly and evenly.
Make sure to wear safety gear like gloves, goggles, and a mask to protect yourself from fumes and overspray.
When applying the primer, pick a color that matches your final finish so the colors blend well later on.
Use a spray or brush to put on thin, even coats. Work slowly to avoid drips or uneven coverage.
Wait for the primer to dry completely, following the manufacturer’s instructions.
Next, apply your refinishing coat using the same spray or brush technique, keeping a steady hand and even pressure.
Applying multiple thin coats gives a better finish than one thick layer. Patience is key here.
This careful approach helps you achieve a smooth, glossy surface that looks professional and lasts longer.
Inspect and Cure Your Refinished Bathtub Properly
After you’ve applied the refinishing coat, it’s vital to carefully inspect your work for any imperfections like drips, bubbles, or uneven coverage. Look closely in good lighting to spot areas needing touch-ups before curing.
Once satisfied, follow proper drying techniques for the best results. Keep the bathroom well-ventilated and avoid touching the surface to prevent disturbing the finish.
Ensure proper drying by ventilating, avoiding contact, and patiently waiting for full curing for a flawless finish.
Safety is crucial during this time. Wear protective gear such as gloves and a mask, especially if fumes are present. Make sure your space stays dust-free so particles don’t settle on the wet surface.
Allow the bathtub to cure fully, which might take several days depending on the product instructions. Proper inspection and curing will enhance the appearance and ensure the finish is durable.
Patience and attention to detail during this phase will give you a smooth, long-lasting finish that resists chips and stains.
Maintain Your Refinished Bathtub for Long-Lasting Results
Wondering how to keep your refinished bathtub looking its best for years? Proper maintenance is key to long-lasting results.
First, always prioritize DIY safety—use gentle cleaning products and avoid harsh abrasives that can damage the finish. Regularly wipe down the tub after each use to prevent soap scum and mineral buildup.
When cleaning, opt for soft cloths or non-abrasive sponges to avoid scratches. Keep your expenses in check by avoiding heavy-duty chemicals and choosing simple, affordable cleaning solutions.
Be mindful of cost considerations and don’t rush to replace or repair. Instead, address issues promptly to prevent more extensive damage.
Avoid using metallic or overly abrasive tools that could harm the refinished surface. Proper upkeep will extend your bathtub’s lifespan and save you money in the long run.
With careful maintenance and attention to DIY safety, your refinished tub can stay beautiful and functional for years.
Frequently Asked Questions
How Long Does It Take for the Refinishing Process to Complete?
Refinishing your porcelain bathtub usually takes about 4 to 6 hours, but drying time afterward can extend completion to 24 hours. Keep in mind, the cost considerations for DIY kits are lower than professional services, but they require proper ventilation to minimize environmental impact.
Rushing the process might compromise durability, so make sure to follow the instructions carefully. Planning for adequate drying guarantees a durable finish while being mindful of environmental considerations.
Can I Repaint or Refinish My Bathtub Again After Initial Work?
Think of refinishing your bathtub as giving it a fresh coat of armor. Yes, you can repaint or refinish it again, but only if the first finish is in good shape.
If your surface shows chips or wear, you’ll need to prep thoroughly with DIY tools before choosing new color options.
Keep in mind, multiple coats can help you get a smoother, longer-lasting finish. But don’t overdo it—patience is your best tool.
What Safety Precautions Should I Take During Refinishing?
You should prioritize chemical safety by wearing protective gloves, goggles, and a respirator to prevent inhaling fumes. Make sure to work in a well-ventilated area by opening windows and using fans to disperse chemical vapors effectively.
Follow the manufacturer’s instructions carefully, and handle refinishing chemicals with care. If you notice strong fumes, it’s a good idea to take breaks outside to keep your safety a top priority.
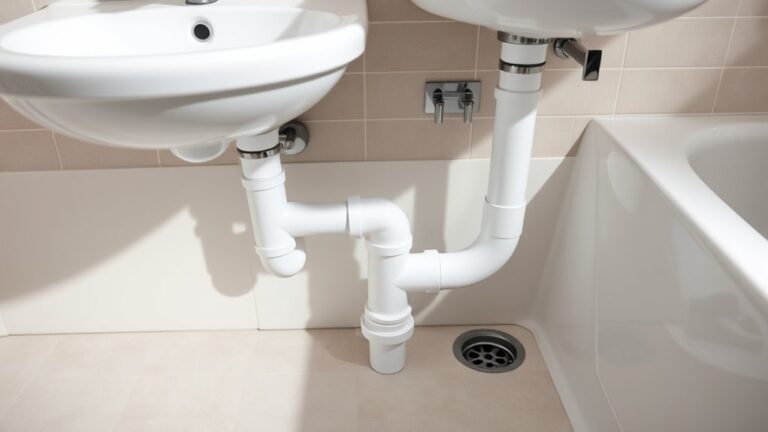
Will Refinishing My Bathtub Affect Its Drainage or Plumbing?
Refinishing your bathtub usually won’t impact its drainage or plumbing if it’s done properly.
However, drain clogs are a common cause of plumbing leaks, so it’s important to check your plumbing beforehand.
Good surface preparation and sealing help keep debris out, which prevents clogs or leaks after refinishing.
If you’re careful, your drain system should stay unaffected, and you’ll enjoy a fresh, durable finish.
How Do I Remove Stubborn Stains Before Refinishing?
To remove stubborn stains before refinishing, start with thorough stain removal by mixing baking soda and water into a paste. Then scrub the affected areas gently.
For tougher stains, apply a commercial porcelain cleaner or a vinegar and baking soda solution, letting it sit briefly.
Proper surface preparation is essential. Make certain you scrub and rinse the surface completely, removing all residues. This process guarantees a smooth, clean surface for the refinishing to adhere properly.
Conclusion
Refinishing your bathtub yourself can save you money and give your bathroom a fresh look. Just remember, patience and attention to detail are key. Like the saying “A stitch in time saves nine,” taking your time with each step guarantees long-lasting results.
With a little effort, your bathtub will shine like new, and you’ll enjoy many more relaxing baths. So, roll up your sleeves and take pride in your work. Your bathroom will thank you for your effort, especially when it’s a DIY porcelain bathtub refinishing project.