10 Steps to Remove the Anti-Scald Valve From Your Bathtub
Many homeowners have struggled with sudden water fluctuations or unexpected temperature changes in their bathrooms. If you’re dealing with these issues, you’re not alone. Removing or replacing the anti-scald valve from your bathtub can be a straightforward way to restore control and safety.
To remove the anti-scald valve from your bathtub, start by diagnosing any water fluctuations or leaks. Gather tools like wrenches and safety gear, then shut off the water supply and drain the tub.
Locate the valve, remove the handle and any obstructions carefully, and inspect for damage.
Choose a compatible replacement, install it properly, and check for leaks. Finally, test the temperature and flow.
Continuing with these steps will help you ensure a safe and effective fix.
Key Takeaways
- Turn off the main water supply and drain any leftover water from the pipes before you start.
- Carefully remove the decorative cap, handle screw, and handle from the anti-scald valve.
- Use the right tools to loosen and detach the valve from the plumbing with steady, gentle movements.
- Check the removed valve for any damage and make sure it matches your existing plumbing for the new one.
- Reinstall the new valve securely, turn the water back on, and check for leaks, correct temperature, and proper function.
Diagnose the Issue With Your Anti-Scald Valve

Before removing the anti-scald valve, you need to figure out if it’s causing the problem. If your water isn’t maintaining a steady temperature or there are big fluctuations, the valve might be faulty or clogged.
Try testing the water temperature during use, and keep an eye out for sudden surges or drops. Sometimes mineral buildup can restrict water flow, making it harder to conserve water effectively.
Test water temperature during use and watch for sudden surges or drops, as mineral buildup can restrict flow.
A malfunctioning valve may also cause water to splash or spray, which can make your bathtub look less appealing. Check that the temperature setting isn’t too high or too low, as improper calibration can seem like a valve issue.
If the valve’s design doesn’t match your bathroom style, consider aesthetic options when replacing it. Picking a sleek or modern style can help improve your bathroom’s overall look.
Getting the diagnosis right ensures you target the right component, helping you restore safety, function, and visual appeal efficiently.
Gather the Right Tools and Safety Gear
Once you’ve identified the need to remove the anti-scald valve, gathering the right tools and safety gear sets the foundation for a safe and efficient process. Start with basic maintenance tips: have a wrench, screwdrivers, and possibly a pipe socket set ready.
You might also need pliers or an adjustable wrench for stubborn parts. Safety gear is essential—wear gloves to protect your hands from sharp edges, and safety goggles to shield your eyes from debris. Remember, common mistakes include working without proper tools or skipping safety precautions, which can lead to injury or damage.
Double-check that you have everything before beginning so you’re not rushing to find missing items mid-task. Proper preparation reduces frustration and prevents accidents. Keep a bucket or towel handy to catch any residual water and avoid water damage.
Staying organized and safety-conscious guarantees a smoother process and minimizes the risk of costly mistakes.
Turn Off Water Supply and Drain the Tub
To start safely removing the anti-scald valve, you need to turn off the water supply to your bathtub.
Locate the main water shutoff valve for your bathroom—usually behind a panel or near the faucet. Turn it clockwise to stop the flow.
Once the water’s off, open the faucet to drain any remaining water from the pipes, preventing messes during removal.
Draining the tub is essential because standing water can cause complications or damage when removing components.
If your setup has individual shutoff valves for the tub, use those instead; otherwise, shutting off the main supply is necessary.
Confirm that water isn’t flowing by turning on the tap briefly. These steps ensure a safe and clean process, making repairs easier and less messy.
Locate Your Bathtub’s Anti-Scald Valve
After shutting off the water supply and draining the tub, the next step is to find the anti-scald valve. This valve is usually located near the bathtub faucet or water outlet.
It’s easier to spot if you know how plumbing has evolved. Modern anti-scald valves are built to meet strict safety standards. These standards came about because of past accidents caused by sudden temperature changes.
Codes now require safety features like this to prevent scalding. Look for a small device attached directly to the hot water line, often inside the wall or beneath the faucet. Its job is to keep water temperature from exceeding safe levels.
Locating this valve correctly is important before you start removing it. It helps you avoid damaging other plumbing parts. If you’re unsure, check your bathtub’s manual or local building codes for guidance.
Remove the Valve Handle and Obstructions
Before you start, make sure to turn off the water supply so you don’t get any leaks. Once the water is off, go ahead and remove the decorative cap to get to the handle screw. Then, loosen and take out the screw completely.
This will give you a clear path to lift off the handle and remove any obstructions that might be blocking your way. Just be careful as you do this, and you’ll be all set to proceed.
Turn Off Water Supply
Before removing the anti-scald valve, you’ll need to shut off the water supply to prevent leaks or water flow. Turning off the main water valve makes sure you won’t be dealing with unexpected water pressure that could cause messes or delays.
If your bathtub has individual shut-off valves, use those instead for easier control. Once the water is off, open the faucet slightly to drain any remaining water and reduce pressure.
This step is essential for safe faucet maintenance and makes removing the valve smoother. Confirm that the water flow has completely stopped before proceeding.
Taking these precautions prevents accidental water damage and makes your task easier and safer. Now, you’re ready to move forward with removing the anti-scald valve.
Remove Decorative Cap
Have you located the decorative cap covering the anti-scald valve? This small piece hides the valve’s aesthetic design, so removing it is your first step.
To do this effectively, use a flathead screwdriver or a plastic pry tool to gently lift the decorative cap.
Apply even pressure to avoid damaging the cap or surrounding surfaces.
Carefully detach the decorative cap, revealing the valve underneath.
Keep the cap in a safe place for reinstallation later.
Removing the decorative cap is essential to access the valve handle and any obstructions.
This step ensures a clean, professional look when you’re finished and prevents damage to the aesthetic design of your bathtub’s fixtures.
Loosen Handle Screw
Use a Phillips or flathead screwdriver to loosen the screw securing the valve handle. You want to make sure the handle is loose enough to remove without causing damage to the handle or the surrounding parts.
Turn the screw counterclockwise to loosen it and gradually release the handle from its place. Be careful not to overtighten during reassembly, as that could affect the screw’s tightness or how secure the handle feels.
Once the screw is fully loosened, gently pull off the handle. This will reveal any obstructions underneath. Removing the handle smoothly helps prevent damage and makes it easier to access the anti-scald valve.
Take your time during this process to avoid stripping the screw threads or forcing the handle, which could make things more complicated. Properly loosening the screw ensures a clear path for disconnecting the valve later.
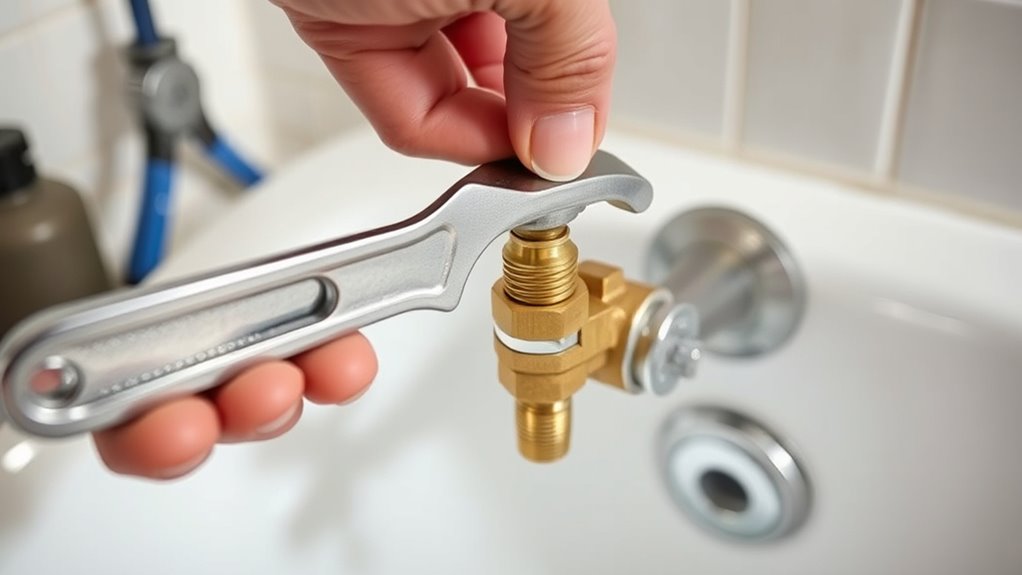
Detach the Valve Carefully From the Plumbing
To detach the valve safely, you’ll want to grab some tools like an adjustable wrench and a pair of pliers. When you’re working on it, handle the valve gently to avoid hurting the surrounding pipes or causing any leaks. Taking your time and using careful techniques will help make sure the removal goes smoothly and can help prevent any issues later on.
Tools Needed for Detachment
Before trying to remove the anti-scald valve, gather the right tools to make the process smooth. Having the proper plumbing accessories is key for maintenance and avoiding damage. First, you’ll need an adjustable wrench to loosen fittings securely.
Second, a pipe wrench can help grip stubborn or tightly secured pipes. Third, a screwdriver—either flat-head or Phillips—will help remove screws or covers. Finally, have a cloth or rag ready to protect your hands and surfaces.
These tools ensure you can carefully detach the valve without harming the plumbing or fixtures. Choosing the right tools minimizes the risk of stripping fittings or damaging threads, making the job safer and more efficient.
Gentle Handling Techniques
Gently handling the anti-scald valve is essential to prevent damage to your plumbing. Use slow, steady movements to detach the valve, avoiding force that could crack fittings or cause leaks. Carefully loosen connections, and if necessary, gently tap with a rubber mallet to release stubborn parts.
Keep water conservation in mind by minimizing water flow during removal. This helps reduce mess and potential water waste. Also, watch your aesthetic considerations; handling the valve with care preserves the fixture’s appearance and prevents scratches or dents.
Remember, patience is key. Rushing could damage pipes or fittings, leading to costly repairs. Always double-check that all connections are properly supported and secure once detached.
This cautious approach ensures the removal process stays smooth and damage-free.
Inspect the Valve for Wear or Damage
As you examine the valve, look for signs of wear or damage that could affect how it works. Check the valve’s appearance—cracks, corrosion, or discoloration can suggest it’s deteriorating. Any physical damage might cause leaks or poor temperature control.
Customer reviews often mention issues like sticking or noises during operation, which could indicate internal problems. To do a thorough check, focus on key areas:
Customer feedback about sticking or noises may point to internal issues needing inspection.
- Cracks or corrosion on the valve body or handle.
- Leaks around seals or connections.
- Worn or damaged internal parts visible through openings.
- Loose or broken mounting parts affecting stability.
Early detection of these issues can help you avoid bigger problems later. Damaged valves tend to be less reliable, and signs of wear might mean it’s time for a replacement. Remember, the valve might look fine on the outside, but internal damage could still be present.
Always prioritize safety and make sure the valve functions correctly before moving forward.
Choose the Correct Replacement Anti-Scald Valve
Looking for the right replacement anti-scald valve? It’s important to make sure the new one fits well with your existing plumbing setup. Take a look at the material and durability of the valve—you want something that’s built to last. Also, double-check that the temperature range it offers matches what you need. By comparing these factors, you can pick a valve that’s safe and reliable for your home.
Compatibility With Existing Valve
Ensuring your new anti-scald valve works with your current plumbing is key for a smooth replacement. Check the compatibility based on installation methods and what the manufacturer recommends.
First, verify that the valve size and threading match your existing one. Then, confirm whether your system uses compression, slip, or threaded fittings.
It’s also a good idea to see if the valve is compatible with your specific brand, as some are designed for certain manufacturers. Lastly, make sure the new valve can handle your household’s water pressure needs.
Material and Durability
Choosing the right anti-scald valve isn’t just about fitting it into your plumbing; the material and build quality determine how long it will last and how well it performs over time.
You should consider material compatibility to ensure the valve resists corrosion and wear in a wet environment. Look for metals like brass or stainless steel, which are known for their durability.
Moreover, check if the valve has undergone durability testing. These tests verify that it can withstand repeated use and temperature fluctuations without failure.
High-quality materials and thorough testing mean you won’t need frequent replacements or repairs. This can save you both time and money in the long run.
Select a valve crafted from resilient materials designed for longevity and consistent performance.
Temperature Range Compatibility
When selecting a replacement anti-scald valve, verifying its temperature range compatibility is vital. You want a valve that matches your existing plumbing and guarantees safe temperature adjustment. To do this, check the valve’s specified temperature range and confirm it aligns with your household hot water setting.
Proper valve calibration is essential for reliable performance and safety. Here are some key points to keep in mind:
- Confirm the valve’s maximum temperature rating meets your needs.
- Verify the temperature adjustment mechanism works smoothly within the range.
- Make sure it’s compatible with your current plumbing setup.
- Double-check that calibration instructions are included for precise temperature control.
Choosing the right valve with a compatible temperature range guarantees safe operation and makes calibration easier.
Reinstall the New Valve and Check for Leaks
After installing the new anti-scald valve, carefully position it into the correct spot and tighten the fittings securely. Make sure the valve lines up properly with your existing plumbing, and use a wrench to avoid over-tightening, which could damage the fittings.
Once the valve is in place, turn on the water supply gradually and check for leaks around the fittings. If you notice any drips or moisture, tighten the connections slightly. Keep in mind that the water pressure should stay steady; too high or too low can affect how the valve works.
You can also make your bathtub look nicer by adding decorative accessories around the new valve to hide any visible fixtures. Use this quick reference table:
| Step | Tip |
|---|---|
| Tighten | Avoid over-tightening fittings to prevent damage. |
| Check | Look for leaks after gradually turning on water. |
| Pressure | Ensure consistent pressure for proper function. |
Following this process helps secure your new valve and ensures it operates without leaks.
Test the Water Temperature and Functionality
Have you tested the water temperature yet to make sure your anti-scald valve is working properly? It’s an important step to keep things safe and ensure everything functions well after removal.
Start by turning on the tap to a moderate setting, then carefully check the water coming out. Make sure the water pressure feels steady and consistent—no sudden surges or drops.
Next, check the water temperature:
- Adjust the faucet to different levels and see how quickly the temperature responds.
- Confirm that the aesthetic looks seamless and matches your bathroom decor after the maintenance.
- Test safety by setting the water to a high temperature—if it heats up too fast, you may need to make further adjustments.
- Inspect around the valve area for leaks or drips, which could indicate a fault.
Following these steps helps ensure your bathtub’s water pressure, temperature, and appearance are safe and ready for regular use.
Frequently Asked Questions
Can I Remove the Anti-Scald Valve Without Professional Help?
You can remove the anti-scald valve yourself, but it’s important to consider valve compatibility and your DIY skills.
If you’re comfortable with basic plumbing and have the right tools, you should be able to handle it.
But if you’re unsure or the valve is hard to access, it’s best to get a professional to do it.
That way, you’ll avoid potential damage or leaks and keep your project safe and running smoothly.
What Signs Indicate My Anti-Scald Valve Needs Replacement?
Spotting softening, surging, or streaks of temperature shifts signals your anti-scald valve might be snagged and should be swapped. Stay safe by following safety precautions and gathering repair tools beforehand.
If you notice inconsistent water temperature, dripping, or if the valve feels loose, it’s time to replace it. Acting early prevents further damage and keeps your shower experience safe and steady every time.
Are There Different Types of Anti-Scald Valves for Bathtubs?
Yes, there are different types of anti-scald valves for bathtubs, including thermostatic and pressure-balancing valves.
When choosing one, think about installation tips like making sure it’s compatible with your setup and mounted correctly.
Regular maintenance is important, so check for leaks, test the temperature limits, and clean away any mineral buildup.
Knowing the specific type of valve helps you find the right replacement or make proper adjustments, ensuring your bathtub’s anti-scald system is safe, efficient, and lasts longer.
How Long Does It Typically Take to Replace the Valve?
Replacing an anti-scald valve usually takes about 1 to 2 hours, depending on your installation timeline and skill level. You’ll need basic tools like a screwdriver, adjustable wrench, and plumber’s tape.
If you’re experienced, the process might be quicker. But if you’re new to plumbing, it’s best to set aside extra time. Always follow the manufacturer’s instructions carefully to ensure proper installation and safe operation of the new valve.
What Should I Do if I Encounter Difficulty During Removal?
If you hit a snag during removal, take a moment to stop and evaluate what’s going on. Make sure you’re using the right tools, like pliers or a wrench, for the job.
Always prioritize safety by wearing gloves and eye protection. If a stubborn part isn’t budging, try applying some penetrating oil to loosen things up.
Gently work on loosening the valve without forcing it, to avoid damaging your bathtub or the fixture.
If you’re still having trouble, it’s a good idea to consider calling in a professional to prevent any safety risks or further damage.
Conclusion
Think of replacing your anti-scald valve as restoring balance to a delicate dance. When the new valve takes its place, it’s like tuning a finely crafted instrument, making sure every note—the right water temperature—resonates perfectly.
With patience and care, you’ll bring harmony back to your bathroom. It transforms a simple task into a small victory of safety and comfort.
Your bath becomes a sanctuary again, where each drop flows in perfect measure thanks to your new anti-scald valve.