How to Turn Your Shower Into a Bathtub Temporarily in 10 Steps
Many people struggle with finding the time or space for a full bath, especially when their shower seems like the only option. You’re not alone—turning a shower into a temporary bathtub can be a game-changer for those moments when you really need a soak.
You can turn your shower into a temporary bathtub by first checking if your shower surface can support a container filled with water. Clean and seal the area to prevent leaks, then choose a sturdy, splash-proof container like a large plastic bin, filling it with warm water.
Securely place the container, add soap or aromatherapy, and carefully fill it to your desired level. After your soak, drain the water promptly and clean up. For more details, keep exploring the steps to make certain of a safe and effective temporary bath.
Key Takeaways
- Seal the edges of your shower with waterproof sealant to stop any leaks when you’re filling it up. This helps keep the water inside and prevents messy spills.
- Pick sturdy, waterproof containers or liners that can hold the water securely in the shower area. Make sure they’re big enough but also stable enough to prevent tipping over.
- Fill the containers with warm water, adjusting the temperature to your comfort level. Secure them well so they don’t accidentally tip or spill.
- Add extra waterproofing measures like liners or secure fixtures to keep everything in place and avoid any water leaks or spills.
- After you’re done, drain the water quickly and clean everything up. Make sure all surfaces and plumbing stay in good condition for next time.
Can Your Shower Support a Temporary Bathtub?
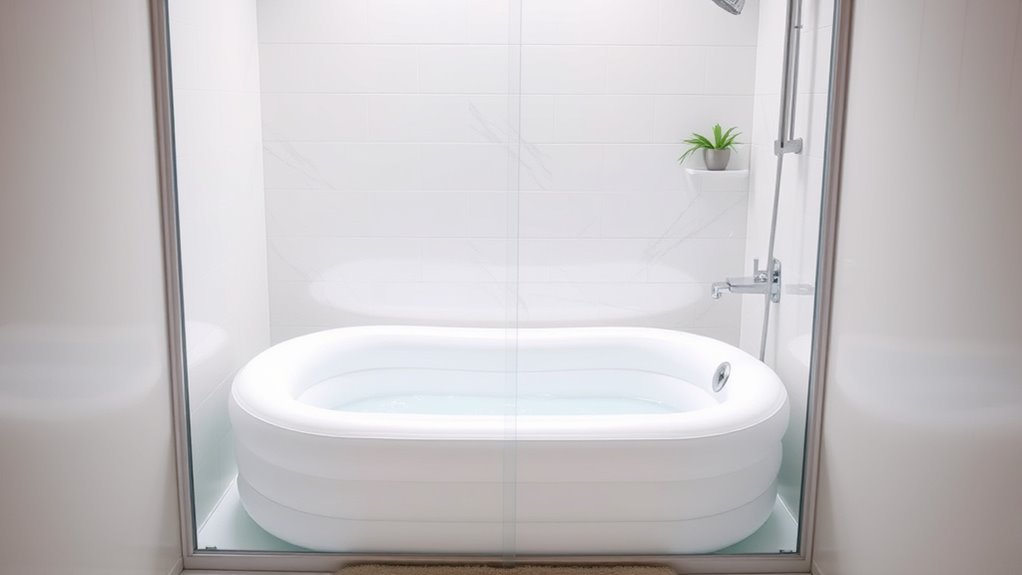
Before transforming your shower into a temporary bathtub, it’s important to check if your shower can handle the extra weight. Start by looking at the materials—surfaces like tile or solid acrylic are usually sturdy enough to hold water and a filled container.
Next, check your shower base’s specs to see if it’s designed to support heavy loads safely. Plumbing matters too—make sure your pipes can handle the extra water volume without leaks or pressure problems.
Verify your shower base’s capacity and ensure plumbing can handle the increased water volume safely.
If your shower has a plastic or flimsy base, it might not support the weight, which could cause damage or even collapse. Also, confirm that your plumbing connections are secure and can supply enough water without putting strain on the system.
When you’re unsure, it’s a good idea to consult a professional. They can assess your shower’s structure and plumbing to prevent mishaps. Ensuring your shower can support this change helps keep your project safe and successful.
Gather Containers and Liners to Hold Water
When you’re picking containers, go for ones that are sturdy and big enough to hold plenty of water without tipping over or spilling. It’s super important to choose waterproof liners made from durable materials—that way, you can prevent leaks and keep your shower surfaces protected.
Getting the right combination of containers and liners makes all the difference. It ensures your setup is safe, effective, and ready to use as your makeshift bathtub without a hitch.
Suitable Container Selection
Selecting the right containers and liners is key to turning your shower into a bathtub successfully. You want sturdy, waterproof options that can hold enough water without spilling.
Think about your plumbing needs too. Make sure the container fits comfortably within your shower space and doesn’t block the drain. Use heavy-duty plastic bins or large waterproof storage containers that can support the water safely.
Keep water temperature in mind. Choose containers that won’t crack or warp when exposed to hot water or temperature changes. The container should also be easy to fill and remove once you’re done.
Avoid flimsy or too-small options that might leak or need constant refilling. Picking the right container makes the whole experience safer and more effective.
Waterproof Liners Choice
How do you guarantee your liner keeps water securely without leaks? The key is choosing the right waterproof liners made from durable materials. Select liners designed specifically for waterproof applications to prevent drips or spills.
Make sure your liner fits snugly within your shower area, maintaining a tight seal to reduce potential leaks during bathtub maintenance. Check for waterproof materials that resist mold and mildew, making cleanup easier and giving your liner a longer lifespan.
Opt for flexible, puncture-resistant liners for easy placement. Properly securing the liner around edges and corners is essential to hold water effectively.
Use heavy-duty waterproof liners made from high-quality materials. Choose flexible, puncture-resistant options for added durability. Secure edges tightly with waterproof tape or clips to prevent leaks.
Ensure the liner overlaps the shower edges for extra protection. Regularly inspect for tears or leaks so you can catch any issues early.
Clear and Seal Your Shower Area to Prevent Leaks
To prevent leaks, it’s important to clear out any debris or soap scum around your shower edges and seams. Regular tile maintenance helps keep these areas clean and reduces the risk of water seeping in.
After cleaning, take a moment to inspect for cracks or gaps where water could escape. Use a good-quality sealant designed for showers to fill those spaces, making sure it’s watertight.
Proper sealing also helps prevent mold by keeping moisture locked in and away from grout lines. Be sure to apply the sealant evenly and give it enough time to cure before using the shower again.
This simple step protects your investment and keeps your space in good shape, especially when turning your shower into a temporary bathtub. Regular resealing will help keep your shower leak-proof, preventing water damage and mold growth.
Following these precautions keeps your shower area safe, clean, and fully functional during your temporary bath setup.
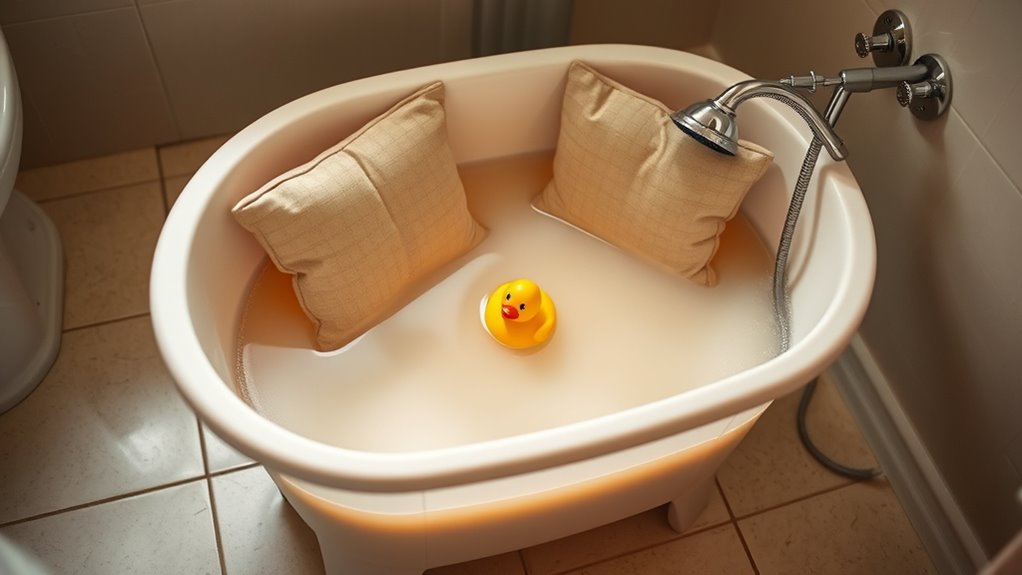
Pick a Safe, Splash-Proof Container for Soaking
When turning your shower into a makeshift bathtub, choosing a safe, splash-proof container is crucial for a comfortable experience. The right container helps prevent water spills and keeps your space dry.
It’s especially important if you’re doing a quick shower makeover or installing a temporary bathtub. Look for something sturdy, stable, and high enough to hold water without overflowing.
Pick containers with non-slip bottoms and secure handles for easy handling. Make sure it fits well inside your shower to avoid knocking over or leaks.
Options include Rubbermaid storage bins or large plastic tubs, collapsible fabric laundry hampers, inflatable kiddie pools or air-filled bathtubs, heavy-duty storage boxes with secure lids, and large shallow basins with high sides.
Choosing one of these ensures safety and helps minimize splashing as you convert your shower into a makeshift bathtub.
Fill the Container With Water at a Comfortable Temperature
Once you’ve picked a suitable container, the next step is to fill it with water at a comfortable temperature. Start by running hot water and then slowly add cold until it feels just right.
Your water should be warm but not scalding, so you avoid burns or discomfort during soaking. A good rule of thumb is to aim for a temperature that feels cozy and gentle on your skin.
Here’s a simple guide to help you find the right temperature:
| Temperature Feel | Water Temperature Example | Soap Selection |
|---|---|---|
| Slightly warm | Just above lukewarm | Use gentle, moisturizing soap |
| Comfortable to touch | Around 100°F (38°C) | Prepare a soft cloth or sponge for cleanup |
| Warm but not hot | 105-110°F (40-43°C) | Keep soap nearby for freshening up |
Adjust the water temperature as needed and pick soap that suits your skin type. This makes your bath relaxing, safe, and enjoyable.
Secure Everything to Stop Spills During Your Bath
Before you start filling your container, make sure everything is securely in place to prevent spills. Check that bathroom fixtures like faucets and handles are turned off tightly so no water leaks out.
If you’ve recently done plumbing upgrades, ensure all connections are sealed correctly to avoid unexpected drips. Secure any loose items or parts around the shower area, like showerheads or hoses, to keep the flow steady.
Use towels or non-slip mats around the perimeter to catch any small spills. Placing waterproof tape around edges or joints prone to leaks can also help contain water.
These steps help keep water confined, preventing messes or damage. If your plumbing is old or faulty, consider upgrading fixtures to reduce leaks during your improvised bath.
Properly securing everything means a smoother, less stressful experience. It turns your shower into a safe, temporary bathtub with minimal mess.
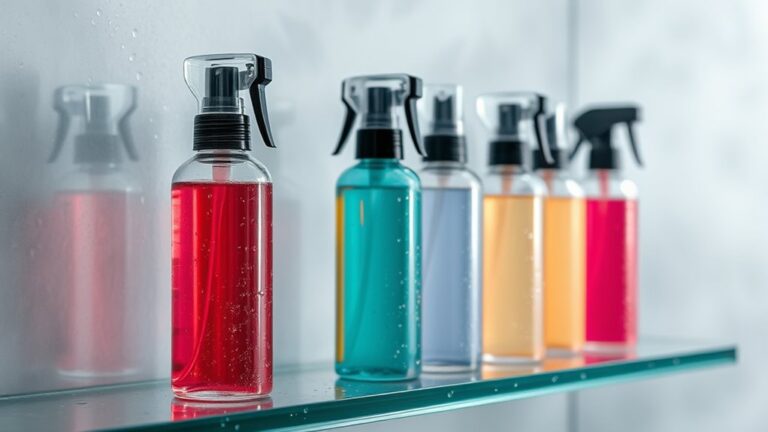
Add Soap, Shampoo, and Aromatherapy for Comfort
Adding soap, shampoo, and aromatherapy transforms your makeshift bathtub into a relaxing sanctuary. Bath additives like fragrant soaps and nourishing shampoos create a soothing environment, while aromatherapy benefits amplify your relaxation.
These elements don’t just clean; they uplift your mood and reduce stress, turning an ordinary bath into a spa-like escape. To improve your experience, consider the following options:
| Bath Additives | Aromatherapy Benefits |
|---|---|
| Lavender soap | Promotes relaxation and reduces anxiety |
| Eucalyptus shampoo | Clears sinuses and invigorates the mind |
| Chamomile bubbles | Eases stress and encourages restful sleep |
How to Prevent Water Overflow and Keep Your Bathroom Dry?
Want to keep your bathroom dry and avoid any nasty water spills? It’s pretty simple—start by applying a good sealant around the edges of your bathtub or shower area. This little trick helps prevent leaks and keeps water from seeping into places it shouldn’t.
Also, don’t forget to adjust the water level to a safe height. If the water’s too high, it’s easy for it to spill over. Keeping the water at a reasonable level can save you from messy cleanups and potential water damage. Just a few easy steps can make a big difference in maintaining a dry, hassle-free bathroom!
Proper Sealant Application
Applying sealant correctly is essential to prevent water from leaking outside your shower or bathtub area. When done right, it creates an effective waterproof barrier, stopping water from sneaking through gaps and causing damage.
Make sure to clean and dry the area thoroughly before applying the sealant. Using a high-quality, waterproof silicone sealant designed for bathrooms will give the best results.
Apply the sealant smoothly along all joints, corners, and edges. Avoid gaps or gaps, and use a caulking tool or your finger to ensure an even, neat finish.
Once you’ve applied the sealant, smooth it out for maximum adhesion. Allow it to fully cure before exposing it to water to keep everything watertight.
Remember, proper sealant application helps minimize leaks and keeps your bathroom dry.
- Clean and dry surfaces thoroughly
- Select waterproof, bathroom-grade sealant
- Apply in a continuous, steady bead
- Smooth the sealant with a caulking tool
- Allow sufficient curing time
Adjust Water Level
If your water level is too high, it’s likely to spill over and cause a mess outside the tub or shower area. To prevent this, carefully monitor the water, keeping in mind your bathtub’s size to set the right fill line.
Adjust the water temperature to avoid constant topping up since hot water expands more. A simple guideline is to fill the tub just below the overflow edge.
Here’s a quick table to help you set the right water level:
| Water Level | Tub Dimensions | Water Temperature |
|---|---|---|
| Slightly below overflow | Match to bathtub size | Keep between 100°F-104°F |
| At overflow | Largest tub size | Slightly cooler or warmer |
| Too low | Smaller tub | Avoid heating issues |
| Too high | Larger tub | Maintain safety |
Keeping these factors in check helps avoid overflows and keeps your bathroom dry.
Drain and Clean Up After Your DIY Bath
Once you’ve finished filling your DIY bathtub, it’s important to drain the water quickly to prevent any leftover residue from causing odors or damage. After draining, make sure to clean the area thoroughly to remove soap scum, dirt, and debris.
Proper cleanup helps protect your plumbing modifications and ensures your shower stays hygienic. Check the drain for blockages or buildup that could slow water flow, and clear any obstructions as needed.
Wipe down all surfaces with a mild cleaner to prevent mold or mildew from forming. If you’ve temporarily altered the shower for a bath, inspect the plumbing connections to confirm everything is intact and there are no leaks.
Regular cleaning during and after your DIY bath will extend the lifespan of your setup and keep it hygienic. Removing water completely from the drain prevents future clogs, and wiping surfaces keeps mold at bay.
Be sure to check for and clear any blockages that could hinder water flow. Inspect the plumbing for leaks or damage to avoid costly repairs later.
Finally, store or recycle any leftover materials safely and properly, helping you finish your project responsibly. Following these simple steps keeps your shower in top shape and makes future bathtub installations easier.
Thinking Long-Term? Consider Installing a Small Bathtub
Thinking about the long run? You might want to consider installing a small bathtub. It’s a great way to save space and make your bathroom more practical. Plus, it’s a smart investment that can add both value and flexibility to your home.
Getting a small bathtub now can really pay off in the future. It’s perfect if you’re looking for convenience and want to plan ahead for any changing needs down the line.
Space Efficiency Solutions
Considering your long-term needs, installing a small bathtub can be a smart way to maximize your bathroom space. It provides a practical solution for future comfort and efficiency, especially if you want a permanent fixture. Be mindful of safety by choosing slip-resistant surfaces and secure installation.
Plan for plumbing considerations to ensure proper water flow and drainage without cluttering your space. Compact tubs fit well in tight areas, saving space for movement or extra storage. To visualize ideas, consider options like wall-mounted or corner models.
You might also explore built-in or alcove designs, which can save space while adding style. Using space-saving fixtures and faucets can further enhance your layout. Incorporate shelves or niches for essentials, making your bathroom more functional.
Finally, plan for easy access and safety features to create a bathroom that’s both efficient and comfortable. These options help improve function while keeping your space sleek and organized.
Long-Term Investment Benefits
Investing in a small bathtub now can save you money and effort in the long run, offering lasting value for your home. It encourages efficient home remodeling by adding versatile bathing options without taking up too much space. Plus, a small bathtub helps conserve water, which can lower your utility bills and reduce your environmental impact over time.
Choosing this upgrade today means you’ll enjoy long-term convenience and sustainability. Here’s a quick look at the benefits:
| Benefit | Details |
|---|---|
| Cost Efficiency | Lower installation and maintenance costs |
| Space Optimization | Frees up room for other home features |
| Water Conservation | Uses less water, supporting eco-friendly habits |
| Increased Home Value | Adds appeal and functionality for future buyers |
A small bathtub is a smart investment for your ongoing home improvement journey.
Frequently Asked Questions
Can I Use My Existing Showerhead During the Temporary Bath?
Yes, you can often use your existing showerhead during a temporary bath, but make sure it’s compatible first. Check if it fits your shower arm — some are universal, and others aren’t.
Keep water pressure in mind too. A high-pressure showerhead might cause splashing or discomfort when used for a bath.
Adjust the water flow if needed, and make sure everything is secure so there are no leaks or accidents.
How Long Can I Safely Fill the Container Without Causing Structural Damage?
Think of your container like a delicate balloon—filled with water, it must stay within its limits.
You can usually fill such a container safely for about 20-30 minutes, depending on its size and material.
Always consider structural safety and container durability.
Avoid overfilling to prevent cracks or leaks.
If you notice any signs of strain or bulging, stop immediately.
This helps protect your space and keeps everything safe.
Are There Specific Waterproof Liners Recommended for Different Shower Types?
Yes, there are specific waterproof liners recommended for different shower types. You should choose liners designed for your shower’s material, like acrylic or tile, to ensure a proper fit and waterproofing.
For acrylic showers, flexible rubber or vinyl liners work really well. If you have tile, you might prefer heavy-duty polyethylene or specialized membrane liners for better protection.
Always check the manufacturer’s guidelines to pick the best waterproof liner for your shower type. That way, you’re sure it will perform well and last a long time.
Will Using Certain Bath Additives Damage My Shower Surface?
Using certain bath additives can damage your shower surface if they contain harsh chemicals or dyes. Always check labels and opt for gentle, non-abrasive products to protect your shower.
While some additives might seem safe, they could cause discoloration or surface erosion over time. To keep your shower looking its best, choose products designed for delicate surfaces.
It’s a good idea to look at manufacturer guidelines for safe use. This way, you can enjoy your bath without worrying about damaging your shower.
How Can I Prevent Mold and Mildew After Using the Shower as a Bathtub?
To prevent mold and mildew after using your shower as a bathtub, make sure to get good ventilation. Open a window or turn on the exhaust fan to help moisture escape.
Stick to a regular cleaning routine with mold-inhibiting solutions. Pay special attention to corners and grout lines where mold tends to hide.
Wipe down surfaces after each use to remove excess moisture. Keeping things dry is key to preventing mold and mildew.
These simple steps will help keep your shower dry, mold-free, and feeling fresh and healthy.
Conclusion
Now that you’ve transformed your shower into a dreamy soak spot, enjoy the feeling of a spa right at home. Think of it as turning your bathroom into a personal oasis—you’re the captain steering this DIY ship!
With a few simple steps, you’ve created a relaxing retreat without the hassle of a full bathtub installation. So go ahead, unwind and let your worries wash away—your portable bathtub is just a splash away!