7 Steps to Refinish a Cast Iron Clawfoot Bathtub
Refinishing a cast iron clawfoot bathtub can seem like a daunting task, especially if you’re worried about creating a professional-looking finish. Many people struggle with getting that smooth, glossy look that makes their bathroom feel fresh and inviting.
But don’t worry—you’re not alone, and with a bit of guidance, you can do it yourself.
To refinish your cast iron clawfoot bathtub, start by clearing the area, protecting surfaces, and evaluating for damage. Sand away old paint and rust, then thoroughly clean the surface to guarantee good adhesion.
Apply a suitable primer, followed by durable, water-resistant paint in thin, even coats. Let each layer dry completely, and finish with proper curing. With regular maintenance, your bathtub will look great for years.
If you follow these steps, you’ll learn more about achieving a perfect finish.
Key Takeaways
- Start by thoroughly cleaning the bathtub surface. Check for chips, cracks, rust, or any damage and fix those before moving on.
- Next, sand the surface with medium-grit sandpaper to get rid of old paint, rust, and to help new paint stick better.
- Mask off any fixtures and surrounding areas. Then, apply a primer that works well for cast iron and tile surfaces.
- Use thin, even coats of water-resistant refinishing paint. Allow enough drying time between each coat for the best finish.
- Finally, keep the bathtub clean with gentle products and regularly check for chips or damage. Reapply sealant or wax when needed to keep it looking good and durable.
Your Complete Guide to Refinishing a Cast Iron Clawfoot Bathtub
Are you ready to give your old cast iron clawfoot bathtub a fresh new look? Refinishing is more than just a surface makeover; it’s a chance for historical restoration and aesthetic upgrade.
Restoring your vintage tub keeps its charming character while breathing new life into its surface. Focus on preserving its classic design and authentic details to keep its historical significance intact.
Restoring your vintage tub preserves its charm and historical significance while revitalizing its surface for timeless beauty.
Choose a color or finish that complements your décor to create a stunning focal point. Proper refinishing restores a smooth, shiny surface and protects against future damage, helping it last longer.
This process not only boosts the visual appeal but also celebrates the bathtub’s original craftsmanship. With careful attention, you can transform your clawfoot tub into a beautifully restored piece. It will blend timeless charm with modern durability.
Refinishing isn’t just about looks. It’s about preserving history and boosting your bathroom’s style at the same time.
How to Prepare Your Bathtub and Workspace for Refinishing
Before you start refinishing your bathtub, it’s important to prepare both the tub and your workspace thoroughly. This will help ensure a smooth and successful process.
Start by clearing the area around your bathtub. Remove any accessories like soap dishes, handles, or decorative elements. Cover nearby surfaces and fixtures with drop cloths to protect them from dust and paint splatters.
Good lighting is essential; make sure your workspace is well-lit so you can see every detail clearly. Organize your tools and materials within easy reach to make your job easier.
Use the table below to check your setup:
| Workspace Preparation | Bathtub Setup |
|---|---|
| Clear surrounding area | Remove all accessories |
| Protect floor and fixtures | Clean tub surface |
| Ensure good workspace lighting | Mask off areas and fixtures |
| Organize tools and materials | Check for any surface damage |
| Ventilate the room | Prepare sandpaper/cleaner |
Proper setup saves you time, improves safety, and helps you achieve a professional finish.
Removing Old Enamel and Surface Imperfections
First, take a good look at the surface damage to figure out the best way to remove the old enamel and surface imperfections. It’s important to be gentle during this step so you don’t cause any additional harm.
Once you’ve assessed the damage, use soft, careful techniques to prepare the surface. This careful approach helps create a smooth and even foundation for the refinishing process, making everything look much better in the end.
Assess Surface Damage
To properly assess surface damage, carefully examine the bathtub’s condition to find areas where the old enamel has chipped, cracked, or worn away. Pay close attention to any surface cracks, as these can get worse if you ignore them.
Look for rust spots and corrosion because these need to be addressed with effective rust removal techniques before refinishing. Use a flashlight to better see imperfections and a utility knife to gently probe surface cracks.
| Damage Type | Key Inspection Tip |
|---|---|
| Surface cracks | Check for fine or deep cracks that need repair |
| Enamel chips/wear | Identify areas with missing or thin enamel |
| Rust spots | Spot rust to determine if rust removal is necessary |
Gentle Surface Preparation
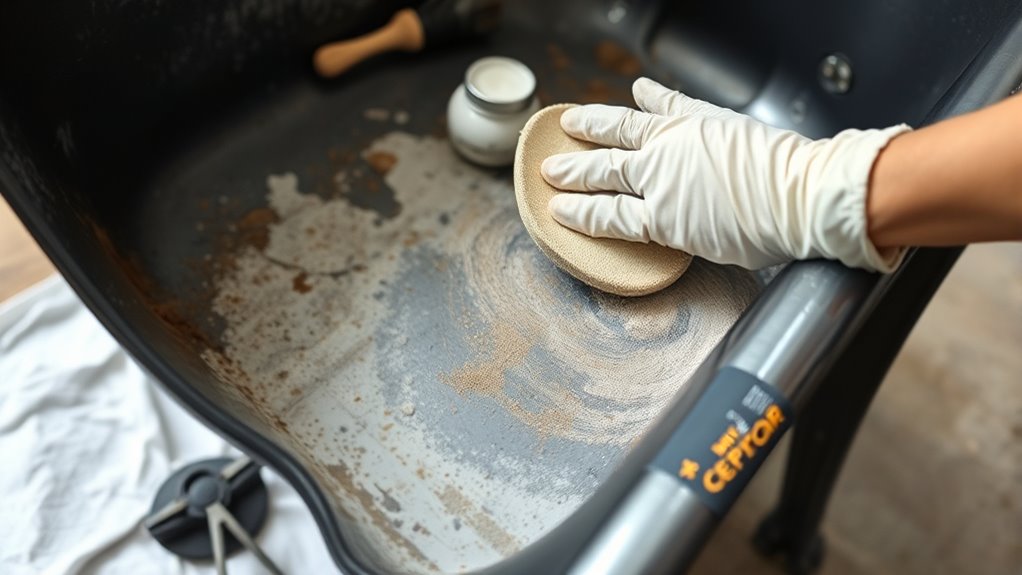
Once you’ve spotted areas with chips, cracks, and rust, the next step is to get the surface ready by removing the old enamel and smoothing out any rough spots. Start with gentle cleaning to get rid of dirt, grease, and residue, which helps with better adhesion later on. Use a soft brush or cloth with a mild cleaner.
Next, carefully strip away the damaged enamel using a safe, non-abrasive pad or a chemical stripper that’s suitable for cast iron. Avoid harsh tools that might damage the surface. Once loose material is gone, focus on polishing the surface to smooth out any rough spots and imperfections.
This process makes sure the surface is properly prepared for refinishing, giving you a clean, even base. Be patient and thorough during this step to ensure a professional-looking finish.
Sanding and Cleaning the Bathtub for a Smooth Finish
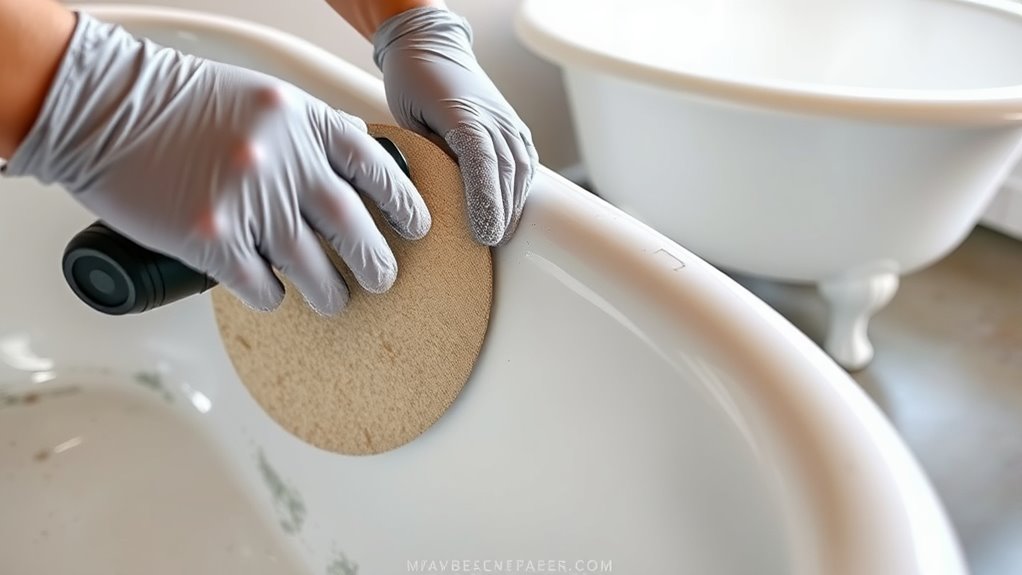
Before you can achieve a smooth, refinished surface, it’s vital to thoroughly sand and clean your cast iron clawfoot bathtub. Start by removing any loose paint, rust, or previous coatings with medium-grit sandpaper.
Focus on areas with decorative patterns or textured finishes to ensure all imperfections are smoothed out. Use a sanding sponge to reach tight corners and intricate designs without damaging them.
Once sanding is complete, clean the entire surface with a degreasing cleaner or vinegar solution to remove dust, grease, and residue. Wipe down with a lint-free cloth and let the tub dry completely.
Proper cleaning is essential for good adhesion of the primer and refinishing paint. Pay special attention to textured finishes, which can trap dirt and debris. When you’re done, your bathtub should have a uniform, slightly rough surface ready for the next steps, with no debris or grease left behind that could harm the final finish.
Choosing the Right Primer and Refinishing Paint
Color options are important too—choose a shade that matches your bathroom style or go with classic white for a versatile look. The refinishing paint should be durable, water-resistant, and able to handle cleaning products.
Pick products labeled for bath or tile use to ensure they last and resist moisture. Always follow the manufacturer’s instructions for the best results.
Applying and Curing the New Finish Evenly
To get a smooth and even finish, it’s best to apply the refinishing paint in thin, consistent coats. This helps prevent drips and ensures the color matches evenly.
After spraying or brushing, make sure to let the paint dry thoroughly before adding the next layer. Proper drying time helps the finish cure correctly and keeps it durable.
Be patient and don’t rush the process. Waiting enough time between coats is key for a professional-looking, long-lasting result.
Here’s a simple guide to managing application and curing:
| Step | Tips |
|---|---|
| Thin Coats | Apply multiple light coats for a smooth finish |
| Consistency | Use steady strokes to keep layers even |
| Color Matching | Blend coats evenly for uniform color |
| Drying Time | Wait the recommended time between coats |
| Final Curing | Let the finish fully cure before using it |
Maintaining Your Refinished Bathtub for Long-Term Durability
To keep your refinished bathtub looking its best, it’s important to stick to the right cleaning techniques and take good care of the finish. Regularly maintaining the protective coating is key to making it last a long time.
Also, try to avoid harsh chemicals when cleaning, because they can damage the new surface and shorten its lifespan. Instead, opt for gentle cleaners to keep your bathtub looking fresh and beautiful for years to come.
Proper Cleaning Techniques
Proper cleaning is essential for preserving the finish of your refinished cast iron clawfoot bathtub and making sure it lasts for years. Use gentle cleaning agents made specifically for refinished surfaces to keep it in good shape.
Avoid harsh abrasives that can scratch or damage the finish. When cleaning, use a soft scrub brush to remove dirt and grime without harming the surface.
Here are the steps to follow:
- Apply a mild, non-abrasive cleaner.
- Gently scrub the surface with a soft brush.
- Rinse thoroughly with warm water to wash away residue.
- Dry with a soft cloth to prevent water spots and keep the shine.
Protective Coating Maintenance
Maintaining your refinished bathtub’s protective coating is essential for guaranteeing long-term durability and beauty. Regularly inspect the coating for chips or scratches to keep it in good condition.
Keep water and cleaning products gentle, as harsh chemicals can weaken the protective coatings and compromise surface adhesion. Use soft cloths or sponges when cleaning, avoiding abrasive materials that might damage the finish.
Applying a sealant or wax periodically can help reinforce the protective layer and prevent moisture from penetrating. Be mindful of soap scum, minerals, and other residues that can erode the coating over time.
Consistent maintenance ensures your refinished bathtub stays glossy and protected. This helps extend its lifespan and keeps it looking its best for years to come.
Avoiding Harsh Chemicals
While keeping your bathtub’s protective coating in good shape is important, using the right cleaning products makes a big difference. You should avoid harsh chemicals that can damage the finish.
Instead, opt for natural cleaning, eco-friendly products that are gentle yet effective. To protect your refinished surface, consider these tips:
- Use vinegar and baking soda for stubborn spots
- Choose plant-based or biodegradable cleaners
- Avoid bleach, ammonia, and abrasive scrubbers
- Regularly wipe the surface with a soft cloth after each use
Frequently Asked Questions
How Long Does a Complete Refinishing Process Typically Take?
A complete refinishing process usually takes about 2 to 4 days. You start with cleaning preparations to remove dirt and old paint, which can take several hours.
Then, you apply primer and carefully follow painting techniques, making sure to allow plenty of drying time between coats. The drying process is crucial, so delays might extend it.
Is It Necessary to Remove the Bathtub From the Bathroom?
Yes, you should consider doing a thorough cleanup, including removing the bathtub if needed. Taking out the bathtub allows for better refinishing and helps prevent messes while keeping things safe.
Removing your bathtub usually involves disconnecting the plumbing and gently lifting the tub out. It’s a process you can handle on your own, but if you’re unsure, it’s smart to call in a professional. This way, everything stays safe, smooth, and hassle-free.
What Safety Precautions Should I Follow During Refinishing?
To guarantee safety during refinishing, you should wear appropriate safety gear like gloves, goggles, and a mask to protect yourself from fumes and chemicals.
Always follow proper ventilation practices by working in a well-ventilated area or using fans and open windows.
These precautions help prevent inhaling harmful vapors and safeguard your skin and eyes. Stay alert and keep a safe distance from fumes at all times.
Can I Customize the Color or Finish Style?
Absolutely, you can customize the color and finish style to be as unique as your personality! With a variety of options available, you can turn your bathtub into a statement piece.
Whether you prefer a glossy, matte, or antique look, the choices are endless. You’re the artist here, so feel free to release your creativity.
Create a vintage or modern masterpiece that transforms your bathroom into a personal sanctuary.
How Do I Prevent Future Chipping or Cracking?
To prevent future chipping or cracking, start by thoroughly preparing the surface with proper cleaning and sanding.
Applying high-quality protective coatings creates a durable barrier against moisture and wear. Avoid harsh chemicals or abrasive cleaners that can damage the finish.
Make sure you’re using the right tools and techniques during application. Regular maintenance and gentle cleaning help preserve the finished surface, reducing the chance of chips or cracks over time.
Conclusion
Refinishing your cast iron clawfoot bathtub takes effort, but it’s surprisingly rewarding. You might find yourself wanting to do it again in a few years, though. With patience and the right techniques, you can preserve that vintage charm for a long time.
Just remember, no matter how perfect your finish looks, a little bit of maintenance goes a long way. Even the best DIY projects aren’t truly “forever,” but with care, you can keep your bathtub looking beautiful for years to come.