How to Install a Pfister Bathtub Faucet in Three Simple Steps
Many homeowners find upgrading or replacing a bathtub faucet intimidating. You’re not alone—many people struggle with this task, unsure where to start or worried about leaks.
To install a Pfister bathtub faucet in three simple steps, start by turning off the water supply and carefully removing the old faucet, keeping all parts organized.
Next, prepare your new faucet by inspecting it, assembling any necessary parts, and connecting the supply lines properly, making sure they’re secure without leaks.
Finally, tighten all connections, turn the water back on, and test for leaks to ensure everything works smoothly.
For more detailed tips, follow the full process outlined below.
Key Takeaways
- Turn off the water supply, then remove the old faucet and prepare the area for installation.
- Inspect and assemble the new Pfister faucet components according to instructions.
- Connect supply lines, ensuring proper alignment and sealing with plumber’s tape or sealant.
- Secure the faucet firmly, checking for levelness and tightness to prevent leaks and wobbling.
- Turn on the water, test for leaks and proper flow, and make adjustments as necessary.
Tools and Materials Needed for Installing a Pfister Bathtub Faucet
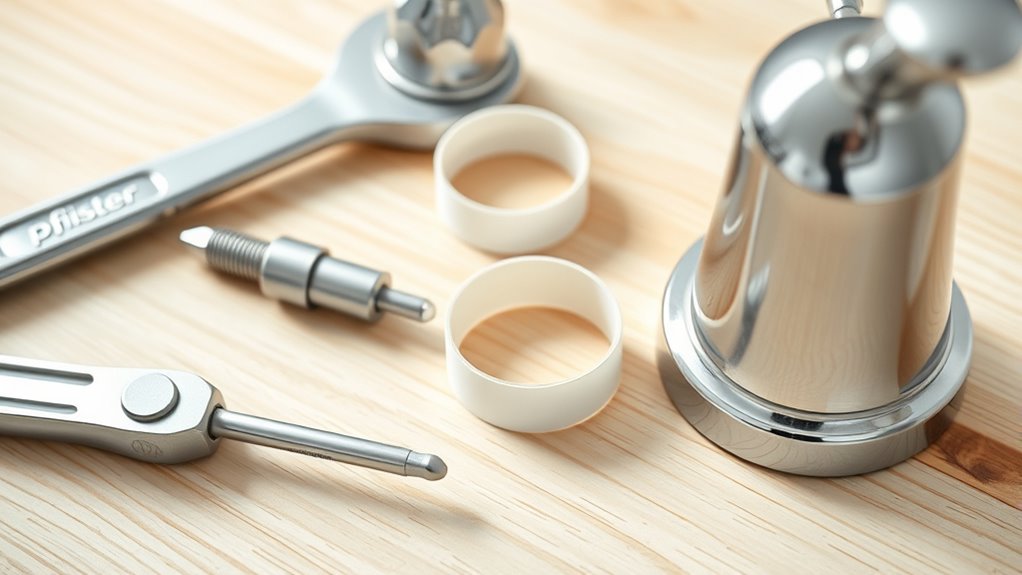
To install a Pfister bathtub faucet effectively, you’ll need a specific set of tools and materials. Start with an adjustable wrench and a Phillips-head screwdriver for general assembly and tightening connections.
Begin with an adjustable wrench and Phillips-head screwdriver for smooth Pfister faucet installation.
You’ll also want a level to ensure the faucet sits evenly, and plumber’s tape to create a watertight seal on threaded connections. The faucet’s decorative finishes, such as brushed nickel or chrome, demand gentle handling to avoid scratches.
Make certain to have replacement O-rings and sealing washers; these are essential for preventing leaks and maintaining water pressure. A waterproof sealant or silicone caulk can help secure the installation and prevent water damage.
Keep in mind, water pressure can impact the faucet’s performance, so verify your home’s water system can handle the fixture’s specifications. Having these tools and materials on hand will streamline the process and guarantee your Pfister faucet operates smoothly and looks great.
Turn Off Water Supply Before Starting
Before removing the old faucet or installing the new one, you should shut off the water supply to prevent leaks and water damage. Turning off the water ensures that flow won’t interfere with your work or cause a mess.
Locate the shut-off valves, usually under the sink or behind access panels. Once they’re off, turn on the faucet to drain any remaining water. This helps stabilize water temperature and minimizes messes.
Knowing what material the faucet is made of can help you gauge how much water might still be in the pipes and how cautious you need to be. Make sure these valves are completely closed; any partial flow can still cause leaks or water damage during the job.
This simple step keeps you safe and protects your bathroom from unnecessary water exposure, making the installation go much more smoothly.
Remove Your Old Bathtub Faucet Step-By-Step
Before you start removing that old bathtub faucet, make sure you’ve turned off the water supply first. It’s a small step, but super important to avoid any surprises. Once that’s done, you can go ahead and take off the faucet handle along with any trim or covers that might be hiding screws or other parts.
Now, carefully detach the old fixture, being mindful not to damage any surrounding area. As you do this, keep track of all the parts and screws you remove—you’ll need these later when installing the new faucet. Taking your time here will make the whole process smoother and less stressful!
Shut Off Water Supply
Since working on your bathtub faucet involves handling the water supply, cutting it off first is essential. Locate the main water valve, usually near the water heater or basement, and shut it off to prevent leaks and water damage.
Turning off the water ensures you won’t accidentally cause water pressure issues or sudden sprays as you work. Test the faucet by turning on the existing handle to release any remaining pressure.
This step also helps keep the faucet areas cleaner by minimizing water splashes and messes. Once the water is off, you’ll have a safer, cleaner workspace, making it easier to remove the old faucet and install the new Pfister model.
Always double-check that no water is flowing before moving on to the next step.
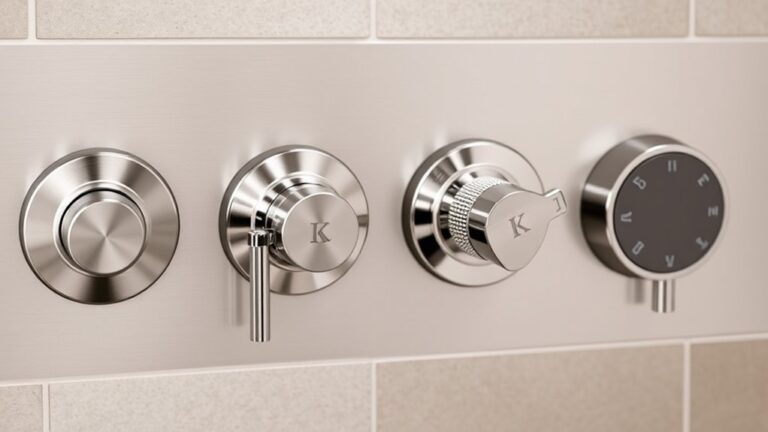
Remove Faucet Handle
To start removing the faucet handle, find the set screw, usually hidden under a decorative cap or cover on the handle.
Once you’ve located it, use an Allen wrench or screwdriver to loosen and take out the screw.
Carefully lift off the faucet handle, making sure you keep track of any small parts.
Work slowly to avoid damaging nearby components and keep safety in mind.
Visualize the process with these steps:
- Find the hidden set screw beneath the handle’s decorative cap.
- Loosen the screw with the right tool, applying steady pressure.
- Gently lift the faucet handle, avoiding sudden moves.
- Set the handle aside in a safe, organized place for the next step.
Always prioritize plumbing safety, working patiently and precisely.
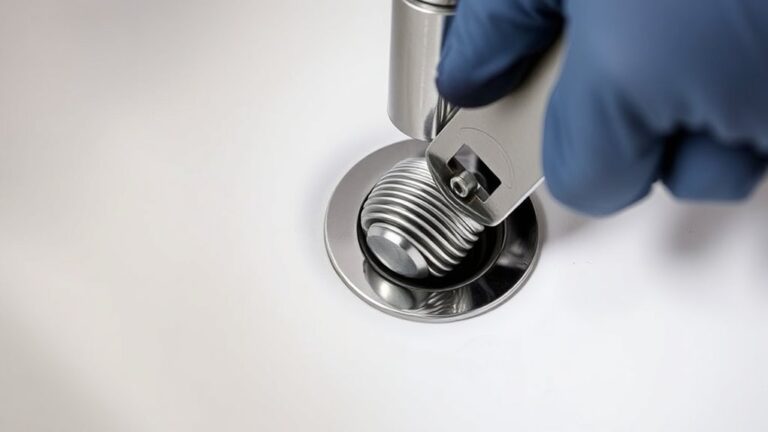
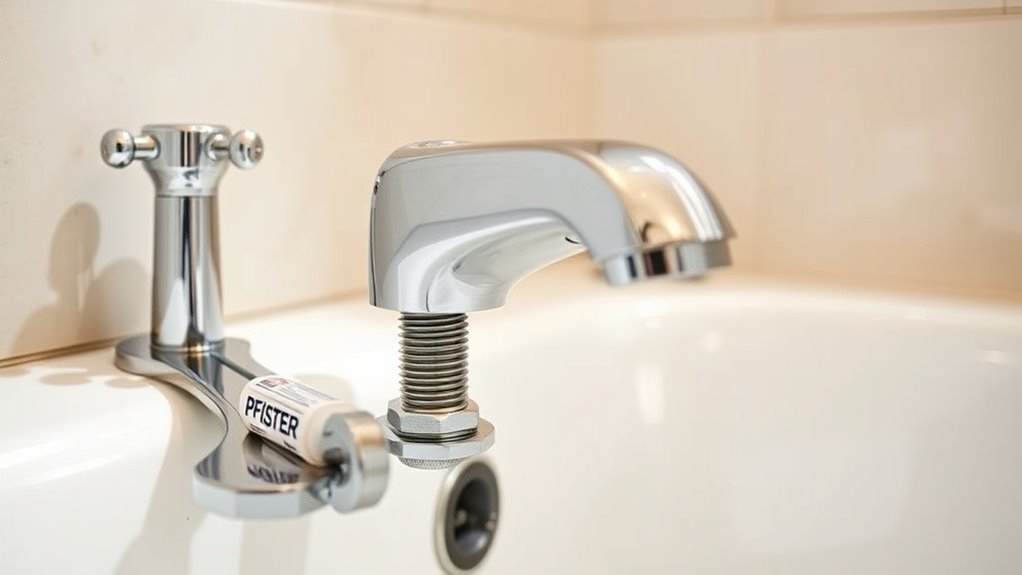
Detach Old Fixture
Removing your old bathtub faucet involves carefully disconnecting it from the plumbing and securing parts. First, turn off the water supply to prevent leaks.
Use a wrench to loosen and remove the mounting nuts holding the fixture in place. Check if the old fixture matches the new Pfister faucet for compatibility and style.
If it doesn’t, you might need to detach additional parts or adapters before installing. Be gentle to avoid damaging nearby tiles or fittings.
Once loose, carefully pull the old faucet from the tub deck. Make sure no debris or residue is left that could interfere with the new install.
This step helps ensure a smooth fit and proper functioning of your new Pfister bathtub faucet.
Prepare Your New Pfister Faucet for Installation
Before you start installing your new Pfister bathtub faucet, it’s a good idea to prepare it first. Begin by inspecting the faucet for any damage or missing parts. Also, check the finish to make sure it matches your bathroom decor and is free of scratches.
Inspect your faucet for damage, missing parts, and scratches to ensure a smooth installation process.
Next, test the water flow from the faucet to ensure your water pressure is suitable. This can prevent problems down the line.
Here are four simple steps to get everything ready:
- Remove any plastic covers from the faucet finishes.
- Assemble the handle and spout following the manufacturer’s instructions to prevent leaks.
- Double-check that fittings are attached securely and properly aligned.
- Gather all the tools you’ll need so you won’t have to pause midway.
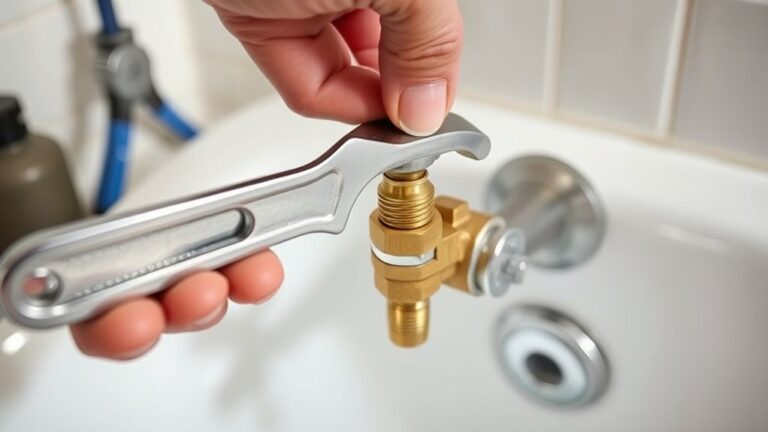
Connect Pfister Water Supply Lines Properly
Are you ready to connect the water supply lines to your Pfister bathtub faucet? First, confirm the water supply lines match the faucet’s material—whether it’s brass, chrome, or stainless steel—to prevent corrosion and maintain ideal water flow.
Attach the supply lines to the corresponding inlets on the faucet, tightening them by hand initially, then secure with a wrench. Be careful not to overtighten, as this could damage the connections or the faucet material.
Check that the supply lines are aligned straight and aren’t kinked, which could affect water flow. Once connected, turn on the water supply valves slowly to test the flow.
Watch for leaks around the connections; if you see any, gently tighten the fittings further. Properly connecting the supply lines guarantees efficient water flow, prevents leaks, and ensures your faucet operates smoothly and reliably.
Mount and Secure Your Pfister Bathtub Faucet
To make sure your faucet stays firmly in place, it’s important to follow the right mounting steps carefully. Take your time, and double-check all your connections — you want everything tight and secure so there are no leaks or wobbles down the line.
Getting this part right really pays off. When your faucet is securely mounted, you can relax knowing it’ll work smoothly and last a long time without any fuss.
Proper Mounting Technique
Ensuring your Pfister bathtub faucet is properly mounted is key for a secure and leak-free setup. Just follow these simple steps:
Align the faucet body with the mounting holes, making sure vintage styles sit flush against the tub wall. Tighten the mounting nuts securely, but be careful not to over-tighten and damage delicate water-saving features.
Check that the faucet is level so water flows smoothly without splashing. Lastly, confirm all connections are tight, paying extra attention to areas where vintage styles might need precise fitting for authenticity.
Proper mounting ensures your water-saving features work efficiently and keeps your vintage bathtub looking great. Take your time to secure everything properly for a professional, long-lasting installation.
Secure Connection Methods
Securing your Pfister bathtub faucet involves choosing the right connection methods to prevent leaks and ensure stability. Start by tightening all connections firmly, but be careful not to over-tighten, as this can damage the parts.
Use sealant around threaded connections or joints to create a watertight seal that lasts. When applying sealant, keep it neat—any excess wiped off will look better and prevent mess.
Double-check that the faucet is level and properly aligned. Good positioning helps with both function and appearance. Secure all mounting hardware tightly and make sure no parts wobble.
Following this approach will give you a leak-free installation that looks professional and attractive. Taking care now will save you trouble down the road.
Test for Leaks and Make Sure It Works
Have you checked your faucet for leaks and tested its functionality yet? Before finishing, it’s really important to make sure everything works smoothly.
First, turn on the water supply slowly and watch the faucet finish. Look for drips or cracks, especially around the handles. Second, check the water pressure by opening the tap fully; it should flow steadily without sudden drops or splashes.
Next, inspect under the faucet for leaks by examining the connections. Tight and dry lines mean everything is secure. Finally, test both hot and cold settings to ensure each flows correctly and maintains steady pressure.
If you notice anything unusual, tighten the connections or adjust the cartridge as needed. Doing these tests now helps prevent leaks or pressure problems later.
This will keep your new Pfister faucet looking great, working well, and lasting for years to come.
Troubleshoot Common Installation Issues
While installing your Pfister bathtub faucet, you might run into some common issues that are easy to fix. This can save you both time and frustration.
Installing a Pfister bathtub faucet? Many common issues are quick fixes to save time and avoid frustration.
If the water flow feels weak or uneven, check if the aerator is clogged and if the cartridge is seated properly. Leaks around fittings could mean connections are loose or joints aren’t sealed tight. Tighten them carefully, but don’t overtighten.
For stubborn leaks, inspect the washer or O-rings for damage and replace them if needed. If the handle is hard to turn, the cartridge might need adjusting or replacing.
Remember, this installation process can also inspire eco-friendly features, like water-saving aerators. Always follow the manufacturer’s instructions closely and double-check all connections.
Addressing these issues properly will make your faucet more efficient and support sustainable bathroom design ideas. Fixing problems now will ensure your Pfister faucet works flawlessly, giving you a relaxing and functional bathing space.
Maintain Your Pfister Faucet for Long-Term Use
To keep your Pfister faucet working smoothly over time, regular maintenance is key. Taking care of it not only makes it look good but also helps conserve water by ensuring everything functions properly.
Here are four simple steps to maintain your faucet:
- Clean the aerator regularly to remove mineral buildup that can slow water flow and reduce efficiency.
- Wipe down the surface with a mild cleaner to keep it looking fresh and free of soap scum or water spots.
- Inspect for leaks and tighten any loose connections to prevent water waste and potential damage.
- Check the cartridge components from time to time and replace them if the faucet feels sluggish or the flow is irregular.
When to Call a Professional Plumber
If you come across complicated plumbing problems or you’re not entirely confident in your skills, it’s a good idea to reach out to a professional plumber. Sometimes, these issues can be more tricky than they seem, and trying to fix them yourself might just make things worse.
Plus, building codes can be pretty complicated to understand on your own. If you’re not familiar with them, there’s a higher chance of making mistakes that could cause bigger problems down the road.
When you’re unsure, it’s always better to call in an expert. They’ll make sure the job gets done safely and correctly, giving you peace of mind.
Complex Plumbing Issues
Sometimes, plumbing issues become too complex or stubborn to fix on your own. If you notice problems like inconsistent water flow, damage to decorative fixtures, or persistent leaks, it’s time to call a professional plumber. They can diagnose underlying issues that go beyond simple repairs.
Picture a plumber crawling under the tub to inspect hidden pipes or using specialized tools to detect water pressure problems. They might replace corroded fittings that are impacting water flow or make sure your fixtures are correctly sealed to prevent future leaks.
These problems often involve tricky plumbing systems or internal damage that need expert attention. Trying to fix them yourself could make things worse, especially if your decorative fixtures are damaged or the water flow is still irregular. Knowing when to call a pro keeps everything running smoothly.
Lack of Plumbing Skills
When your plumbing tasks go beyond basic fixes or you lack the necessary skills, it’s essential to call in a professional plumber.
Attempting complex repairs without proper expertise can compromise plumbing safety and lead to costly damage.
If you’re unsure about the correct installation process or uncomfortable handling tools and parts, it’s better to rely on an expert.
A professional ensures the faucet is installed correctly, maintaining both functionality and faucet aesthetics.
They also have the experience to troubleshoot issues that might not be obvious, preventing future leaks or problems.
Knowing your limits helps protect your home and guarantees the job’s done safely and effectively.
When in doubt, it’s always wise to seek professional help rather than risk damage or safety hazards.
Building Code Requirements
Building codes set specific standards for installing plumbing fixtures like bathtub faucets to guarantee safety, functionality, and compliance with local regulations. If your bathtub design involves unusual water pressure or complex plumbing layouts, it’s wise to call a professional.
Since incorrect installation can lead to leaks, poor water flow, or code violations, knowing when to seek help is essential. Consider these points:
- The faucet installation requires adjustments for excellent water pressure.
- Your bathtub’s design involves multiple water lines or unusual shapes.
- Local codes specify certain heights or clearances for fixtures.
- You’re unsure if your current setup meets safety and accessibility standards.
If any of these apply, hiring a licensed plumber ensures your project complies with building code requirements and functions properly.
Frequently Asked Questions
Can I Install a Pfister Bathtub Faucet Without Professional Help?
Yes, you can install a Pfister bathtub faucet yourself, but keep in mind there might be some challenges, like working with plumbing upgrades and making sure all seals are tight.
If you’re comfortable with basic plumbing skills and tools, it’s definitely doable.
However, if you’re unsure or run into complex issues, it’s smart to seek professional help to avoid leaks or damage.
Doing it right ensures your faucet will work safely and efficiently for years to come.
How Long Does the Installation Process Typically Take?
The installation process for a Pfister bathtub faucet usually takes about one to two hours. It really depends on your experience with DIY projects and how complex the faucet is.
The main steps include turning off the water supplies, removing the old faucet, and securely fitting the new one. If you’re comfortable with basic plumbing, you might get it done faster.
But if you’re new to this, it’s a good idea to set aside some extra time. Take your time following the instructions carefully and making sure everything seals properly.
Are Special Tools Required for Specific Pfister Faucet Models?
You don’t need special tools for most Pfister faucet models, but it’s a good idea to check which tools are compatible with your specific model.
Some models might need an Allen wrench or an adjustable wrench, while others could require a Phillips screwdriver.
Always review the installation instructions that come with your faucet to make sure you have the right tools on hand.
This makes the process smoother and helps prevent any damage.
Packaging or product details usually clarify if any special tools are needed.
What Should I Do if My New Faucet Doesn’T Fit Properly?
If your new faucet doesn’t fit properly, start by double-checking if it’s compatible with your bathtub’s plumbing and fittings. Sometimes, mismatched sizes or threading issues are the main cause.
Take a moment to verify the measurements and inspect the mounting surface to ensure everything matches up. If it still doesn’t fit, check the manufacturer’s guidelines or consider reaching out to a professional plumber.
Getting the fit right is important for a secure, leak-free installation and the best faucet performance.
Is It Necessary to Replace Old Plumbing During Installation?
You typically don’t need to replace old plumbing during a faucet installation unless you see leaks or corrosion.
Think about plumbing upgrades if your system is outdated or damaged, especially when you’re doing renovations.
Upgrading pipes can prevent future problems and help water flow better.
If everything looks good with your current plumbing, just connecting the new faucet should do the trick, saving you time and money.
Conclusion
Installing a Pfister bathtub faucet might seem tricky, but with the right tools and steps, you’re capable of a smooth upgrade. Think of it as easy as turning off the water, removing the old fixture, and fitting in the new.
If frustration hits or leaks persist, remember, sometimes a professional is your best ally. Like calling an expert when the puzzle becomes too complex.
Trust in your skills, but don’t hesitate to seek help when needed. Installing a Pfister bathtub faucet can be straightforward if you follow these simple steps and know when to ask for help.