How to Fix Leaks in Reverse Threaded Sink Drains
Dealing with leaks in reverse threaded sink drains can be incredibly frustrating. You’re not alone—many people struggle with this common plumbing issue and just want a quick, effective fix.
Fortunately, fixing these leaks is often simpler than you think.
To fix leaks in reverse threaded sink drains, start by turning off the water supply. Carefully loosen the fittings with an adjustable wrench or pliers, remembering they turn counterclockwise to loosen.
Remove the old drain parts, inspect for damage, and replace worn gaskets or washers with the correct reverse-threaded ones.
Apply plumber’s tape or sealant on the threads, then tighten the fittings clockwise.
If leaks persist, proper installation techniques and tips for prevention will help you achieve a leak-free sink.
Key Takeaways
- Turn off the water supply and drain any standing water before starting repairs.
- Use an adjustable wrench to loosen nuts counterclockwise because reverse threads tighten clockwise.
- Check the washers or gaskets for wear and replace them. Make sure they match in size and material.
- Wrap plumber’s tape or sealant around the threads, turning clockwise 2-3 times for a good seal.
- Carefully reassemble the fittings, tightening them in the correct direction but avoid overtightening to prevent damage.
How to Recognize a Leak in Your Sink Drain
Are you noticing water pooling around your sink or a persistent damp smell? That’s a clear sign something’s off with your drain. To confirm a leak, check for dampness around the base of the sink or underneath the cabinet.
Look for water stains or discoloration that signal leakage. Next, inspect the drain during use—see if water drains slowly, which indicates drainage issues, or if it backs up.
When cleaning, look for residue or buildup around the drain. That can point to a leak letting water escape or debris collect. Also, pay attention to odd sounds like gurgling when you run water; that hints at drainage problems.
Recognizing these signs early helps you prevent bigger issues and act fast. Keep your sink clean and inspect regularly to spot leaks before they cause serious damage or plumbing failure.
What Makes Reverse Threaded Sink Drains Different?
Unlike standard plumbing fittings, reverse threaded sink drains have threads that turn counterclockwise to tighten, making them different and sometimes confusing for DIY repairs. This reverse threading helps prevent regular pipe corrosion but can be tricky if you’re not familiar with it.
Reverse threaded sink drains tighten counterclockwise, preventing corrosion but tricking DIYers unfamiliar with their unique design.
When cleaning drains, you might find it difficult to loosen or tighten parts because of the opposite threading. Remember, turning counterclockwise tightens the connection, unlike usual threads.
Here are some key differences:
- Thread Direction: Turns counterclockwise to tighten, which can trip you up during repairs.
- Leak Prevention: Designed to reduce pipe corrosion caused by standard threading.
- Repair Challenges: Often needs special tools or techniques to avoid damaging the drain parts.
Knowing about this unique threading system helps you avoid unnecessary damage and makes fixing leaks in reverse threaded sink drains easier and more effective.
Common Causes of Leaks in Reverse Threaded Connections
One common cause of leaks in reverse-threaded sink connections is improper assembly, often from not fully tightening or overtightening the fittings.
If the connection isn’t tight enough, water can seep through, causing drips and water damage. Overtightening, on the other hand, can deform the fittings or threads and create gaps where water escapes.
Leaks can reduce water flow efficiency and cause the drain to slow down as buildups or blockages form. Poorly sealed or damaged washers and gaskets also contribute, especially if they’re cracked or misaligned during assembly.
Over time, mineral deposits or corrosion can weaken the threads, making leaks worse. Always make sure fittings are snug but not overtightened, and that all washers and gaskets are properly positioned.
Correct assembly helps prevent leaks, keeps water flowing smoothly, and ensures your sink drains efficiently.
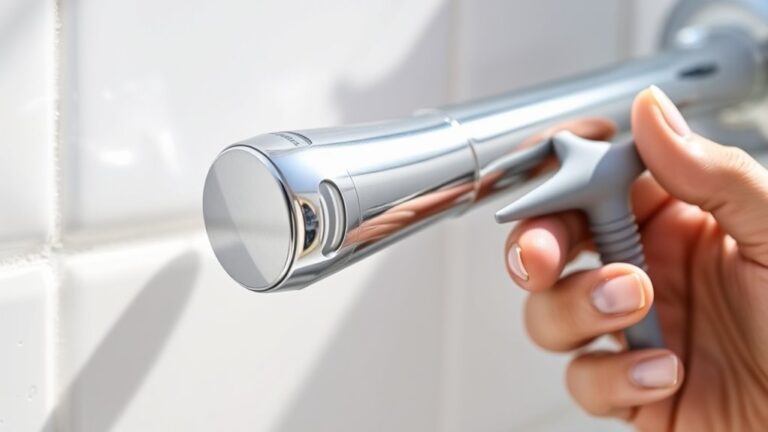
Tools and Replacement Parts Needed for Fixing Sink Drain Leaks
To fix sink drain leaks, you’ll want to start with some basic tools like a wrench, pliers, and a screwdriver—that way, you’re all set to tackle the job. It’s also important to choose the right replacement parts, like gaskets or washers, to make sure everything seals properly. Having these tools and parts ready beforehand will make the repair process go much smoother and help you get your sink back in good shape quickly.
Essential Tools for Repair
Having the right tools and replacement parts on hand is essential for effectively fixing leaks in reverse threaded sink drains. Using eco-friendly materials whenever possible guarantees your repair aligns with sustainable practices and complements your kitchen decor.
Here are three must-have tools:
- Adjustable wrench for tightening or loosening fittings securely.
- Plumber’s putty and rubber washers to create watertight seals.
- Pipe thread tape to prevent leaks at connections.
These tools make the job easier and help you avoid damaging fittings. When selecting replacement parts, choose eco-friendly materials that reduce environmental impact while still being durable.
Proper tools and quality components keep your sink drain leak-free and maintain a clean, stylish kitchen decor. Being prepared with the right essentials saves time and helps you achieve a professional-looking repair.
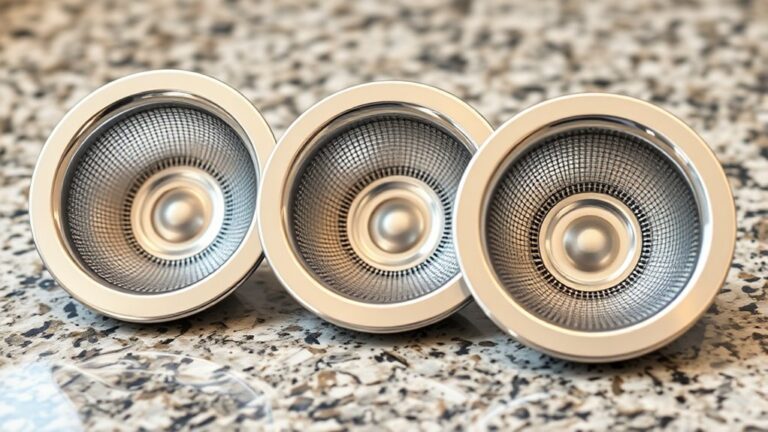
Replacement Parts Selection
Selecting the right replacement parts is key to a successful sink drain repair, especially when dealing with reverse threaded fittings. Make sure to get compatible washers, gaskets, and the right reverse threaded drain assembly.
Before you buy, review the cleaning procedures to remove debris and buildup that could impact sealing. Always check that parts meet local plumbing regulations for safety and durability.
Properly labeled components help prevent leaks and future damage. Verify the size and thread type to match your existing drain setup. When choosing replacement parts, opt for quality materials like rubber or PVC for longer-lasting results.
Keep your workspace organized, and double-check that all necessary fittings and connectors are included. Picking the right parts makes installation easier and helps keep your sink leak-free, compliant, and working smoothly.
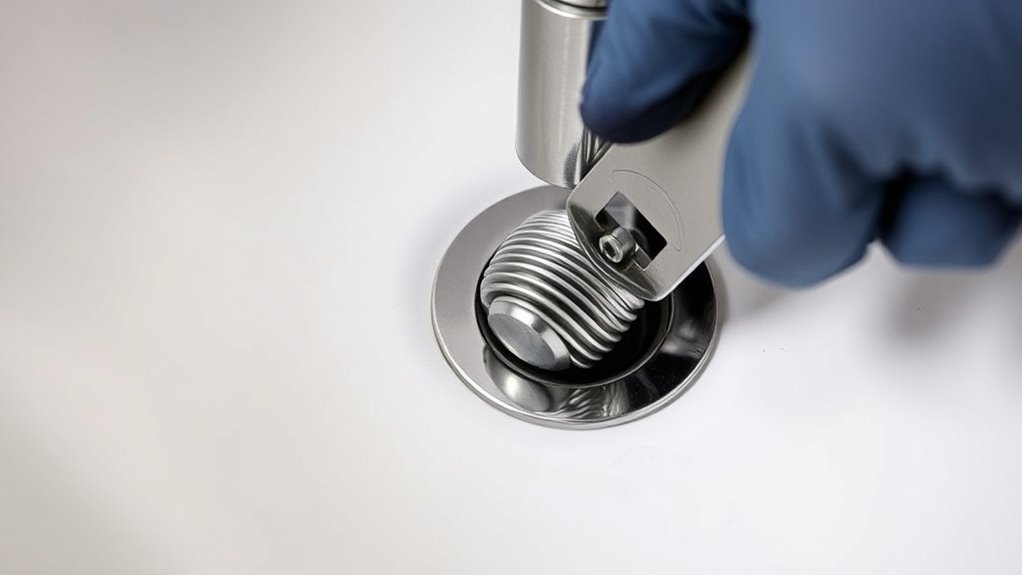
How to Remove the Old Reverse Threaded Drain Assembly
Are you ready to dive into removing that old reverse-threaded drain assembly? First off, turn off the water supply and clear out any standing water. This helps conserve water and keeps the area tidy.
Next, gather your tools, like pliers and a basin wrench. Having the right tools makes the process much easier and smoother.
Gathering pliers and a basin wrench simplifies removing and installing your drain assembly effortlessly.
Now, carefully loosen and remove the nuts holding the drain assembly in place. Turn them counterclockwise to loosen.
Then, twist and unscrew the drain components, keeping in mind how they’re assembled. It’ll help when installing the new parts later.
Remove the old drain and check it for cracks or damage. Note if it’s made of eco-friendly materials—these are better for the environment and easier to recycle.
Taking your time during removal helps prevent damage and supports water conservation efforts. When replacing, choose a new eco-friendly drain to reduce leaks and environmental impact over time.
Be gentle but firm with each step, and keep track of all the parts you remove. That way, the installation of the new drain will go smoothly.
Check and Replace the Washer or Gasket for a Tight Seal
First off, take a good look at the washer or gasket. You want to check for any signs of wear, like cracks or if it’s flattened out. If it looks pretty worn or damaged, it’s probably time to swap it out for a new one.
When you’re choosing a replacement, make sure it’s the right size and type. Getting a proper fit is key — a snug seal means fewer leaks and a more secure connection overall. So, double-check those details, and you’ll be all set for a tight, leak-proof seal!
Identifying Worn Washers
Worn washers or gaskets are often the cause of leaks in reverse-threaded sink drains, so it’s important to inspect them closely. Look for signs of wear such as cracking, flattening, or brittleness, which can compromise the seal.
When identifying a worn washer, check for material compatibility. Make sure the gasket matches the original type to prevent leaks. Also, examine for deformities or damage that suggest it’s no longer sealing properly.
You can perform leak detection by applying gentle pressure. If the leak persists even after tightening, the washer might be worn out. Replacing worn washers with the correct material ensures a tight seal and helps prevent future leaks.
Regular inspection helps catch issues early and keeps your drain working properly.
Proper Gasket Replacement
Once you’ve identified a worn washer or gasket, replacing it correctly is key to restoring a proper seal. Make sure to remove the old gasket completely before installing the new one, ensuring there’s no debris or limescale that could prevent a tight fit.
When choosing a gasket, match its size and material to your drain fitting to avoid leaks. Think of it like a cooking tip: precision matters for a perfect result. Proper gasket replacement not only stops leaks but also keeps your space looking neat, contributing to your bathroom decor.
Take your time during installation, applying gentle pressure to seat the gasket securely. A well-sealed gasket prevents water damage and keeps your sink functioning smoothly, making your repair last longer.
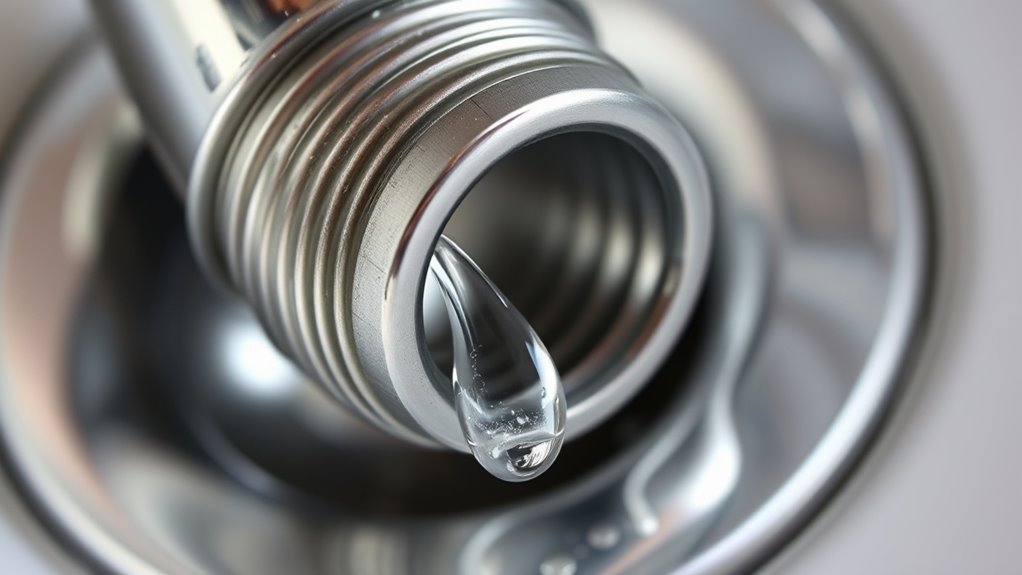
How to Apply Sealant or Plumber’s Tape to Prevent Future Leaks
To effectively prevent leaks in your sink drain, you need to properly apply sealant or plumber’s tape to the threaded connections. Start by turning off the water supply and cleaning the threads to remove debris and old sealant.
Next, follow these steps:
Wrap plumber’s tape 2-3 times clockwise and tighten fittings securely to prevent leaks.
- Wrap plumber’s tape around the male threads 2-3 times clockwise, making sure it’s evenly covered for a tight seal.
- Apply a thin bead of sealant around the threaded area if recommended, especially on plastic parts, to improve waterproofing.
- Tighten the fittings by hand first, then use a wrench to secure them. Be careful not to overtighten, as this could damage the threads or cause leaks.
Using the right amount of plumber’s tape and applying sealant correctly helps create a secure, leak-proof connection. This will help prevent future leaks and keep your drain dry.
Reinstall the Drain Correctly in Reverse Threaded Fittings
Are you aware of the key steps to guarantee your drain is properly reinstalled in reverse threaded fittings? First, confirm the drain materials match your existing fittings for ideal thread compatibility. Check that the drain flange, tailpiece, and locknut are compatible with your sink and drain assembly.
When reassembling, tighten the fittings in the proper sequence, turning clockwise to engage the threads securely. Avoid over-tightening, which can damage the threads or crack the fittings. As you tighten, feel for resistance; enough tension should be present to prevent leaks but not so much that it causes damage.
Be mindful of the thread direction: reverse threads tighten clockwise but tend to loosen counterclockwise. Double-check you’re tightening in the correct direction. Using the right drain materials that fit snugly and are thread-compatible prevents future leaks and ensures a lasting seal.
Proper reinstallation ensures your sink drain functions smoothly without leaks.
Test Your Sink for Leaks After Repair
Once you’ve finished the repair, take a moment to look underneath the sink. Just peek underneath and see if there are any drips or water pooling—that’s a good sign there might still be a leak. Next, turn on the faucet and see what happens. Watch carefully to see if any water starts to drip or leak during use.
If you notice any moisture or dripping, don’t worry! Just double-check your fittings, make sure everything is tight, and adjust if needed. It’s always better to be thorough now than to deal with a leak later on.
Check Under Sink
Have you made sure your sink is dry before checking for leaks? Now, slide under the sink and give it a careful look. Start by spotting any water traces around the drain area and beneath the pipes.
To ensure your repair worked well, consider these steps:
Check for drips or pooling water near the reverse threaded drain connection.
Examine how the sink looks—any new leaks could ruin its appearance or cause damage.
Make sure your faucet fittings are tight and sealed properly to avoid putting stress on the pipes.
If you see any leaks, tighten the connections or reapply sealant. Keeping the area dry helps you spot issues quickly and keeps your sink working smoothly without ruining its look.
Observe Drip During Use
Once you’ve finished your repairs, it’s important to check that the leak is completely fixed. Observe the sink while you run water. Turn on the water gradually, watching for any drips or leaks around the drain area.
Pay close attention to how the drain handle and gasket behave during drain cleaning or water flow. Use this table to guide your inspection:
| Observation Point | What to Look For | Action If Leaking Occurs |
|---|---|---|
| Drain connection | Water dripping during use | Tighten or reseal the drain fitting |
| Gasket area | Water seepage at the gasket seal | Replace gasket or tighten fittings |
| Under sink | Puddles or drips after drain use | Recheck tightenings or reapply sealant |
| Water pressure effects | Unusual sounds or splashes | Adjust water pressure if needed |
This check helps ensure your repair holds and the water flows cleanly without leaks.
Tips for Maintaining Your Sink Drain and Preventing Leaks
Regularly inspecting and cleaning your sink drain can prevent many common leaks before they start. Just like in cooking techniques, paying attention to details keeps everything running smoothly.
To keep your drain in good shape, regularly remove debris and buildup by flushing with hot water or a gentle cleaning solution. This helps prevent clogs and leaks.
Make sure to check and tighten fittings and connections now and then, especially after bathroom painting or renovations. Loose parts can cause problems later.
When installing or repairing, apply thread sealant or plumber’s tape on reverse threaded fittings. This ensures a good seal and helps prevent leaks down the line.
Frequently Asked Questions
How Do I Identify a Reverse Threaded Drain Versus a Standard Threaded Drain?
You can identify a reverse threaded drain by looking at the fittings. If they seem to tighten counterclockwise or feel loose when turning clockwise, it’s probably reverse threaded.
Usually, you’ll notice more corrosion around these fittings, which can hint at a different threading style. Take a close look at the directions on the fittings to be sure.
Be careful—reverse threads need specific tools or techniques to loosen or tighten properly. This helps prevent any damage to the fittings or plumbing.
Are Special Tools Needed for Reverse Threaded Drain Repairs?
They say “a stitch in time saves nine,” and that applies here. For reverse threaded drain repairs, you might need special tools designed specifically for threading orientation. Standard tools often don’t fit, so it’s good to check your tools’ compatibility first.
Using the wrong tools can strip threads or make leaks worse. You may need a reverse threaded drain wrench or pliers with the right size and grip. These tailored tools make fixing leaks easier and safer.
Can I Fix a Leak Without Removing the Entire Drain Assembly?
Yes, you can fix a leak without removing the entire drain assembly. First, try tightening the nuts gently; sometimes that’s enough to stop the leak.
If that doesn’t work, apply sealant around the leak areas. That can usually seal small leaks without needing to disassemble the whole drain.
You might also want to clean the drain to remove any debris causing seepage. These simple steps often solve small leaks, saving you time and effort.
How Often Should I Check My Sink Drain for Leaks?
You should schedule sink inspections regularly, ideally once a month, as part of your maintenance routine.
During leak detection, look for water drips, puddles, or unusual moisture around the drain.
Frequent checks help prevent small drips from turning into big problems, saving you time and trouble.
Staying vigilant keeps your sink dry, damage-free, and well-maintained, giving you peace of mind with minimal fuss and fixes.
What Are Signs of Damage to Reverse Threaded Fittings Beyond Leaks?
You might notice signs of damage to reverse threaded fittings beyond leaks, like corrosion buildup or visible corrosion on the fittings.
These issues can cause the fittings to weaken, become brittle, or develop discoloration and rough patches.
You may also see water spots or unexplained moisture around the fittings, which can indicate deterioration.
Regularly inspecting for corrosion and discoloration helps catch damage early, preventing leaks or bigger plumbing problems.
Conclusion
By recognizing leaks early, understanding reverse threading, and following proper repair steps, you can keep your sink drain secure and leak-free.
Regular maintenance, careful installation, and timely fixes help your plumbing stay in top shape. These small habits can prevent bigger problems down the line.
Adopting good practices will stop leaks before they start, keep your sink working properly, and save you from costly repairs.
When you stay proactive, confident, and vigilant, your sink remains reliable, leak-free, and problem-free.