How to Remove a Jetted Bathtub in Three Simple Steps
Removing a jetted bathtub can seem like a daunting task, especially if you’re not sure where to start. You’re not alone—many people struggle with figuring out how to safely and efficiently take out these bulky tubs.
To remove a jetted bathtub in three simple steps, start by turning off the water, disconnecting the plumbing, and shutting off power to the jets.
Next, carefully detach the tub from the surrounding walls and support brackets using pry bars and tools.
Finally, lift the tub out with help, ensuring you protect your floors and fixtures.
If you’d like to learn helpful tips and techniques for tackling tricky parts, keep exploring for more guidance.
Key Takeaways
– Before starting, turn off the electrical power, shut off the water supply, and drain the tub completely.
It’s important to do this first to stay safe and avoid water damage.
– Disconnect the plumbing and electrical connections, making sure to label wires and fittings so you can easily reconnect everything later.
Take your time with this step to prevent damaging any parts.
– Carefully remove fasteners, caulk, and fixtures, then lift the bathtub with help, using the appropriate tools.
Don’t force it—gentle movements work best here.
– Use pry bars and dollies to gently detach the tub from the floor and walls.
Proceed slowly to avoid damaging your space or the tub.
– If the plumbing setup is complex or the tub is heavy or damaged, it’s a good idea to get professional help.
This way, you stay safe and ensure the removal goes smoothly.
Why Removing Your Jetted Tub Can Improve Your Bathroom Makeover
Removing your jetted tub can really boost your bathroom makeover by freeing up space and creating a more modern, sleek look.
With the tub out, you get more room for decorative tiles, which can instantly upgrade the style and give your bathroom a fresh vibe.
You can swap the bulky, outdated tub for stylish fixtures or a walk-in shower, making the whole space feel bigger and more inviting.
When removing the tub, don’t forget to seal the grout around your tiles properly. This helps prevent water damage and mold, setting the stage for new tile work.
This step ensures your bathroom stays clean, polished, and looking great in your new design.
All in all, ditching the jetted tub clears the way for a modern update, making your bathroom more functional, attractive, and on-trend.
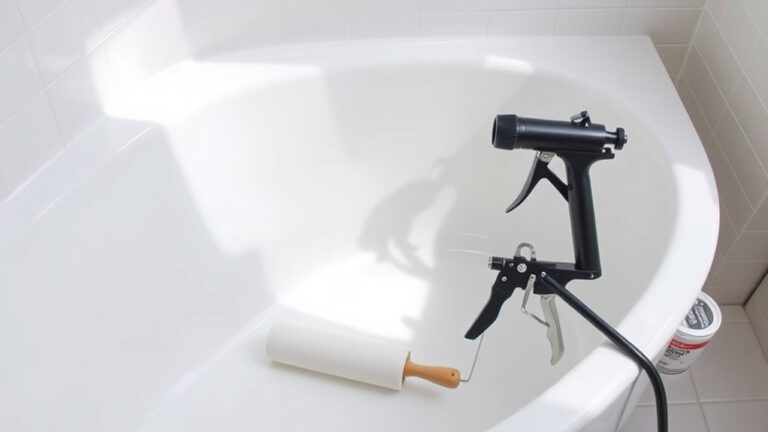
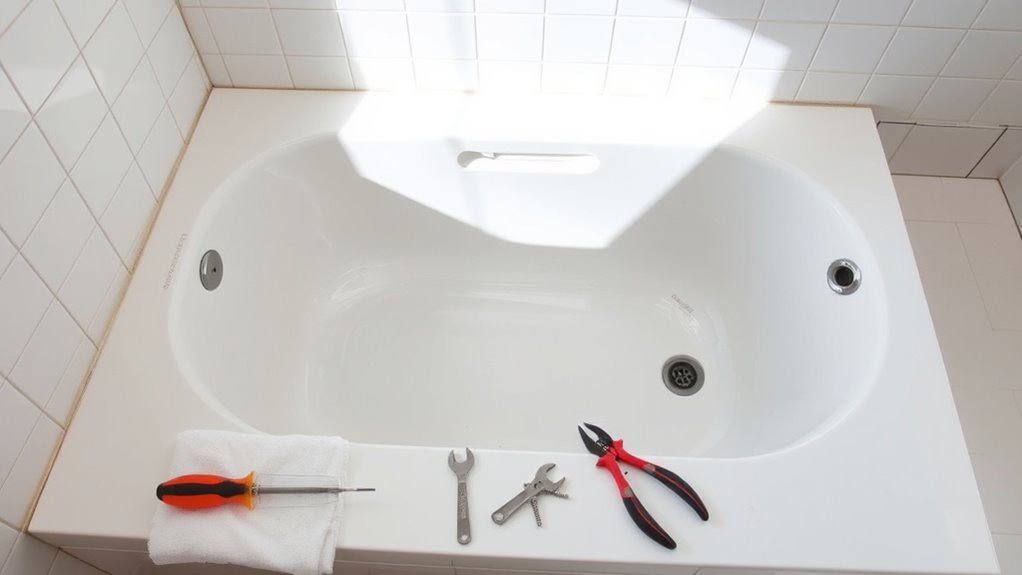
Gather the Tools and Materials You Need for Removal
Before you start disconnecting and lifting the tub, it’s important to gather all the tools and materials you’ll need for the removal process. First, have a wrench or socket set handy to disconnect plumbing fixtures and drain lines.
Gather essential tools like wrenches, screwdrivers, and safety gear before removing your tub.
You’ll also need a screwdriver, utility knife, and pry bar to carefully unseal and loosen the tub from the surrounding area. Keep safety precautions in mind, so wear gloves, goggles, and a dust mask to protect against debris and chemicals.
If your jetted tub has decorative finishes like tiles or panels, have a putty knife for gently removing them without damage. You may also need a reciprocating saw if the tub is securely fastened or stuck.
Furthermore, gather drop cloths or tarps to protect your flooring and nearby fixtures. Preparing this collection of tools and materials beforehand ensures a smooth, safe removal process.
Prepare Your Bathroom for Bathtub Removal
To guarantee a safe and efficient bathtub removal, start by clearing the area around the tub and protecting your bathroom surfaces. This helps prevent damage and keeps your decor intact.
Remove all items like towels, toiletries, and rugs from around the tub. Then, cover your flooring and nearby fixtures with drop cloths or plastic sheeting to keep debris off them.
Next, disconnect any wall-mounted accessories such as soap dishes or grab bars to avoid breakage.
Plan for tile replacement too, since removing the tub might expose or damage existing tiles.
Getting your workspace ready makes the whole removal process smoother and cleaner.
Keeping things tidy minimizes accidents and helps preserve your bathroom’s look.
With proper preparation, the removal becomes less stressful and sets the stage for a successful renovation or upgrade.
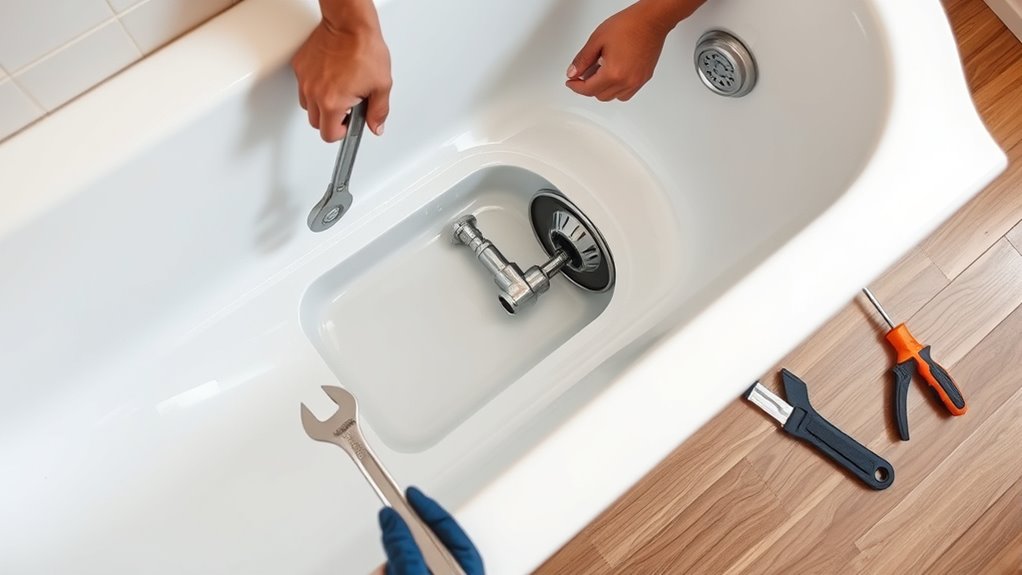
How to Safely Disconnect Plumbing and Electrical Connections
Before you start disconnecting your jetted bathtub, the first thing you want to do is turn off the power at the circuit breaker. It’s always better to be safe than sorry, right? Once the power is off, go ahead and shut off the water supply too.
When it’s time to disconnect the electrical wiring, just take your time and be sure to label the connections if necessary. That way, it’ll make reconnecting everything later much smoother. And don’t forget to double-check that both the power and water are completely turned off before you begin any disconnection work. It’s a simple step, but it really makes a difference for your safety.
Turn Off Power
Turning off the power is a crucial first step before disconnecting any plumbing or electrical connections. Ensuring electrical safety means you prevent shocks or accidents while working on the bathtub.
To do this, follow these steps for a proper power shutdown:
- Locate your home’s main electrical panel and find the breaker labeled for the bathroom or the jetted tub.
- Flip the breaker switch to the “Off” position to cut power to the entire bathroom.
- Double-check that the power is off by testing the electrical components or outlets connected to the tub.
- Use a voltage tester to confirm there’s no live current before you start disconnecting anything.
Taking these precautions keeps you safe during the removal process and ensures your workspace is safe.
Shut Off Water
Since you’ve confirmed that the power is off, the next step is to shut off the water supply. This helps prevent leaks or water damage during removal. Turning off the water also protects decorative accents and makes the process smoother and safer.
Before disconnecting, consider a few maintenance tips: drain the tub completely and try to avoid damaging nearby surfaces. Use the table below for guidance:
| Step | Action | Emotional Reminder |
|---|---|---|
| Locate the water shutoff | Find the main or local valve | Confidence in taking control |
| Turn off the valve | Turn clockwise until fully closed | Peace of mind for safety |
| Verify no water flow | Open a faucet to confirm | Satisfaction in thoroughness |
Properly shutting off the water makes removal safer and helps preserve your home’s look.
Disconnect Electrical Wiring
Are you ready to disconnect the electrical wiring safely? Ensuring electrical safety is key before working on your jetted bathtub. First, turn off the circuit breaker dedicated to the bathtub to prevent shocks.
Next, find the wiring connection. It should match your setup’s wiring compatibility. Now, follow these steps:
- Use a screwdriver to remove the electrical cover plate near the access panel.
- Carefully disconnect the wires, keeping track of how they were connected for reassembly.
- Cap any exposed wires with wire nuts if you’re not removing the entire wiring right away.
- Double-check that all wiring is fully disconnected before proceeding.
Detach the Jetted Tub From Surrounding Walls and Supports
Before you can remove the bathtub, you’ll need to detach it from the surrounding walls and supports. Start by removing any caulk or sealant around the edges to prevent damage.
Check for nails, screws, or brackets holding the tub in place. These are often hidden behind trim or panels. Carefully unscrew or pry them loose using a screwdriver or pry bar.
Carefully locate and remove hidden nails, screws, or brackets securing the tub with tools like a screwdriver or pry bar.
As you do this, keep in mind that your bathtub’s appearance and the surrounding decor might be affected. Work gently to avoid chipping or damaging nearby tiles or wall surfaces.
If the walls are tiled, take care to avoid cracking the tile or damaging the grout. Once all fasteners are removed and supports loosened, gently loosen the tub from its mounting.
You’re now ready to lift it out. But first, verify all connections are disconnected and supports are fully detached.
How to Lift and Remove a Heavy Jetted Bathtub Safely
Lifting and removing a heavy jetted bathtub can definitely seem like a daunting task, but with the right approach, you can do it safely. First off, it’s super important to use proper lifting techniques to avoid any injuries. Just take your time, bend your knees, and keep your back straight as you lift—think of it as lifting with your legs, not your back.
It’s also a good idea to gather the right tools before you start. Things like dollies, straps, and gloves can make the whole process much safer and easier. Using these tools helps distribute the weight and gives you better control, so you don’t strain yourself or risk dropping the tub.
All in all, taking your time and using the right gear can make removing that heavy bathtub much more manageable—safety first, and you’ll get the job done without any mishaps.
Proper Lifting Techniques
Handling a heavy jetted bathtub requires careful technique to prevent injury. To safely lift and remove it, follow these steps:
- Plan the lift: Clear the area of obstacles. Make sure your friends or helpers are available to support you.
- Use proper posture: Keep your back straight, bend your knees, and grip the tub firmly. Avoid twisting your body.
- Coordinate with helpers: Lift at the same time, and communicate clearly to spread the weight evenly.
- Protect your water filtration components: Remove any spa maintenance parts and disconnect water lines ahead of time to prevent damage.
This careful approach minimizes strain and injury risk. Remember, a heavy jetted tub is bulky, so take your time. Proper lifting technique protects your body and makes sure the bathtub is removed safely.
Using Suitable Tools
Using the right tools can really make removing a heavy jetted bathtub easier and safer. Make sure you have a sturdy pry bar, a utility knife, and a dolly or hand truck to help with lifting.
Use these tools carefully to detach the tub from fixtures and the floor. During removal, wear gloves and protect your surfaces to prevent damage or spills.
Once the bathtub is out, think about disposal options like recycling or scheduling a bulk waste pickup, depending on what your local regulations say.
Handling your tools properly and knowing your disposal options will help you get the job done smoothly and safely. Always put safety first to avoid injuries and make the process more manageable.
Tips for Handling Heavy or Difficult Bathtubs
When dealing with heavy or awkward bathtubs, planning your approach is key to avoiding injury and damage. First, check your bathroom layout, especially if decorative tiles surround the tub, so you don’t crack them.
Next, make sure you manage water drainage by turning off water supplies and removing any standing water. This helps reduce weight and keeps the floor less slippery.
Gather tools like straps, dollies, and padding to help move the tub safely. It’s a good idea to recruit a friend or use professional gear if the tub is particularly large or stubborn.
When lifting, keep communication clear with anyone helping and protect nearby surfaces from scratches. Be extra careful around edges and corners to avoid damaging your decorative tiles.
Proper planning reduces strain, keeps everyone safe, and helps preserve your bathroom’s look. Remember, patience and organization are your best friends when handling heavy or tricky bathtubs.
Clean Up Your Bathroom and Prepare for a New Tub
Before installing a new bathtub, it’s essential to thoroughly clean and clear your bathroom to guarantee a smooth replacement process. Start by removing any remaining debris, dust, and dirt, using cleaning tips like wiping down surfaces with a damp cloth and disinfecting all areas. Empty and store bathroom accessories such as soap dishes, shower caddies, and rugs to prevent damage and make space for the new tub.
Check for mold or mildew, especially around the edges and grout lines, and treat these spots with appropriate cleaners. Clear the area surrounding the old bathtub to avoid accidental damage during removal and ensure ample space for installation. Organize tools, supplies, and leftover packaging so everything’s ready for the next steps.
Common Challenges When Removing a Jetted Bathtub and How to Overcome Them
Removing a jetted bathtub can be a bit challenging, mainly because of those complicated plumbing connections, how heavy it is, and those hidden fasteners that can sneak up on you. If you’re not ready for these issues, they can slow things down or even cause some damage. But don’t worry—understanding how to handle these problems can make the whole process much smoother and safer.
Navigating Plumbing Connections
Navigating the plumbing connections of a jetted bathtub can be tricky, especially if they were installed years ago or customized. To avoid surprises, follow these simple steps:
First, turn off the water supply and drain the tub completely. Then, carefully disconnect the water lines, making sure to note how they connect.
It’s a good idea to label or photograph the connections so reinstallation goes smoothly. Also, check for buildup of cleaning supplies or mineral deposits that could affect water pressure or loosen fittings.
Be prepared for possible corrosion or tight fittings that might make removal difficult. Sometimes, gentle prying or applying penetrating oil is needed. Always handle with care to prevent damaging the plumbing or causing leaks.
Managing Heavy Bathtub Weight
Have you ever wondered why jetted bathtubs are so difficult to lift and remove? Their heavy weight comes from the durable materials used and the water-filled jets that add extra bulk. Managing this weight takes some planning and safety precautions.
Before lifting, make sure to drain all the water and activate the water control valves to prevent spills. Emptying the tub reduces unnecessary weight, making it safer and easier to remove. Use squeegees or towels to ensure no leftover water remains, which helps minimize slip hazards.
When you’re ready to lift, don’t forget to enlist help. Use proper tools like dollies or straps to distribute the weight evenly. Never underestimate how heavy these tubs can be—being prepared keeps you safe and makes the process smoother.
Handling Hidden Fasteners
Often, hidden fasteners challenge homeowners when trying to remove a jetted bathtub because they’re tucked away behind panels or beneath the tub’s apron, making them easy to overlook. To prevent surface damage and successfully remove the tub, follow these steps:
- Carefully inspect all accessible areas for hidden fasteners, using a flashlight if needed.
- Use a flat-head screwdriver or putty knife to gently pry away panels without scratching the surface.
- Look for screws or bolts concealed behind caulking or adhesive, and remove them cautiously.
- Keep track of all fasteners removed to avoid surface damage and make reinstallation easier if needed.
Addressing hidden fasteners methodically minimizes damage and guarantees smooth removal of your jetted bathtub.
When to Call in a Professional for Jetted Bathtub Removal
While removing a jetted bathtub might seem straightforward, some situations call for professional help to guarantee the job is done safely and correctly. If your bathroom design includes complex plumbing or structural modifications, it’s best to let experts handle the removal.
Damaged or corroded pipes can pose safety hazards and may require specialized tools and expertise for proper disconnection. Furthermore, if you’re unsure about the condition of your tub’s plumbing or if frequent tub maintenance has revealed underlying issues, a professional can assess and resolve potential problems before removal.
Damaged or corroded pipes require expert handling for safe, proper removal and to prevent future issues.
Attempting to force or rush the process in these cases could cause damage to surrounding walls, floors, or the plumbing system. Calling in a professional ensures the job is completed efficiently, reducing risks of future leaks or costly repairs.
Trusting experts helps preserve the integrity of your bathroom’s design and guarantees that your space remains functional and safe.
Frequently Asked Questions
Can I Remove a Jetted Tub Without Damaging My Bathroom Walls?
Yes, you can remove a jetted tub without damaging your bathroom walls by carefully disconnecting the plumbing and supporting the tub during removal.
Take your time so you don’t pull too hard, which could affect your bathroom’s look. Use the right tools and gentle techniques for the best results.
If you’re unsure, it’s a good idea to ask a professional for help. Following these steps can help keep your walls intact and make the removal cleaner and damage-free.
What Safety Equipment Should I Wear During Removal?
You should wear protective clothing like long sleeves, gloves, and safety goggles to guard your skin and eyes from debris and dust.
A respirator mask is essential to prevent inhaling dust, mold spores, or other airborne particles during the removal process.
These safety equipment pieces help minimize risks, keep you safe, and ensure a smoother removal experience while working around potentially harmful materials.
How Long Does the Removal Process Typically Take?
The removal process usually takes about 3 to 6 hours, depending on your bathroom’s size and plumbing setup.
You’ll spend that time carefully disconnecting plumbing, detaching the bathtub, and making any necessary plumbing adjustments for your bathroom renovation.
To stay efficient, make sure you have all tools ready beforehand and work methodically through each step.
Taking your time prevents damage and makes the upcoming installation smoother.
Are There Eco-Friendly Disposal Options for Old Bathtubs?
You can explore eco-friendly disposal options like recycling programs or repurposing your old bathtub. Many recycling centers accept acrylic or fiberglass tubs and transform them into new products.
Alternatively, consider donation options or other eco-friendly disposal methods that minimize environmental impact.
Choosing recycling and eco-conscious disposal helps ensure your old bathtub isn’t wasted and reduces landfill damage, making your bath removal more sustainable.
How Can I Prevent Mold and Water Damage After Removal?
To prevent mold and water damage after removal, make sure to thoroughly dry the area and remove any leftover moisture. Using a dehumidifier or fans can help improve airflow and speed up drying.
You might also want to apply a mold-resistant primer or sealant to exposed surfaces for extra protection. Keep an eye out for leaks or water seeping in, especially in wall cavities or under flooring.
Regularly check these areas to catch any issues early. Proper ventilation and quick cleanup are your best bets for preventing mold and protecting your space from water damage.
Conclusion
Removing a jetted bathtub can boost your bathroom’s appeal and functionality, giving you a fresh, modern space. Just remember, safety is vital, so take your time and follow these essential steps.
Did you know that about 70% of homeowners who upgrade their bathrooms report increased satisfaction with their home’s value? By tackling this project carefully, you’re not just upgrading your bathroom—you’re making a smart investment in your home’s future.
Removing a jetted bathtub might seem challenging, but with patience and the right tools, it’s manageable. Ready to get started?