Are Sink Faucets Easy to Replace in 7 Simple Steps
Replacing a sink faucet can seem intimidating, especially if you’re not sure where to start. Many people struggle with the process or worry about making mistakes that could cause leaks or damage. But the good news is, it’s easier than you think—and you’re not alone in feeling a little unsure.
Replacing a sink faucet is quite straightforward if you follow a few simple steps. First, you need to gather the right tools and turn off the water supply.
Then, carefully remove the old faucet, disconnect the supply lines, and install the new one, making sure everything fits snugly.
Afterward, check for leaks and make any adjustments needed. If you want to guarantee a smooth upgrade and avoid common mistakes, keep going to learn the full process.
Key Takeaways
Replacing a sink faucet involves straightforward steps like turning off water, removing the old faucet, and installing the new one.
Having the right tools and proper preparation really helps make the process easier and less messy.
Clear guidance on removing and installing fixtures can help ensure everything goes smoothly.
Regular maintenance and inspections can extend your faucet’s lifespan and help avoid future problems.
Overall, if you have some basic DIY skills, replacing a sink faucet is a manageable and simple project.
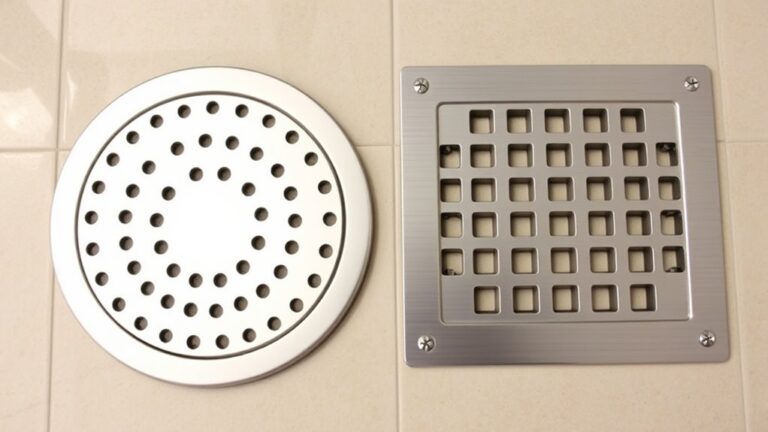
Do You Need to Replace Your Sink Faucet?
Knowing when to replace your sink faucet can save you both time and money in the long run. If your faucet looks outdated or damaged, replacing it can improve the look of your kitchen or bathroom and match your decor better.
If you notice low water pressure or irregular flow, your faucet might be the cause, indicating internal wear or clogging. Dripping or leaking faucets waste water and can raise your utility bills, so it might be time to replace them.
Corrosion or mineral buildup around the spout or handles also suggests that your faucet is deteriorating. Sometimes, there’s no obvious damage, but if the performance decreases, replacing it can restore efficient water flow and refresh your space.
Paying attention to both how your faucet looks and how it functions helps you decide if a new one will boost your room’s style and water pressure.
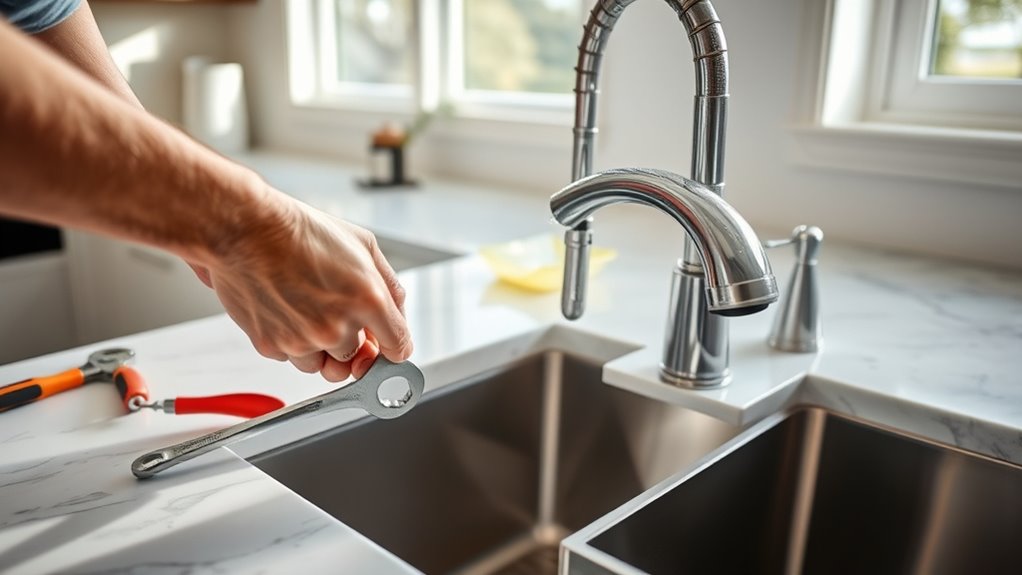
Gather the Tools and Materials You Need
Before you jump in, it’s a good idea to gather all the tools you’ll need. Make sure you have things like an adjustable wrench, screwdriver, and pliers ready to go. Getting these tools beforehand will save you time and hassle during the process.
You’ll also want to gather any replacement parts, like new washers, fittings, or even the faucet itself. Having everything you need within reach makes the whole faucet removal and installation go much smoother and more efficiently.
Essential Tools Required
Having the right tools on hand is essential for a smooth sink faucet replacement. Correct tools make the installation easier and keep plumbing safety a priority.
Make sure you have a set of adjustable wrenches to loosen fittings without damaging the pipes. A basin wrench is especially helpful for reaching tight spots under the sink, like when removing the old faucet.
Keep a bucket and towels nearby to catch water and prevent messes during the process. These tools help you work efficiently and safely, avoiding unnecessary damage.
Using the proper tools also reduces the risk of leaks or accidents, making the whole project safer and more successful. Before you start, double-check that you have everything ready for a hassle-free faucet replacement.
Necessary Replacement Parts
Are you ready to gather all the necessary replacement parts? First, identify your faucet’s color — brushed nickel, chrome, or matte black — so you get matching parts.
You’ll need new O-rings, washers, and mounting nuts suited for your faucet model. If you’re replacing the spout, make sure you have the correct cartridge or valve assembly.
Think about whether your water temperature control needs an upgrade. Some faucets use specific thermostats or handles. Check that you have the right tools like a wrench and screwdriver for installation.
Finally, confirm that your new parts are compatible with your existing setup. This will help prevent leaks or malfunctions.
Being thorough in gathering these parts ensures a smooth replacement process and helps you get your sink working like new again.
Turn Off Water and Prepare Your Sink Area
To prevent water from spilling everywhere, start by shutting off the main water supply or the shut-off valves under the sink. This makes sure no water flows while you’re working on the faucet.
After shutting off the water, open the faucet to drain any remaining water and relieve pressure. This makes the job easier and keeps things cleaner. Next, cover the sink drain with a cloth to catch small parts and protect your basin from damage.
Before you begin, check your faucet style and water pressure to spot any potential issues. If your faucet has multiple handles or special connections, plan accordingly. Also, gather all the necessary tools and replacement parts so you’re ready to go without delays.
- Turn off the shut-off valves securely
- Drain remaining water by opening the faucet
- Prepare tools and replacement parts in advance
Remove Your Old Sink Faucet Step-by-Step
Before you start removing your old sink faucet, it’s really important to turn off the water supply first. You don’t want any surprises flooding the area! Once that’s taken care of, you can begin disconnecting the faucet parts. Just make sure to use the right tools to loosen those fittings—careful now to avoid damaging anything.
After you’ve done that, you’ll be all set to completely remove the old faucet. Easy peasy!
Turn Off Water Supply
Switching off the water supply is an important first step before removing your old sink faucet. It stops water from spraying everywhere and causing damage. You’ll find your shut-off valves usually beneath the sink and turn them clockwise to stop the flow.
Keep in mind, some faucets have multiple supply lines, so be sure all are closed. If you notice high water pressure, shutting off might need a bit more force. Knowing your faucet style helps you identify the correct valves to turn off.
Check for residual water in the lines by opening a faucet after turning off the supply. Use pliers if valves are stiff or hard to turn. Keep a towel handy to catch any unexpected drips or leaks.
Disconnect Faucet Components
With the water supply shut off and drained from the lines, you can now start disconnecting the faucet components. Begin by removing any mounting hardware holding the faucet to the sink.
Carefully loosen and take out the faucet cartridge if you can access it. This often involves unscrewing retaining clips or nuts. Next, disconnect the water supply lines from the faucet’s tails using a wrench. Be ready for any leftover water in the lines.
Once the supply lines are detached, lift the faucet free from the sink. You might need to wiggle it a bit if it’s stuck. With these steps, you’ve successfully disconnected everything needed to replace your old sink faucet.
Install Your New Sink Faucet Correctly
Installing your new sink faucet correctly is essential to make sure it works well and doesn’t leak over time. Proper installation also helps keep the faucet looking nice and fresh, boosting your sink’s appearance.
Proper faucet installation prevents leaks, enhances appearance, and ensures long-lasting, efficient performance.
It ensures the water pressure is steady, so you get a smooth flow without splashes or drips. To start, align the faucet mounting holes and tighten the mounting nuts snugly.
Make sure the water supply lines are connected tightly to prevent leaks. Double-check that the handles move smoothly and that the spout sits evenly.
Remember these key steps: verify the gasket is correctly placed and sealed, tighten connections without overtightening to avoid damage, and test water flow while checking for leaks before you finish.
Following these tips guarantees your faucet looks good and works efficiently, delivering the right water pressure and a sleek look. Proper installation also helps prevent future issues and extends the lifespan of your faucet.
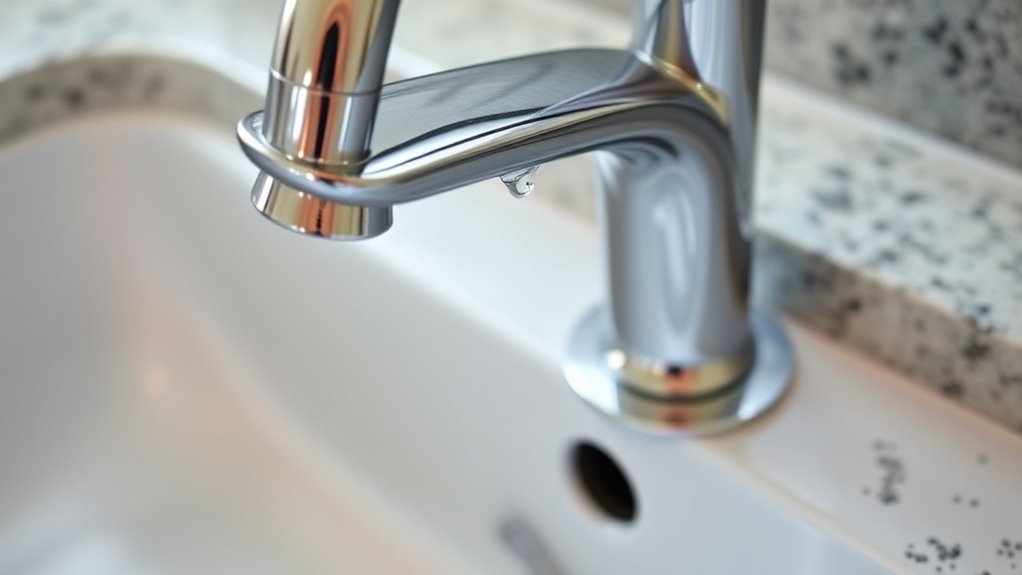
Troubleshoot Common Issues Like Leaks and Drips
Leaks and drips are common issues that can happen with a new sink faucet, often signaling a problem with connections or seals. If you see water dripping from the spout or around the base, check your faucet style. Some styles, like single-handle models, may need tightening or parts adjusted more carefully.
Make sure all connections are secure and that washers or seals haven’t shifted during installation. Low water pressure can also cause drips, making the faucet seem like it’s not working right. If water flow feels weak, check aerators or filters for clogs.
For persistent leaks, you might need to replace faulty washers, O-rings, or tighten loose fittings. Sometimes, switching to a different faucet style may help reduce ongoing issues. Always turn off the water before troubleshooting, and double-check your work so you don’t damage seals or connections.
Maintain Your Faucet to Prevent Future Leaks
Regularly maintaining your faucet is key to preventing future leaks. It helps you catch small issues early before they become costly repairs.
Check for signs of wear around seals and cartridges. Cleaning aerators and replacing worn washers as needed can keep everything running smoothly.
Keep an eye out for corrosion or mineral buildup, which can cause leaks over time. Regular inspection and care will help your faucet stay in top shape.
- Regularly clean aerators and screens to avoid blockages and pressure issues
- Replace worn or damaged washers and seals promptly
- Check for corrosion and address it before it worsens
Frequently Asked Questions
How Long Does It Typically Take to Replace a Sink Faucet?
Replacing a sink faucet usually takes about 30 minutes to an hour, depending on your experience.
You’ll want to follow some installation tips, like turning off the water supply first. Use wrench techniques carefully to loosen and tighten fittings without damage.
With patience and the right tools, you can handle the replacement efficiently. Just make sure to double-check for leaks after installation to ensure everything’s secure.
Can I Replace a Sink Faucet Without Professional Help?
Yes, you can replace a sink faucet yourself, especially if you’re comfortable with basic DIY tasks.
Choosing the right faucet style and understanding your sink’s connection types can help make the process smoother.
But be aware of your limits—if the plumbing seems complicated or the space is tight, it’s better to call in a professional.
A little patience and the right tools will make this project manageable and save you money.
What Are Signs That My Faucet Needs Replacement Sooner?
You’ll need to replace your faucet sooner if you notice persistent leaks or difficulty in leak detection, which can mean internal wear.
If your faucet style no longer matches your décor or has become outdated, it’s probably time to upgrade.
Corrosion or mineral buildup can cause performance issues too. Replacing it promptly ensures proper function and looks good too, preventing water wastage and damage.
Are There Different Types of Sink Faucets I Should Choose From?
Yes, there are different types of sink faucets. For example, if you like a modern look, a single-handle pull-down faucet could be a good choice. It offers style options and easy control.
When you’re choosing, think about brand options and what style matches your decor. You’ll find plenty of finishes and designs, making it easier to find a faucet that suits your needs and looks great in your space.
Is It Necessary to Replace Plumbing Pipes During Faucet Replacement?
You don’t need to replace plumbing pipes when replacing a sink faucet if the plumbing looks good. Just focus on inspecting the pipe fittings for leaks, corrosion, or damage.
If the fittings are in good shape, there’s no need to replace them. But if you find issues or notice your pipes are old, it’s smart to replace the fittings.
That way, you’ll ensure a proper seal and avoid future leaks, saving yourself trouble later on.
Conclusion
Replacing your sink faucet might seem straightforward, but surprises can pop up. Will your new faucet fit perfectly, or will a sneaky leak catch you off guard?
With the right steps and tools, you’ll be prepared. Still, a small glitch might test your patience. Stay focused and take your time.
Keep an eye on your project, stay attentive, and don’t rush. The final piece is almost in reach—are you ready to secure your sink confidently or will one last twist challenge you?