How to Seal Bathtub Grout in Seven Easy Steps
Many people struggle with maintaining their bathtub grout, especially with mold, dirt, and soap scum building up over time. If you’re tired of dealing with stained or cracked grout, you’re not alone. Sealing your grout can make a big difference in keeping your bathtub looking fresh and clean.
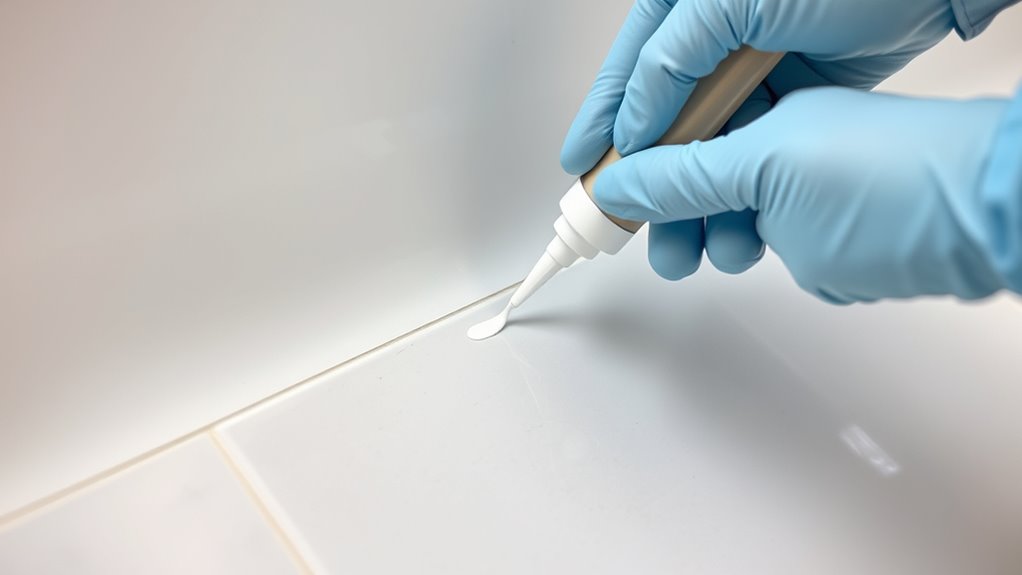
To seal your bathtub grout in seven easy steps, start by cleaning the grout thoroughly with a gentle cleaner to remove dirt, mold, and soap scum.
Next, inspect for cracks or damage and repair if needed.
Choose a suitable grout sealer, then apply it evenly with a brush or applicator in small sections, controlling the flow and wiping away excess immediately.
Wait 24–48 hours for it to cure before using the tub.
Proper technique and maintenance will guarantee long-lasting protection.
Learn more to get it just right.
Key Takeaways
- Make sure to clean and dry the grout thoroughly to get rid of dirt, mold, and soap scum before sealing.
- Pick a grout sealer that matches your grout color and gives you the protection you want.
- Apply the sealer evenly in small sections using a brush or applicator, carefully working to avoid gaps.
- Wipe away any excess sealant right away to prevent residue or discoloration.
- Let the sealant cure for 24 to 48 hours before using your bathtub again.
Why Sealing Your Bathtub Grout Is Important
Sealing your bathtub grout is crucial because it helps prevent water from seeping into the underlying surfaces, which can lead to mold, mildew, and structural damage. When choosing a grout color, keep in mind that sealing keeps that shade vibrant and helps prevent stains from setting in.
Sealing grout prevents water damage, mold, and stains, keeping your bathtub looking vibrant and protected.
Regular sealing is essential, and how often you do it depends on your usage, the type of grout, and how much water exposure there is. Usually, resealing every 6 to 12 months works well, but if your bathroom is high-traffic, you might need to do it more often.
Without proper sealing, your grout becomes more porous, allowing water and dirt to penetrate. This can cause discoloration and weaken the surface over time. Sealing not only keeps your grout looking good but also helps it last longer.
Staying consistent with sealing will keep your bathtub clean, mold-free, and visually appealing. It’s a simple way to protect your investment and ensure your bathroom stays in great shape for years to come.
Signs Your Grout Needs Sealing
Over time, your grout may start showing signs that it needs sealing, especially if it’s losing its original appearance or becoming more difficult to clean. One clear sign is a noticeable change in grout color, which may fade or darken unevenly, indicating moisture has penetrated the surface.
You might also notice mold or mildew spots forming more easily or recurring despite cleaning. If your grout becomes stained or discolored quickly, it’s a sign that sealing frequency should increase to protect it.
Furthermore, if water no longer beads or tends to seep into the grout lines, sealing could help restore its water resistance. The overall condition of your grout is a good gauge—if it feels rough or crumbly when touched, it’s time to reseal.
Addressing these signs promptly helps prolong your grout’s appearance and prevents costly repairs later on.
Essential Supplies for Sealing Bathtub Grout
Before you start sealing your bathtub grout, gather the supplies you’ll need to ensure the job goes smoothly and lasts. You’ll want a high-quality grout sealer, which has become more user-friendly and effective over time.
A small brush or applicator is great for precise application, helping you avoid messes and wasted product. Have a clean cloth or sponge ready to wipe off excess sealer and keep your workspace tidy.
Protective gloves are a good idea to safeguard your skin, and good ventilation is important for safety—especially since bathrooms often symbolize cleanliness and health. A putty knife or scraper can help you remove old residues or smooth out uneven spots before sealing.
Using the right supplies not only makes the process easier but also helps your results last longer. This respects the evolving standards of hygiene and aesthetics, reflecting a tradition of craftsmanship that has developed over time.
Having everything on hand keeps your project flowing smoothly and shows a thoughtful approach to your work.
Preparing Your Grout: Cleaning and Surface Prep
Have you checked your grout thoroughly before applying the sealer? Proper cleaning and surface prep are key to avoiding issues like color variance or damage later on.
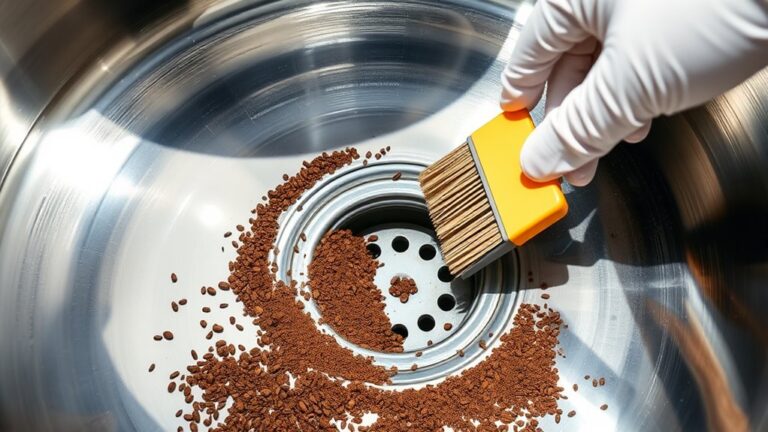
Start by removing soap scum, mold, and debris using a grout cleaner or a simple mix of baking soda and vinegar. Use a soft brush or toothbrush to gently scrub the grout lines, making sure you don’t damage the grout or create uneven patches.
Remove soap scum, mold, and debris with a gentle scrub for a clean, even grout surface before sealing.
Rinse thoroughly and let everything dry completely, as moisture can interfere with how well the sealer sticks. Inspect the grout for cracks or damage—any compromised spots should be repaired before sealing.
This step ensures a smooth, professional-looking finish and helps prevent problems like discoloration or weakened grout in the future. Taking these prep steps creates a clean, solid surface for the sealer, helping to keep things uniform and extend your grout’s lifespan.
Choosing the Best Grout Sealer for Your Bathtub
Choosing the right grout sealer for your bathtub depends on your specific needs and the type of grout you have.
If your grout is lighter in color, you’ll want a sealer that *amplifies* it without darkening or changing the shade. On the other hand, darker grout might benefit from a sealer that prevents staining and *highlights* its tone.
Think about how often you’ll need to reseal. Some sealers require more frequent applications, like every one to two years, while others last longer.
Waterproof or penetrating sealers are popular choices, especially for bathtubs, because they offer strong moisture protection.
If you prefer an easy application, look for a sealer labeled as user-friendly. Always check the product labels to *verify* compatibility with your grout type.
Ultimately, finding the right sealer is about balancing your color preferences with how often you’re willing to reseal.
This way, your bathtub stays protected and looks great for longer.
Applying Grout Sealer in 7 Easy Steps
Applying grout sealer is pretty straightforward if you follow a few simple steps. First things first, you want to make sure the surface is nice and clean, dry, and free of any dirt or soap residue. This helps the sealer do its job and stick properly.
Once your surface is prepped, you can go ahead and apply the sealer carefully. Take your time to cover all the grout lines evenly without rushing. After you’ve applied the sealer, make sure to smooth it out into an even coat, so everything looks neat and consistent.
Preparing the Grout Surface
Wondering how to guarantee your grout is ready for sealing? First, make sure the surface is completely clean and dry. Remove any existing mold or stains, as these can prevent the sealer from sticking properly.
Use a gentle brush and a grout cleaner to scrub away dirt and mold, then rinse thoroughly. Once everything’s dry, inspect the grout for cracks or damage and repair any issues before sealing.
Properly prepared grout not only prevents future mold growth but also enhances the color, giving your tub a fresh, vibrant look. By ensuring a smooth, clean surface, you create the perfect base for sealing.
This helps the sealer work better and keeps your grout looking great longer.
Applying and Finishing the Seal
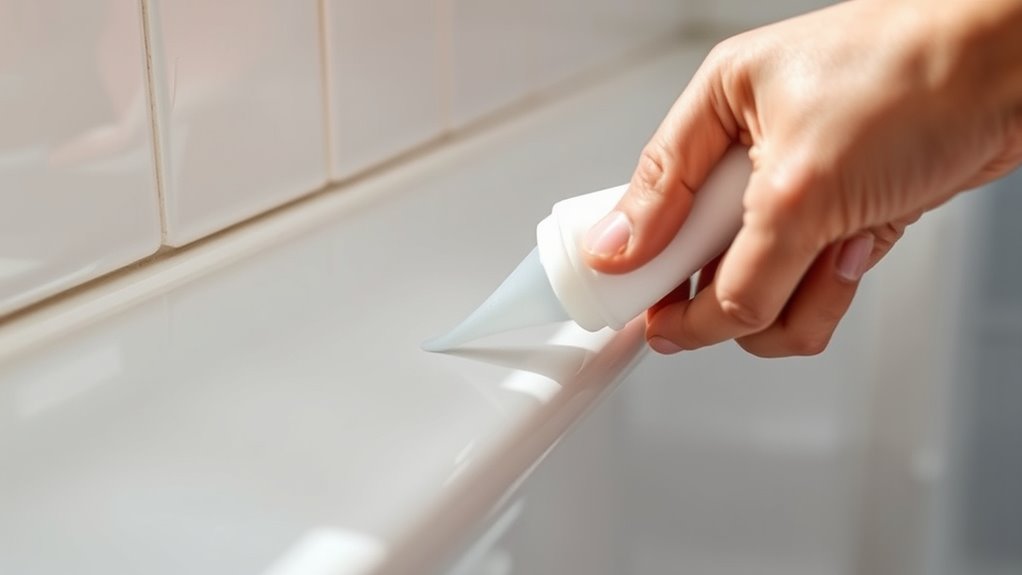
Once your grout surface is ready, it’s time to carefully and methodically apply the sealer. Choose a sealant type that suits your needs—whether it’s a penetrating or film-forming sealer—and pick a color that matches or improves your tile’s look.
Use a brush, roller, or applicator to spread the sealer evenly over the grout lines, making sure every area is covered. Be cautious not to over-apply, as this can cause drips or pooling.
Let the sealer sit according to the manufacturer’s instructions. Afterward, wipe away any excess to prevent residue from forming. If recommended, apply a second coat for extra protection.
Finally, allow the sealant to cure completely. This helps protect your grout from moisture and stains, keeping it looking great over time.
Tips for Achieving a Smooth, Even Seal
If you want to get a smooth, even seal, it’s all about picking the right tool. You might use a caulk finishing tool or just a damp finger—either works well. The key is to apply gentle, consistent pressure as you go. That way, you’ll avoid those pesky gaps or uneven spots.
It’s also a good idea to work in small sections. That way, you can stay in control and really focus on making each part look professional. Taking it slow and steady usually gives the best results!
Use the Right Tool
Using the right tool is key to getting a smooth, even seal when sealing bathtub grout. The right tool helps you control the application and gives a professional look.
Before you start, check your tools. Make sure they’re clean and in good condition. Replace worn tools to avoid uneven seals.
Consider these tips: Use a high-quality caulking gun for steady application. Choose a smoothing tool or spatula that fits your grout seal needs. Keep tools clean as you work to prevent debris from causing imperfections.
Match how often you seal to your project. This helps avoid overapplication or gaps. Picking the right tools makes the process easier and your seal more durable.
Proper tool maintenance reduces mistakes and saves you time. With the right approach, you’ll get a flawless, long-lasting seal in fewer steps.
Apply Even Pressure
Applying even pressure while sealing guarantees a smooth, consistent bead that adheres properly and looks professional. As you run the caulk gun along the grout line, keep steady pressure to ensure the sealant flows evenly.
This helps with color matching and prevents gaps that could cause discoloration or mismatched areas. Keep an eye on the grout texture below; if it’s rough or uneven, consistent pressure can help fill those gaps.
Don’t press too hard, which might cause excess caulk to spill over, or too lightly, which may leave gaps. Maintaining even pressure creates a uniform bead that blends seamlessly with the existing grout, giving you a clean, professional finish.
Work in Small Sections
Breaking the sealing process into small sections helps you stay in control and get a smoother, more even bead. This helps prevent uneven application that might cause color differences or grout discoloration over time. To get consistent results:
- Work in 3–4-foot sections so the sealant doesn’t dry before you finish.
- Keep your tools steady and press evenly to avoid uneven beads.
- Wipe away excess sealant right away to prevent buildup that can lead to color issues.
- Check your work regularly for smoothness and evenness, adjusting your technique if needed.
Focusing on small sections helps you stay precise and avoid mistakes that can cause grout discoloration or visible seams. This method helps you achieve a neat, professional look with uniform color and lasting protection.
How Long to Wait Before Using Your Bathtub Again
After sealing the grout, it’s important to give it enough time to cure before using your bathtub again. Usually, waiting at least 24 to 48 hours after application is best.
This curing period lets the sealant fully set, offering the best protection against water and stains. If you used grout alternatives or specific colors, follow the manufacturer’s instructions for cure times, as they can differ.
Rushing this process might weaken the seal or cause smudges, so it’s best to be patient. During this time, avoid splashing water or using harsh cleaning products around the area.
If you’re unsure how long to wait, check the product label for the recommended drying time. Giving it enough time now will help your sealed grout last longer, keep your bathtub looking fresh, and prevent future water damage.
Common Sealing Mistakes and How to Avoid Them
Even with careful planning, mistakes can happen during the sealing process that undermine your grout’s effectiveness. One common error is overlooking the importance of grout color choice. Picking the wrong color can highlight imperfections or clash with your tiles.
Second, ignoring sealing frequency can reduce how long your grout lasts. Sealing too often or not enough leaves the grout vulnerable to damage. It’s important to follow recommended guidelines for sealing.
Third, rushing the application without proper cleaning can trap dirt and moisture under the sealant. This weakens its protective qualities and can lead to problems down the line. Make sure the grout is fully clean before sealing.
Fourth, applying sealant unevenly or missing spots can harm its effectiveness. This can cause water damage and other issues. Always apply sealant evenly across all areas for the best results.
To avoid these mistakes, choose a grout color that complements your tiles, follow sealing frequency guidelines, and ensure everything is clean before sealing. Proper preparation and careful application will help your grout last longer and stay protected.
Maintaining Your Sealed Grout for Long-Lasting Results
To keep your sealed grout looking its best and working well, regular care is a must. Clean the tiles often with a gentle, pH-neutral cleaner to help protect the grout and prevent buildup that could damage the seal.
Avoid harsh chemicals that can weaken the grout or ruin the sealant. After cleaning, take a moment to check the grout for any signs of damage or wear, and reapply sealant if needed.
This proactive step helps maintain the seal’s integrity and keeps stains and moisture out. Proper maintenance also keeps the color looking fresh and vibrant for longer.
Make sure your bathroom stays well-ventilated to reduce mold and mildew, which can weaken the grout over time. By sticking to a routine of gentle cleaning, regular inspections, and resealing when needed, your grout will stay durable, attractive, and resistant to water damage for years.
Frequently Asked Questions
How Often Should I Reseal My Bathtub Grout?
You should reseal your bathtub grout every 12 to 18 months to keep it protected. Regular resealing helps prevent moisture buildup and keeps stains at bay.
It’s a good idea to choose a sealing product based on your grout type. When picking your grout color, try to select a sealant that either complements or highlights those colors.
Consistently resealing your grout helps it stay looking fresh and prevents long-term damage.
Can I Use Any Type of Grout Sealer?
You can’t use just any type of grout sealer. It’s important to choose the right one based on your grout color and the type of sealant available.
For instance, color sealers match or enhance your grout’s hue, while penetrating sealers provide better moisture resistance. Always check that the sealant works with your grout—whether it’s sanded or unsanded.
Picking the right sealant ensures your grout stays durable, prevents stains, and helps keep your bathtub looking fresh longer.
Is Sealing Necessary for Already Stained Grout?
Sealing stained grout is necessary because it helps protect the grout color and prevents further staining and moisture damage.
When choosing sealer types, go for a penetrating sealer to keep the grout’s look intact, especially since it’s already stained.
Applying a fresh coat of sealer makes the grout more durable and helps it stay clean. It also lowers the risk of discoloration and damage down the line.
What Are the Signs of Over-Sealing Grout?
You might notice over-sealing grout if water or stains start to bead instead of soaking in. This suggests the sealant is too thick or strong.
Excessive sealing can stop the grout from absorbing water and stains naturally. Over time, this can lead to cracking or discoloration.
To prevent this, always test your grout’s absorption first. Apply thin, even coats for the best results.
Proper sealing helps your grout last longer without losing its flexibility.
If you over-seal, it reduces the grout’s ability to absorb cleaning agents, which can cause damage over time.
Can Sealing Improve Grout Mold Resistance?
Sealing your grout is like giving it a superhero shield against mold wonderlands. It doesn’t just protect; it actively boosts mold prevention by blocking moisture infiltration.
This added barrier strengthens grout durability, making it less prone to cracks and stains that mold loves. When you seal effectively, you’re turning your bathtub area into an uninviting fortress for mold.
This helps ensure your bathroom stays fresh and clean longer.
Conclusion
Now that you’ve mastered sealing your grout, imagine it lasting so long that your bathtub practically ages in peace—untouched by mold, grime, or pesky leaks. No more frantic scrubbing sessions or emergency touch-ups.
Instead, you can relax and enjoy your flawless, waterproof fortress. Truly, who knew sealing grout could turn you into a bathroom superhero?
Just remember: with great grout sealing power comes great DIY responsibility. Go forth and conquer your grout!