How to Replace a Pfister Bathtub Faucet Cartridge in 10 Easy Steps
Replacing a Pfister bathtub faucet cartridge can seem intimidating, especially if you’re not sure where to start. Many people struggle with DIY plumbing fixes, but don’t worry—you’re not alone.
With a few simple steps, you can get your faucet working like new again.
To replace your Pfister bathtub faucet cartridge, start by turning off the water supply and draining the faucet. Remove the handle and any trim or escutcheon, then locate and remove the retaining clip or screw securing the cartridge.
Carefully pull out the old cartridge, clean the area, and inspect parts for damage.
Insert the new cartridge, reassemble everything in reverse order, and turn the water back on to check for leaks. Keep going to uncover detailed tips for a smooth replacement.
Key Takeaways
- Turn off the main water supply and drain any remaining water from the faucet before you start.
- Remove the handle and trim to access the cartridge securely, and make a note of where everything was placed.
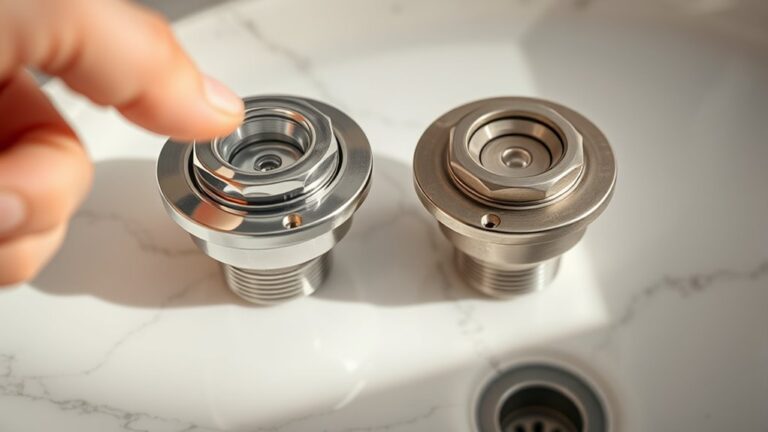
- Carefully extract the old cartridge using the right tools, checking for any corrosion or debris that might be stuck.
- Insert the new cartridge, making sure it’s aligned properly and locks into place without forcing it.
- Slowly turn the water back on, then check for any leaks and ensure the handle operates smoothly.
Signs Your Pfister Bathtub Faucet Needs a Cartridge Replacement
Your Pfister bathtub faucet will often give you signals when its cartridge needs replacing. If you notice your vintage fixtures dripping or leaking, it’s a clear sign something’s wrong. Reduced water flow or inconsistent temperature control also indicates cartridge trouble.
Watch for dripping, leaks, or inconsistent water flow — signs your Pfister faucet cartridge needs attention.
You might see water sputtering or find it hard to switch from hot to cold—these are clues a replacement is needed. Ignoring these signs wastes water and energy, which goes against eco-friendly tips to conserve resources.
Over time, mineral buildup, especially in older fixtures, can cause internal damage, making replacement necessary. Staying alert to these symptoms helps avoid costly repairs and keeps your vintage fixtures functioning smoothly.
Regular maintenance not only prolongs the lifespan of your bathtub faucet but also supports eco-conscious living. Recognizing these signals early ensures you solve issues promptly, maintaining the best performance and water efficiency.
Tools and Materials You’ll Need to Replace the Faucet Cartridge
Replacing a faucet cartridge needs a specific set of tools and materials to make the job easier and safer. You’ll want basic items like an Allen wrench, screwdriver, pliers, and a replacement cartridge.
Having plumber’s grease and a towel nearby is helpful during installation. Reviewing market trends and competitor options can guide you in choosing durable, reliable tools.
| Tool/Material | Purpose |
|---|---|
| Allen wrench | Remove set screws |
| Screwdriver (flat-head) | Pry off fixtures |
| Pliers | Grip and remove the old cartridge |
| Replacement cartridge | The main component to replace |
| Plumber’s grease | Lubricate o-rings for smoother installation |
This toolkit simplifies the process and aligns with current market standards. It helps ensure your repair lasts and keeps your fixtures modern and reliable.
Shut Off the Water Supply and Prepare Your Workspace
Before starting the replacement, it’s really important to shut off the water supply to prevent leaks and water damage. Find the shut-off valves under the sink or behind the wall if your home has controls for the bathtub.
Turn them clockwise to cut off the water completely. After that, turn on the faucet to let any remaining water drain out and make sure there’s no water flowing. This step is key because water during the repair can cause a big mess.
Shutting off the water also helps reduce faucet noise and stops accidental sprays. Clear the area around the bathtub of any items to keep your workspace safe and organized.
Place a towel or bucket nearby to catch any drips when you remove the faucet cartridge. Taking these simple precautions means you won’t get interrupted by unexpected leaks or water flow during your project.
How to Remove the Old Pfister Faucet Cartridge
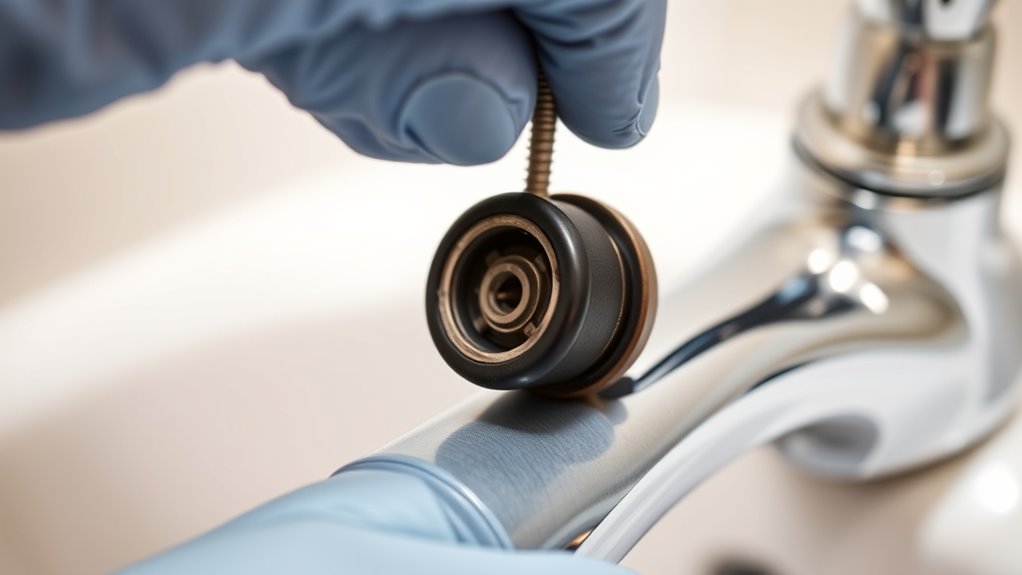
To remove the old Pfister faucet cartridge, start by locating the retaining clip or screw that holds it in place. Depending on your faucet style, you might see a small clip under the handle or a screw at the base. Use your screwdriver or pliers to carefully remove it.
Once the clip or screw is out, grip the cartridge with pliers and gently turn or pull it straight out. Some cartridges may resist because of mineral buildup or small parts inside. Be patient and avoid forcing it to prevent damage to surrounding components.
Removing the cartridge can affect water pressure if debris is lodged inside. Check for any sediment or buildup once it’s free. Keep track of all the parts you remove so you can reassemble everything correctly.
Knowing your faucet style helps because some models require specific tools or steps, but all follow this basic removal process.
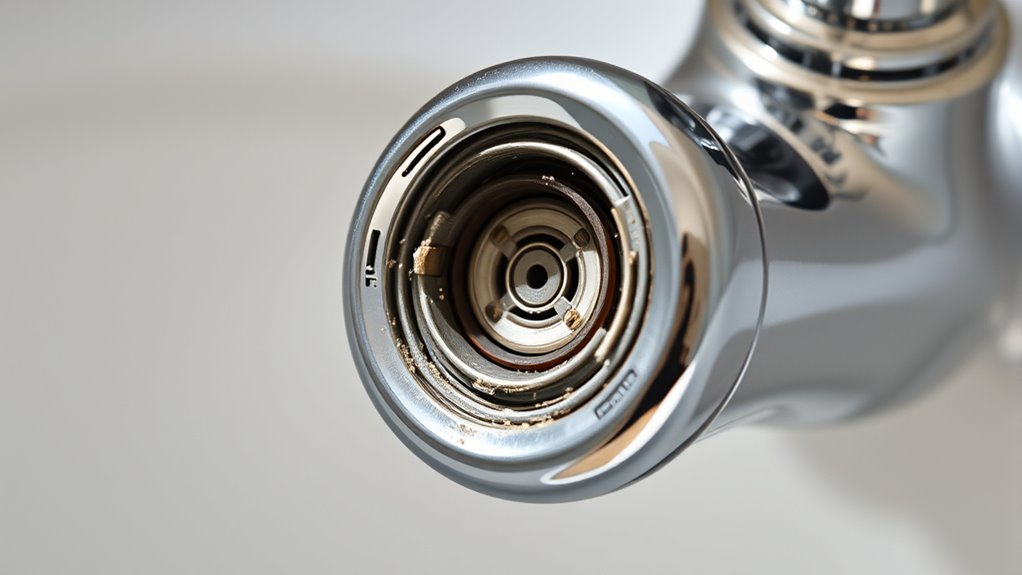
Inspect and Clean Your Faucet Components for Smooth Operation
After removing the old cartridge, it’s important to check the surrounding parts for any buildup or damage. Look at the decorative finishes for signs of corrosion or wear, and make sure they’re still secure and looking good.
Clean off any mineral deposits or grime from the faucet parts using a soft cloth and a mild cleaner. Pay special attention to the valve seat and other internal parts, removing debris that could block water flow.
This helps keep the water pressure steady and can prevent leaks. If you see corrosion or damaged parts, replace them before installing the new cartridge.
Making sure these elements are clean and in good shape promotes smooth operation and helps your faucet last longer. Regular inspections can also catch potential problems early, saving you trouble later on.
Spending a few minutes to clean and check your faucet components will ensure it works reliably and stays looking nice.
How to Install the New Pfister Faucet Cartridge Properly
Before you start installing the new cartridge, take a moment to clean and dry the faucet area. You want to make sure everything is free of dirt and debris so the new cartridge fits perfectly.
Next, carefully align the cartridge with the valve seat. Just take your time to get it seated properly—it should fit snugly without being forced. Once it’s in place, tighten it securely. This will help prevent any leaks and make sure the faucet operates smoothly.
Prepare the Faucet Area
Ensuring the faucet area is clean and accessible is essential before installing the new Pfister cartridge. A tidy surface helps you work efficiently and prevents debris from entering the faucet assembly. Check that the faucet’s exterior looks appealing, as faucet aesthetics matter for overall bathroom or tub appeal.
Clear away any soap scum, mineral build-up, or grime that could hinder installation. Also, verify the water pressure is turned off and steady to avoid sudden leaks or sprays once the cartridge is installed. Removing any existing parts that might obstruct your access ensures a smooth process.
With a clean, dry workspace, you’ll be able to install the new cartridge accurately. This helps maintain proper water pressure and keeps your faucet functioning properly.
Align and Secure Cartridge
To install the new Pfister cartridge properly, start by aligning it with the internal guide notches inside the faucet body. Make sure the cartridge’s tabs fit snugly into the notches so it works correctly.
Once aligned, gently push the cartridge into place while applying steady pressure. Be careful—incorrect alignment can affect water pressure and the overall operation of the faucet.
To secure the cartridge, confirm that it sits flush and locks into position. Avoid forcing it, as this could damage internal parts.
Then, test the valve by turning on the water to check for smooth operation and consistent flow. Proper alignment helps ensure good water pressure, prevents leaks, and keeps the faucet functioning well over time.
Reassemble the Faucet and Check for Leaks
After you’ve put the faucet back together, go ahead and tighten all the connections to make sure they’re snug. Then, turn the water back on and take a close look around the faucet to see if there are any drips or leaks. If you notice any leaks, just tighten the fittings a bit more until they stop leaking.
Tighten All Connections
After installing the new cartridge, carefully tighten all the faucet connections to ensure a secure fit. Make sure the connections holding the decorative finishes are snug but avoid overtightening, which could damage the finish.
Properly tightened connections help maintain ideal water pressure and prevent leaks. As you tighten, keep these tips in mind:
- Use a wrench carefully to avoid scratching or damaging surfaces.
- Check that the hot and cold water lines are aligned correctly.
- Confirm all fittings are snug, but don’t overtighten to prevent cracking or stripping threads.
Inspect for Drips
With all connections tightened, it’s time to reassemble the faucet and check for leaks. Turn on the water supply slowly and keep an eye on all parts for any signs of leaking issues.
Pay close attention to the spout and handle areas; even small drips can signal a problem. Confirm that water pressure feels consistent. Low or uneven pressure might mean a loose cartridge or another issue.
If you see dripping after putting everything back together, turn off the water and double-check your connections and the cartridge placement. Tighten things up if needed, but don’t overtighten, as that can cause damage.
Once everything seems secure, run the water again for a few minutes to make sure there are no leaks and the water flows smoothly. Doing this thorough check helps prevent future leaks and keeps your faucet working perfectly.
Test Your Faucet to Ensure It’s Working Correctly
Before you replace the cartridge, it’s *crucial* to test the faucet to confirm everything functions correctly. Turn on the water and observe how it flows, paying attention to the faucet material, which influences water pressure and overall performance. *Making certain* the water pressure feels consistent, without fluctuations or drips, indicates a successful replacement.
Here are key things to check:
- Verify that hot and cold water switch smoothly without resistance.
- Confirm the water flow is steady and not weaker than before.
- Watch for leaks around the faucet, especially at the handle and spout.
If water pressure seems low or uneven, it might be due to debris or improper installation. Make sure all components are tight and aligned correctly. Testing your faucet ensures your work is effective and prevents future issues. A properly functioning faucet provides smooth operation and consistent water flow, confirming the cartridge replacement was successful.
Troubleshooting Common Issues After Replacing the Cartridge
Even when you follow all the steps carefully, issues can still come up after replacing a faucet cartridge. If you notice the water pressure drops, check for debris or mineral buildup in the new cartridge or on the inlet screens. Clean these thoroughly to restore good flow.
Even with careful installation, debris or mineral buildup can cause water pressure issues—clean inlet screens thoroughly.
If your faucet starts making noise, it might be due to loose parts or improper installation. Tighten all fittings and make sure the cartridge is seated correctly. Sometimes, a worn or damaged O-ring can cause leaks or whistling sounds, so inspect and replace it if needed.
Make sure the handle moves smoothly without resistance. If problems persist, turn off the water supply and double-check your installation. Troubleshooting these issues early helps prevent more damage and keeps your faucet running quietly and efficiently.
Pay attention to these signs—they’ll save you time and help maintain ideal water flow.
Tips for Maintaining Your Pfister Faucet and Preventing Future Problems
Regular maintenance is key to keeping your Pfister faucet functioning smoothly and preventing future problems. To maximize its lifespan, take small steps periodically.
Start by cleaning or replacing faucet aerators to maintain ideal water flow and prevent buildup. Installing aerators also helps conserve water, saving you money over time.
Check for leaks or drips often—addressing issues early prevents more significant repairs. Keep the cartridge area clean to avoid mineral deposits that can cause stiffness or irregular operation.
Lastly, avoid using harsh chemicals that could damage faucet components. Periodically inspect seals and connections to make sure they’re tight.
You might also consider upgrading to a water-saving faucet aerator if you haven’t already. This conserves water without sacrificing performance.
Staying attentive to these simple tips will keep your faucet functional, efficient, and problem-free for years to come.
Frequently Asked Questions
Can I Replace the Cartridge Myself Without Professional Help?
Yes, you can replace the cartridge yourself, especially if you have some basic DIY plumbing skills. It’s usually a straightforward task that doesn’t require professional help.
With the right tools and a little patience, you can do this at home and avoid calling a plumber. Just remember to turn off the water supply first, follow simple step-by-step instructions, and handle the internal parts carefully.
Replacing the cartridge isn’t as hard as it might seem, and doing it yourself can save you some money on repair costs.
How Long Does a Typical Cartridge Replacement Take?
Time is of the essence, and replacing your Pfister cartridge typically takes about 30 minutes to an hour.
You’ll want to gather tools like a wrench, screwdriver, and the replacement cartridge beforehand.
First, shut off the water using the shutoff valve to prevent messes.
Once you’ve drained the faucet, carefully remove the old cartridge and install the new one.
Your patience and preparation make all the difference.
Are Pfister Cartridges Universal or Model-Specific?
Pfister cartridges are generally model-specific, meaning you’ll need to find the exact faucet model for a proper replacement.
During faucet maintenance, it’s important to use the right plumbing tools to avoid damaging the cartridge or faucet.
Always check your faucet’s model number before buying a replacement cartridge.
Using compatible cartridges helps ensure smooth operation and prevents unnecessary repairs, making your DIY project much easier and more successful.
What Are Signs of a Faulty Faucet Cartridge Besides Leaks?
If your faucet isn’t changing temperature properly or the water pressure fluctuates unexpectedly, your cartridge may be faulty.
You might also notice a rough or stiff handle movement, making it hard to switch between hot and cold water.
These issues show the cartridge isn’t sealing properly, which affects both water pressure and temperature control.
Replacing the cartridge can help restore smooth operation and steady water flow.
How Often Should I Replace the Faucet Cartridge?
You should replace your faucet cartridge every 5 to 7 years as part of regular maintenance. This is especially true if you notice issues like inconsistent water flow, difficulty turning the handle, or ongoing leaks.
It’s a good idea to check the cartridge now and then and replace it if you see signs of wear or corrosion. Doing this helps prevent further damage and keeps your faucet working smoothly.
Replacing the cartridge regularly helps ensure your bathroom functions properly and avoids more costly repairs down the line.
Conclusion
Think of your faucet as a trusted garden hose, kinked and blocked by debris. Replacing the cartridge is like clearing that obstruction, letting the water flow freely once again.
With patience and care, you’ve untwisted the old, cleaned out the grime, and reconnected the flow. Now, your faucet sings smoothly, an effortless melody of function.
Just like caring for a garden, a little upkeep keeps everything flowing beautifully. Regular maintenance ensures your Pfister bathtub faucet works perfectly and is ready for your next splash of refreshment.