Regrout Bathtub Tile in 5 Easy Steps
Are you tired of those unsightly, stained grout lines ruining the look of your bathroom? You’re not alone—many people struggle with maintaining clean and fresh-looking bathroom tiles. Regrouting your bathtub tiles can seem intimidating, but it’s easier than you think and makes a big difference.
Regrout Bathtub Tile in 5 Easy Steps
To regrout bathtub tiles in five simple steps, start by gathering your tools and safety gear. Carefully remove the old grout using a grout saw or utility knife, working gently to avoid damaging tiles.
Next, apply new grout with a rubber float, pressing firmly into the joints. Shape the grout lines with a damp sponge and let it cure.
Finally, seal the grout to protect against water and stains. Keep watching to learn how to perfect your finish and maintain your tiles long-term.
Key Takeaways
- Protect surrounding surfaces and carefully remove old grout with a grout saw or utility knife.
- Clean and thoroughly dry the joints for the best way for the new grout to stick.
- Press the mixed grout into the joints using a rubber float at a 45-degree angle. Then, smooth it out with a damp sponge.
- Let the grout fully cure, then clean off any haze and check for gaps or uneven spots.
- Seal the grout with a penetrating sealer to keep stains out and make sure it lasts a long time.
Tools and Materials You’ll Need to Regrout Bathtub Tiles
Before you start regrouting your bathtub tiles, make sure you’ve gathered all the necessary tools and materials.
You’ll need a grout removal tool or grout saw to carefully take out the old grout. A sturdy putty knife or spatula will help you apply the new grout smoothly.
Mix your grout to your desired color. Consider grout coloring options to match or refresh your tile look.
To ensure a sealed and long-lasting finish, get tile sealing products that are compatible with your grout and tiles.
A spray bottle or sponge will make applying the grout and cleaning up excess easier.
Don’t forget protective gear like gloves and eye protection. Having everything ready helps keep the process smooth and professional-looking.
Proper tile sealing after regrouting will help prevent future damage, and grout coloring lets you customize your tile’s appearance.
With all these tools in place, you’re ready to transform your bathtub area efficiently.
How to Remove Old Grout Safely and Effectively
Removing the old grout is a key step in regrouting your bathtub tiles, and doing it safely helps prevent damage to the tiles and surrounding areas. Start by protecting nearby surfaces and using a grout removal tool or a utility knife to carefully score along the grout lines. Be gentle, especially if doing mural restoration or matching grout color, to avoid chipping tiles. Work slowly to prevent unnecessary damage, and vacuum or wipe away debris regularly.
| Tool | Purpose |
|---|---|
| Grout saw | Removes stubborn grout |
| Utility knife | Scores grout for easier removal |
| Grout removal tool | Safely exfoliates old grout |
| Vacuum | Cleans debris for inspection |
| Sponge | Preps surface for regrouting |
Take your time during removal, making sure the surface stays intact for mural restoration. Proper removal makes it easier to match grout colors seamlessly and results in a cleaner, more professional finish.
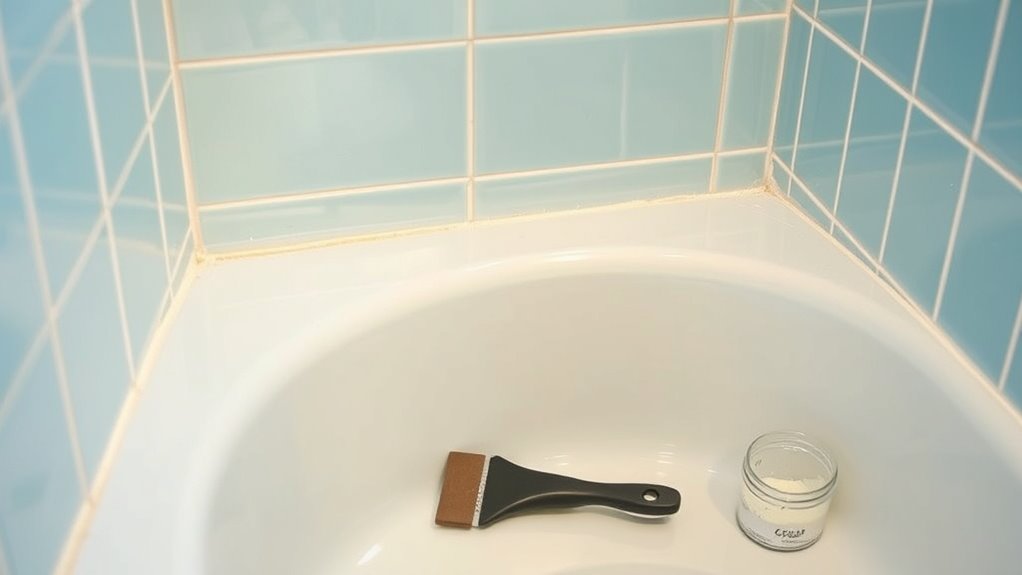
How to Apply and Finish New Grout for a Seamless Look
Once you’ve prepared the surface by thoroughly cleaning and drying the area, applying and finishing new grout is pretty straightforward. Start by using a rubber float held at a 45-degree angle to press the grout into the joints. Work in small sections so everything stays even.
As you go, pay attention to color matching. Choose a grout color that complements your tiles for a seamless look. After spreading, remove excess grout with the float.
To get a smooth, uniform finish, use a damp sponge to gently shape and wipe away any extra grout. Rinse the sponge often to avoid smudges. Sculpt the edges with a finishing tool to keep grout lines crisp, and clean your tools regularly to prevent dried grout buildup.
Once the grout has cured, do a final cleaning to restore shine and remove any haze. Proper finishing ensures your regrouted tiles look flawless and brand new.
Tips for Sealing and Maintaining Grout to Prevent Mold and Damage
Sealing and maintaining your grout is key to keeping it looking fresh and preventing mold and damage over time. Proper sealing protects against moisture that causes mold growth, while choosing the right grout color can help hide stains and boost your bathroom’s appearance.
Regular maintenance, like quick cleanups after showers, stops grime from settling in. To help you decide, here’s a table showing different sealing techniques and their effects:
| Sealing Technique | Effect | Best for |
|---|---|---|
| Penetrating sealers | Deep, long-lasting protection | Preventing mold in grout lines |
| Surface sealers | Adds shine, easy to clean | Keeping grout bright and fresh |
| Impregnating sealers | Resist stains and moisture | High-moisture areas and grout color choices |
Sticking to these tips keeps your grout sturdy, fresh, and mold-free. Regular sealing helps maintain durability and makes your bathroom look great without much effort.
Common Regrouting Problems and How to Fix Them
Even with proper sealing and maintenance, regrouting can come with its own set of challenges. One common issue is color mismatches, where the new grout doesn’t quite match the existing tile or grout color. It’s important to pick a grout color that matches to keep everything looking seamless.
Color mismatches can occur; choosing the right grout color ensures a seamless, polished appearance.
Grout staining can happen if cleaning products or moisture get into the fresh grout before it’s fully cured, leading to discoloration. You might notice your regrouted area looks uneven or patchy, which can affect your bathroom’s look.
To fix these problems, try using a grout colorant to correct mismatched shades. Make sure the grout is given enough time to cure before you start cleaning. Applying a sealant can help prevent stains from setting in.
Regularly clean your grout with pH-neutral products to keep it looking fresh. If color matching is a big problem, consider calling in a professional for help. Following these steps will help your grout stay uniform, stain-free, and looking polished.
Frequently Asked Questions
How Long Does Regrouting Typically Take From Start to Finish?
Regrouting usually takes about 2 to 4 hours, depending on the size of your tub area and your experience level.
You’ll spend time removing old grout, cleaning tiles, and applying fresh grout, so plan for some downtime.
During the process, consider grout color options to match your decor, and always prioritize regrouting safety by working in a well-ventilated space and wearing gloves.
This way, you can enjoy a fresh new look in just one session.
Can I Regrout Tiles Without Professional Help?
Absolutely, you can regrout tiles yourself; it’s like painting a canvas with careful strokes.
With DIY tips, you’ll clean the existing grout thoroughly—getting it ready for a fresh start—and then apply new grout confidently.
Think of grout cleaning as preparing your surface for renewal. Gather your tools, follow step-by-step instructions, and take your time.
Regrouting your bathtub tile becomes a manageable, rewarding project, transforming your space with your own hands.
What Are the Signs My Grout Needs Regrouting?
You know your grout needs regrouting when you notice cracks, crumbling, or discoloration. Mold growth or black stains also signal it’s time to refresh the grout, especially if your cleaning tips no longer remove stains effectively.
When your grout’s color no longer matches the original or it looks dull, regrouting can help restore its appearance. Regular inspections are key to catching these signs early and keeping your bathroom looking clean and appealing.
Is Regrouting Suitable for All Types of Bathtub Tiles?
Regrouting isn’t suitable for all types of bathtub tiles, especially if you’re hoping to change the grout color or hide stains.
If your tiles are delicate or have textured surfaces, regrouting might damage them or not stick well. It’s important to consider the condition of your grout and tiles first.
If you want a fresh look or to conceal grout stains, regrouting works best with more durable, smooth tiles for a lasting, clean finish.
How Often Should Grout Be Regrouted to Maintain Tile Integrity?
You should regrout your bathtub tiles every 1-2 years to keep the grout in good shape. This helps prevent problems down the road and keeps everything looking fresh.
When regrouting, think about choosing a grout color that matches or complements your tiles. It can make your bathroom look cleaner and more updated.
Using the right tools is important. A grout saw or a multi-tool works well for removal, and sponges are great for cleaning up.
Regular regrouting keeps your tiles sealed and prevents water damage or mold. Plus, it helps your bathroom stay neat and appealing.
Conclusion
Regrouting your bathtub tiles not only restores their beauty but also boosts your bathroom’s hygiene. Did you know that poorly maintained grout can harbor mold and bacteria, impacting your health?
Regular regrouting improves both durability and cleanliness, saving you money on repairs down the line. With these five simple steps, you can achieve a professional-looking finish and enjoy a safer, more beautiful bathroom space.
Remember, taking care of your grout now helps prevent costly issues later. Regrouting your bathtub tiles is a smart move for a cleaner, healthier bathroom.