How to Remove a Porcelain Bathtub in Three Easy Steps
Feeling overwhelmed by the idea of removing a porcelain bathtub? You’re not alone. Many people struggle with this project, unsure of where to start or how to do it safely.
To remove a porcelain bathtub in three steps, first shut off the water supply and disconnect the plumbing by safely unscrewing the drain and water lines.
Next, carefully detach any surrounding fixtures or access panels to expose the tub’s edges.
Finally, use pry bars and protective gear to break and lift the tub out, then dispose of it properly.
If you’re ready to learn detailed tips for a smooth removal process, there’s more to investigate below.
Key Takeaways
- Turn off the water supply, disconnect plumbing, and remove any fixtures around the tub to get clear access.
- Carefully start detaching the tub by working slowly with pry bars, and make sure to use safety gear.
- If needed, cut or break the porcelain into smaller pieces using a utility saw.
- Lift and carry the sections carefully, using proper technique and wear protective equipment.
- Finally, dispose of the debris following local laws, salvage any useful parts, and clean up your workspace.
Why Might You Need to Remove a Porcelain Bathtub?
There are several reasons you might need to remove a porcelain bathtub. Despite its durability, wear and tear over the years can lead to cracks, chips, or stains, making replacement necessary.
If your bathtub has outdated or damaged plumbing connections, removing it becomes essential for repairs or upgrades.
Sometimes, old porcelain tubs are part of historical designs that no longer fit your modern style or accessible needs. You might also decide to replace a porcelain tub with a more functional or space-efficient option.
Prolonged exposure to harsh cleaning agents can deteriorate the porcelain surface, prompting removal.
Corrosion around fixtures or underlying water damage can compromise the tub’s integrity, requiring you to take it out.
Basically, even though porcelain is tough, age, damage, or changing preferences can lead to the decision to remove and replace your bathtub. This helps keep your bathroom functional and looking good.
Gather Your Tools and Prepare the Workspace
Before you get started, it’s a good idea to gather all the tools you’ll need—things like a wrench, pry bar, and safety goggles. Being prepared right from the start just makes everything smoother and safer.
Next, take a quick look around your workspace. Make sure it’s free of any obstacles that might trip you up or get in your way. It’s also a good idea to lay down some drop cloths to protect your surfaces from any damage or debris.
Doing these simple prep steps helps ensure the removal process goes safely and efficiently from the very beginning.
Tool Checklist Preparation
Gathering the right tools and preparing your workspace is an essential first step to removing a porcelain bathtub safely and efficiently. Start by making a complete tool checklist, including hammers, screwdrivers, pry bars, a reciprocating saw, and a bucket for debris.
Check your tools to ensure they’re in good condition to avoid any mishaps. Don’t forget safety gear like gloves, goggles, and a dust mask to protect yourself during demolition.
Organize your tools within easy reach to make the process smoother and reduce frustration. Clearing away unnecessary clutter helps prevent accidents and keeps your workspace safe.
Once your tools are ready and your workspace is prepared, you’ll be ready to start removing your bathtub confidently.
Workspace Safety Measures
Making sure your workspace is safe and ready before removing your porcelain bathtub is crucial. Check for hazards like loose flooring or exposed wiring that could cause accidents.
Clear the area of unnecessary items to avoid tripping or injury. Gather safety gear such as gloves, goggles, and a dust mask to protect against sharp edges, debris, and dust.
Turn off the water and electrical supplies to prevent leaks or shocks. Set up good lighting so you can see clearly during the removal process.
Creating a tidy, hazard-free workspace helps minimize risks and makes your work easier. These safety steps ensure you can work safely and efficiently, reducing the chances of injuries or mishaps.
Turn Off Water Supply and Disconnect Plumbing
Before you start removing the bathtub, it’s important to turn off the main water supply. That way, you won’t have to deal with unexpected leaks or water spraying everywhere. Once the water’s off, go ahead and disconnect the drain pipes and water supply lines from the fixtures.
It’s a good idea to have some buckets or towels on hand just in case there’s still some water left in the pipes. That way, you can catch any drips and keep everything as neat as possible.
Shut Off Main Water
To safely remove a porcelain bathtub, you need to shut off the main water supply first. This step is essential for plumbing maintenance and preventing water damage.
Locate your main shutoff valve, usually near the water meter or where the main line enters your home. Turn it clockwise to fully close it and stop water flow.
Once the water is off, open a faucet in your bathroom to release any remaining water pressure. This helps create a safer work environment and prevents leaks or flooding during removal.
Disconnect Drain and Supply
Have you turned off the water supply and prepared to disconnect the plumbing? Now, gather your cleaning supplies and some basic tools like a wrench and screwdrivers.
Start by disconnecting the drain pipe, loosening the slip nuts carefully to avoid water spills. Use cleaning supplies to clear out any remaining debris or stubborn buildup.
Next, locate and disconnect the water supply lines from the faucet and shut-off valves, applying your installation tips for removing fittings safely. Keep a bucket nearby to catch any residual water.
Label or organize the disconnected parts to make reinstallation easier later. Remember, patience is key—work slowly to avoid damaging your plumbing.
Once disconnected, you’re ready to move on to removing the bathtub itself with confidence.
Remove Surrounding Fixtures and Access Panels
Removing the surrounding fixtures and access panels is a crucial step in preparing your bathtub for removal. Take your time to carefully perform fixture removal to avoid damaging the walls or plumbing.
Start by locating all screws and fittings securing the access panel and fixtures. Then gently disconnect them using a screwdriver and pry tool, being careful not to crack tiles or drywall.
Removing the access panels gives you room to work and access the plumbing connections behind the tub. Be cautious and keep track of all parts you remove so you can reassemble things later.
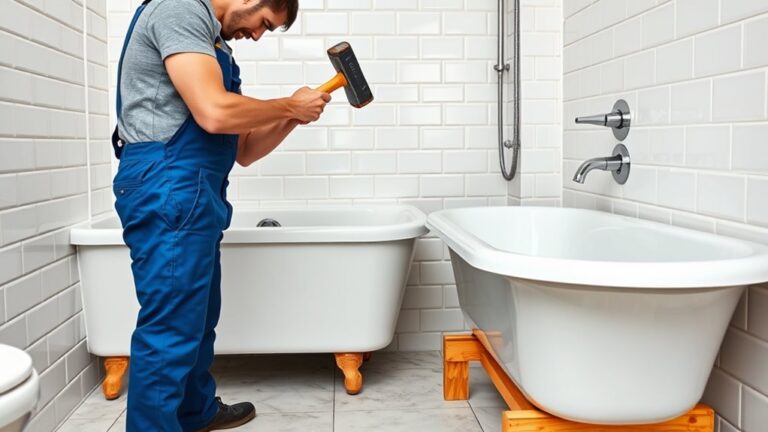
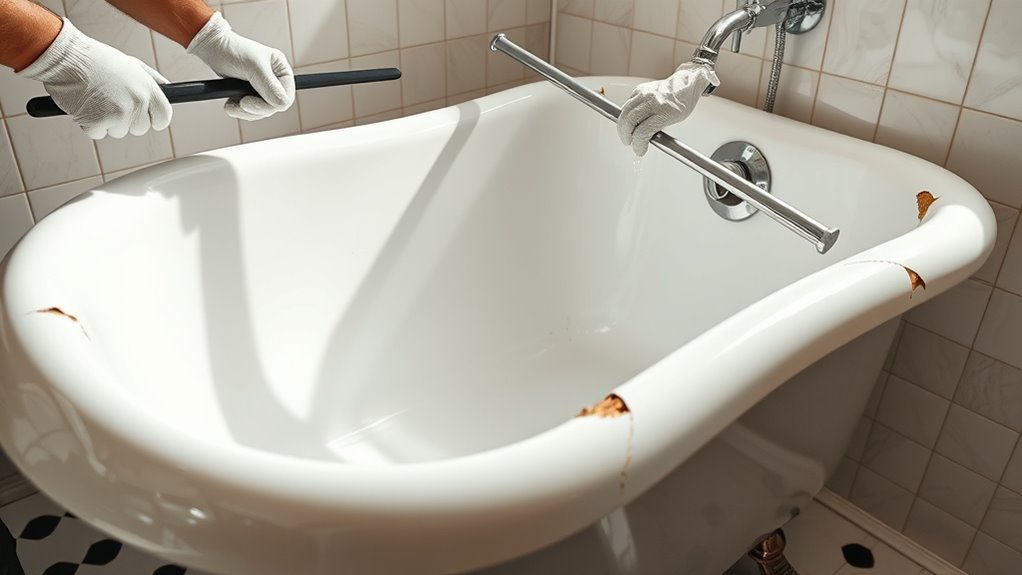
How to Safely Break and Detach the Old Bathtub
Before you start breaking the bathtub, make sure the plumbing is fully disconnected and the area is clear of any obstructions. This step is vital to prevent damage or injury.
Porcelain elegance ensures your old tub looks timeless, but it also makes removal delicate. Use a utility crowbar or a sledgehammer with care, applying controlled force to weaken the porcelain along seams or weak points.
Work gradually, tapping gently instead of smashing, to avoid damaging surrounding structures. Protect yourself with safety goggles and gloves, as porcelain shards can be sharp.
Once the outer shell begins to crack, carefully detach the tub, supporting it as you go. Remember, this old tub’s durability means it can be fragile and heavy.
Patience and precision are essential. Forcing it may cause unnecessary mess or damage. With the right approach, you’ll safely break and detach the porcelain bathtub, ready for replacement.
Common Challenges During Bathtub Removal and How to Overcome Them
Taking out a bathtub can sometimes be more tricky than you expect. You might run into stubborn sealant residue or rusted fixtures that just won’t budge easily. It’s enough to make you want to give up! But don’t worry—there are ways to handle these issues without too much hassle.
Sometimes, you’ll also discover underlying structural damage once you start removing the tub. This can make the job a lot more complicated. The key is to stay calm and approach each problem step by step. With the right tools and a bit of patience, you can keep your project moving smoothly and avoid any big surprises down the line.
Tackling Stubborn Sealant Residue
Stubborn sealant residue can be a real headache when you’re removing a porcelain bathtub. It clings tightly to the surfaces around it, making the job tougher than it seems.
To start, carefully remove the sealant with a utility knife or caulk remover. This cuts through the old sealant without damaging the tub edges or underlay.
Once it’s loosened, gently pry away the leftover residue for easier cleanup. For any remaining bits, apply a commercial adhesive remover or a vinegar-water solution to soften them up.
Let it sit for a few minutes, then scrub with a stiff brush or plastic scraper. Be sure to rinse thoroughly to remove all residue, as leftovers can cause issues with the new sealant.
Doing proper sealant removal and cleaning beforehand keeps the whole process smoother and less messy.
Managing Underlying Structural Damage
As you begin removing the bathtub, you might encounter underlying structural damage that complicates the process. This is common in vintage homes emphasizing historical preservation and maintaining that charming vintage appeal. To address this challenge:
- Assess the Damage – Look for cracks, rot, or compromised framing that could weaken the structure.
- Reinforce If Needed – Strengthen weak areas with new framing or supports to preserve vintage charm and *guarantee* safety.
- Consult a Professional – For extensive damage, bring in a contractor experienced in historic preservation to prevent further issues.
Managing underlying structural damage early preserves the bathtub’s aesthetic value and maintains the integrity of your space. Doing this carefully helps *confirm* a smooth removal process without sacrificing its historical charm.
—
Modified Version:
As you start removing the bathtub, you may find underlying structural damage that makes things more complicated. This is pretty common in vintage homes that focus on preserving historical charm.
To handle this, first assess the damage. Check for cracks, rot, or weak framing that could compromise the structure.
If needed, reinforce weak areas with new supports or framing to keep the vintage look and ensure safety.
For more extensive damage, it’s a good idea to bring in a contractor experienced in historic preservation. They can help prevent further issues.
Dealing with structural problems early on helps protect the bathtub’s aesthetic and keeps your space intact. Taking your time with this step makes sure the removal goes smoothly without losing any of the old-time charm.
Handling Rusted Fixtures Safely
Rusted fixtures can be a real challenge when removing a vintage bathtub. Corroded bolts and fittings often become tough to loosen or break free.
To handle rusted fixtures safely, start by applying a rust prevention product like penetrating oil to loosen the corrosion. Let it sit for several minutes so it can penetrate deeply.
Use the right tools that match the fixture to avoid damaging the surrounding materials. Be patient and don’t force stubborn bolts, as that can cause injury or damage.
Protect yourself with gloves and eye protection. If the fixtures are too corroded, consider replacing them altogether to prevent future problems.
With proper preparation and the right tools, you can safely remove rusted fixtures and avoid unnecessary damage during the bathtub removal process.
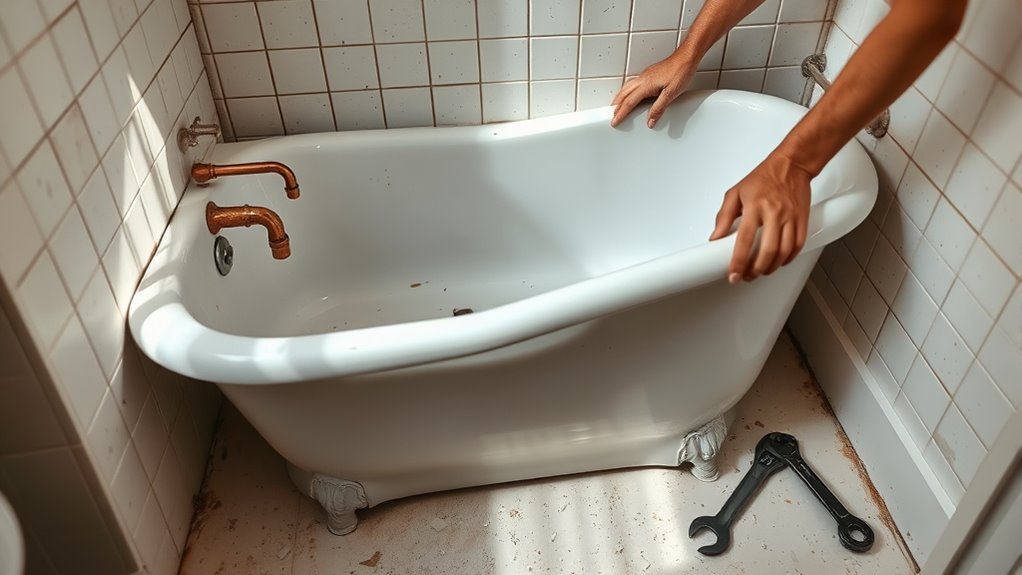
Lift and Dispose of the Old Bathtub Safely
Removing an old porcelain bathtub requires careful effort to guarantee safety and prevent damage. To lift and dispose of it properly, first make sure the bathtub is free of plumbing connections and secured with any remaining fixtures.
Next, gather your tools: gloves, a utility saw, and a sturdy dolly.
Here’s how to proceed:
1. Cut the Tub into Manageable Pieces
Use the saw to carefully cut the porcelain into sections, which helps prevent injury and makes disposal easier. Be mindful of historical styles or unique features—handle them gently to avoid breakage.
2. Lift with Proper Technique
Bend your knees, keep your back straight, and lift with your legs. Coordinate with a helper if the tub is heavy, ensuring safe handling.
3. Dispose Responsibly
Load pieces onto the dolly and transport them to a designated disposal or recycling site, following local regulations.
Proper lifting preserves your safety and respects your home’s old-fashioned charm.
Salvaging and Reusing Parts of Your Old Porcelain Tub
Even if you’re replacing your old porcelain bathtub, you can still find ways to salvage and reuse its parts to reduce waste and preserve some charm. Start by carefully removing any accessible porcelain pieces that are still intact. These can be valuable for porcelain recycling or used in tub repair projects.
The porcelain shards can be repurposed as decorative accents or fillers in creative DIY projects. Salvaging fixtures like taps or drain covers may also be possible if they’re in good condition. Reusing parts minimizes landfill waste and can save you money.
If you plan to DIY repair later, keeping intact porcelain pieces on hand can be useful as backup or for patching small cracks. Remember to handle all parts safely, wearing gloves and eye protection during removal.
Properly recycling ceramic and porcelain materials supports environmentally friendly practices and may even help you recover some costs.
Next Steps for Your Bathroom Remodel
After salvaging and reusing parts from your old porcelain bathtub, the next step is to plan your overall bathroom remodel. Think about how you want your space to look and function, including matching bathroom decor to your style. Then, focus on plumbing repairs to make sure all connections are secure and leak-free before installing new fixtures.
Plan your bathroom remodel by matching decor and securing plumbing connections before installing new fixtures.
Here’s a clear plan:
- Choose a new bathtub style and color that complements your decor.
- Schedule plumbing repairs, like replacing old pipes or fixing drainage issues.
- Prepare your bathroom layout, including tiling, lighting, and accessories.
This approach helps you stay organized, reduces surprises during installation, and ensures your remodel creates a cohesive, functional space. Prioritize plumbing repairs now to avoid future headaches, while selecting the right decor ties everything together for a fresh, updated look.
Troubleshooting Difficult Bathtub Removal Cases
When dealing with a stubborn or tightly embedded porcelain bathtub, the removal process can get tricky and challenging. Old tubs with decorative accents or intricate details often resist simple removal methods, especially during restoration projects.
Start by carefully examining the surrounding area for hidden fasteners or mortar that might be holding the tub in place. Use a small pry bar and a hammer to gently loosen the edges. Be cautious not to damage any decorative features or tiles nearby.
Sometimes applying heat with a heat gun can soften adhesives or mortar, making removal easier. For more stubborn cases, specialized tools like oscillating saws or reciprocating blades can cut through embedded materials.
Frequently Asked Questions
Can I Remove a Porcelain Bathtub Without Professional Help?
You can remove a porcelain bathtub without professional help if you pay attention to safety and pick the right tools. Start by gathering sturdy pry bars, a sledgehammer, and safety gear like gloves and goggles.
Carefully disconnect the plumbing and support the tub before you start demolition. Staying cautious and taking your time will make the process safer and easier.
How Long Does the Entire Removal Process Usually Take?
They say “time is money,” and when removing a porcelain bathtub, the whole process usually takes about 4 to 8 hours. This depends on your experience and the tools you have.
This includes demolition, tub disposal, and cleanup. The timeline also depends on your renovation schedule.
Being prepared and organized helps keep things on track. It ensures you finish efficiently without delaying your overall renovation plans.
Are There Safety Precautions Specific to Porcelain Tubs?
During tub removal, focus on porcelain safety by wearing sturdy gloves and eye protection, since porcelain chips can cause injuries. Make sure to cover nearby surfaces to prevent any damage.
Use proper tools gently to avoid breaking the porcelain, and disconnect plumbing carefully to prevent water leaks. Being cautious and patient helps ensure a safe removal process and reduces the risk of injuries from sharp edges or porcelain shards.
What Should I Do if the Bathtub Is Stuck or Damaged During Removal?
When your bathtub gets stuck or damaged during disassembly, don’t give up just yet. First, carefully assess the damage and try not to force the porcelain, since that could make things worse.
Gently handle any broken porcelain, and make sure to wear protective gear to prevent injury. If you’re dealing with stubborn spots, using tools like a reciprocating saw might help.
If you’re unsure or the damage is extensive, it’s best to call in a professional. They can ensure the removal is safe and prevent further damage or injury.
Is It Necessary to Replace Old Plumbing When Removing the Bathtub?
You don’t always need to replace plumbing when removing your old bathtub. If it’s in good shape and properly sealed, you can usually reuse it.
But check for leaks or corrosion—these signs mean it might be time to replace. Upgrading fixtures is another reason to consider new plumbing.
Also, make sure the area around the plumbing isn’t damaged during removal. Replacing old pipes can help prevent future problems and make sure everything connects securely with your new bathtub.
Conclusion
Removing a porcelain bathtub might seem intimidating, but with the right steps, you can do it confidently. Just remember, patience is key—you don’t want to bite off more than you can chew.
Stick to the plan, take your time, and don’t hesitate to seek help if needed. Once your old tub is out, you’ll be ready to transform your bathroom into a true showstopper.
No turning back now—you’re on the home stretch! Removing a porcelain bathtub in three easy steps is totally achievable with a little patience and some elbow grease.