How to Choose Bigger Tiles for Better Shower Walls
Looking to upgrade your shower walls with bigger tiles but feeling overwhelmed by the process? You’re not alone—many people struggle with choosing the right size and layout for a polished, professional look. Picking the perfect tiles can feel tricky, but with a little guidance, you’ll be able to create a stunning shower that’s both functional and stylish.
To select bigger tiles for your shower walls, first measure your space accurately and plan your layout carefully. Consider patterns like herringbone or diagonal for visual interest.
Opt for durable materials such as porcelain or glass that can handle moisture, and guarantee your surface is level and clean before installation.
Use minimal grout lines for a seamless look, and maintain proper spacing and adhesive application.
If you want to investigate more tips, you’ll find helpful advice to create a stunning, long-lasting shower.
Key Takeaways
- Measure your shower space accurately to pick tile sizes that make the area feel open without feeling overwhelming. Larger tiles can really open up the space if chosen wisely.
- Go for materials like porcelain or glass, which are durable, water-resistant, and easy to clean. They’ll last longer and stay looking sleek.
- Think about your layout and pattern carefully. Large tiles work best when arranged thoughtfully to highlight their size and add visual interest.
- Proper surface prep and good adhesive application are key to preventing cracks or shifting with big tiles. Take your time to do it right.
- Keep grout lines minimal and match the grout color to the tiles for a smooth, seamless look. It makes the shower feel modern and polished.
How Bigger Tiles Transform Your Shower’s Look and Feel
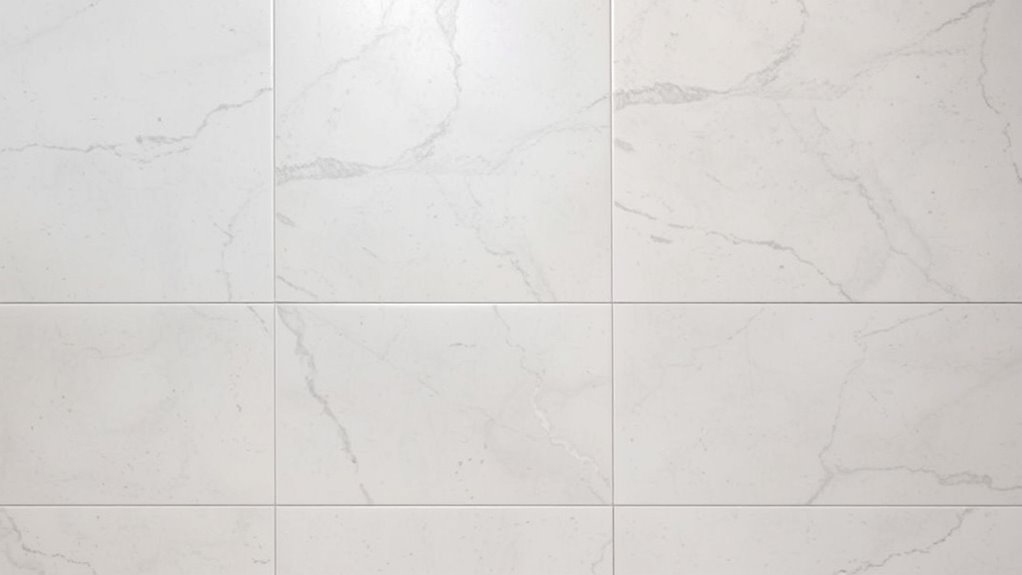
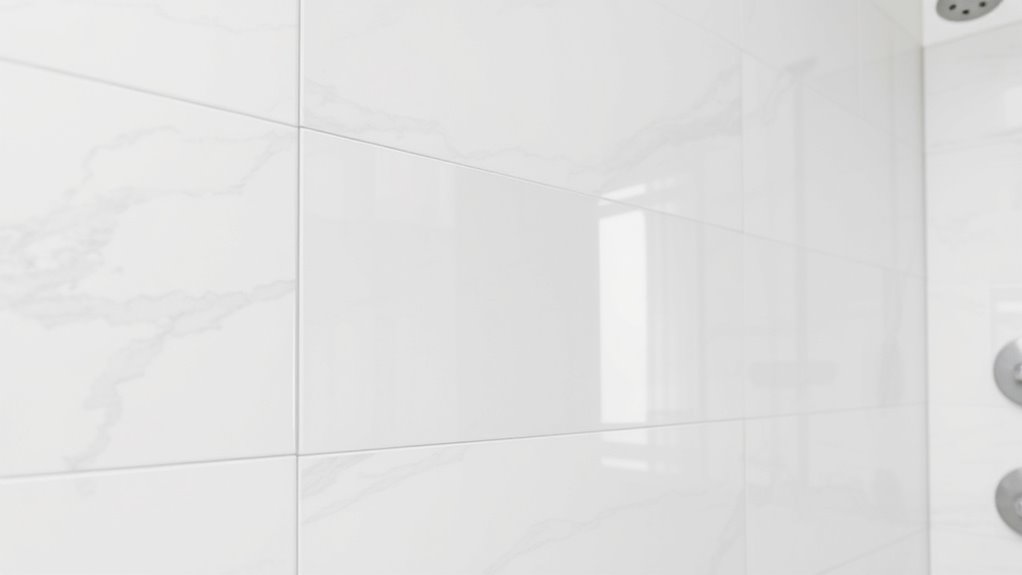
When you choose bigger tiles for your shower, it instantly creates a sleek, modern look that can make the space feel larger and more open. Larger tiles reduce grout lines, giving your shower a clean, uninterrupted appearance. This seamless effect really makes your color scheme pop; lighter shades brighten the room, while darker hues add depth.
Your lighting choices make a big difference in this transformation. Bright, well-placed lighting reflects off the sizable tiles, amplifying the sense of space and highlighting textures. Softer lighting, on the other hand, creates a cozy, intimate vibe, emphasizing the natural beauty of stone or textured finishes.
Big tiles act as a versatile canvas, complementing both bold and subtle color schemes. Your lighting boosts their visual impact, taking your shower’s look to the next level. To sum up, wider tiles, combined with smart lighting and colors, make your shower feel more spacious, modern, and inviting.
How to Pick the Right Size for Your Shower Walls
Choosing the right tile size for your shower walls depends on your space, style preferences, and the look you want to achieve. Larger tiles can make a small shower feel more open, but make sure they don’t overwhelm the area.
Opt for tiles that balance durability and style. Bigger tiles tend to last longer because they have fewer grout lines, which means fewer weak spots.
When picking tile size, think about grout colors too. Narrow grout lines give a seamless look, while wider ones can add character.
Keep in mind that larger tiles need a stronger adhesive and careful installation to avoid cracking. Also, consider how much maintenance you’re comfortable with — fewer grout lines mean less cleaning.
In the end, choose a size that enhances your shower’s style, stays durable, and makes grout cleaning easier for a clean, cohesive finish.
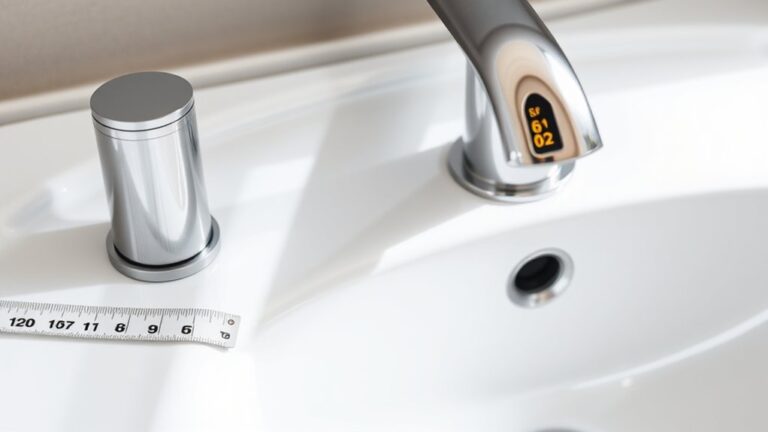
Measuring Your Bathroom Space for Bigger Tile Projects
When you’re planning to go bigger with your tiles, the first thing you want to do is measure your bathroom space carefully. It’s pretty important to get those floor dimensions just right, so you don’t end up with tiles that don’t fit. Take your time to be precise—double-check those measurements to make sure everything lines up.
And don’t forget to also measure your walls! Making sure you have the right measurements before you start will really save you a lot of hassle down the line, especially during installation. Doing all this now means fewer surprises afterward and a smoother process overall.
Measure Floor Dimensions Carefully
Accurately measuring your bathroom floor is key before installing larger tiles. This step helps create a precise plan and reduces waste. Take detailed measurements of the length and width in different sections, especially around fixtures and drains.
Pay close attention to areas with decorative accents or specific colors you want to match. Make sure the tiles will fit well around these features. Use a tape measure for exact figures and sketch a rough layout to see how the tiles will look.
Check Wall Space Accurately
Measuring the wall space precisely is key for a successful bigger tile project. Accurate measurements make sure your tiles fit well and give the room a flexible design.
Use a tape measure to check height and width at multiple points, then mark the largest dimensions. Keep an eye out for obstructions like pipes or fixtures that could affect tile placement.
Larger tiles can boost durability by cutting down on grout lines and weak points. Here’s a quick overview:
| Measurement Tip | Why it Matters |
|---|---|
| Measure multiple points | Ensures accuracy despite wall imperfections. |
| Account for fixtures | Prevents surprises during installation. |
| Double-check dimensions | Avoids costly mistakes or adjustments. |
Benefits of Using Large Tiles in Your Shower Design
Using large tiles in your shower can really make the space feel more open and airy. It’s like opening up the room and giving it that bigger, more expansive vibe. And since there are fewer grout lines, your shower will look super clean and seamless—kind of like a smooth, uninterrupted surface.
Plus, they add a really modern touch to your bathroom. The sleek, contemporary look of large tiles can elevate the overall style, making everything feel fresh and up-to-date.
Enhanced Spacious Appearance
Have you ever noticed how large tiles can instantly make a shower feel more open and airy? They create a continuous, sleek look that boosts space perception.
With fewer grout lines, your shower walls appear less cluttered, making the space seem bigger. Large tiles also make it easier to coordinate colors, helping you create a seamless design.
You can also try different tile patterns, like a subway layout or running bond, to add visual interest without overwhelming the space. The result is a modern, expansive look that feels more inviting.
Incorporating large tiles helps your shower feel more open, even in small bathrooms. It’s a simple way to improve your shower’s style and atmosphere.
Fewer Grout Lines
Large tiles naturally reduce the number of grout lines in your shower, creating a cleaner, more streamlined look. With fewer grout lines to distract the eye, your color schemes stand out more and look more cohesive.
Having less grout makes it easier to keep your shower fresh and clean, so maintenance becomes simpler. Larger tiles also reflect light more evenly, helping your space feel brighter and more open.
The fewer seams let your materials shine, whether you prefer bold, contrasting colors or subtle, harmonious tones. Overall, bigger tiles make maintenance easier while boosting your shower’s style.
Modern and Sleek Look
Opting for sizable tiles instantly boosts your shower’s look, giving it a modern and sleek vibe. Larger tiles create a smooth, uncluttered appearance that highlights clean lines and minimalist style.
With the right color choices, you can make your shower feel more spacious or add bold accents for visual interest. Lighting also plays a key role—bright, well-placed lights reflect off large surfaces, enhancing their sleekness and creating a luxurious feel.
Consider neutral tones to keep things simple and elegant, or go with darker shades for a bold statement. Big tiles cut down on grout lines, reducing visual noise. This mix results in a polished, contemporary look that makes your shower more sophisticated and inviting.
Choosing Durable Materials for Large Shower Tiles
These materials often need less maintenance and can stay looking good longer if you take care of them. Also, think about sealing your tiles well—using high-quality sealants creates a protective layer against moisture, mold, and soap scum.
This helps keep your tiles looking new and prevents damage over time. Go for tiles with a dense composition, like glass or porcelain, because they’re less likely to chip or crack.
When choosing tiles, check that they meet durability standards for wet areas. Proper sealing and choosing eco-friendly, dense materials make sure your large shower tiles last and stay both functional and beautiful.
Preparing Your Walls for Installing Big Tiles
Before installing big tiles, you need to make certain your walls are properly prepared to support their weight and size. Start by checking for any structural issues, making sure the wall is strong enough and free of cracks.
You should also smooth out uneven surfaces because imperfections can make large tiles tricky to install evenly. Proper wall prep helps the tiles look seamless and improves color coordination in your shower.
Don’t forget to thoroughly clean the wall to remove dust or debris, which can affect how well the tiles stick later on. Applying an appropriate primer can boost adhesion and help ensure your tiles stay in place long-term.
To make the process easier, keep these steps in mind:
- Inspect the wall for stability and repair any cracks
- Level and smooth the surface for even tile placement
- Clean the surface thoroughly before tiling
- Use primer to support adhesion and make maintenance easier
Proper preparation guarantees a better finish and makes future upkeep much simpler.
Grout and Spacing Tips for Large Shower Tiles
When working with large shower tiles, paying close attention to grout lines and spacing can make a big difference in achieving a polished look. Keep grout lines minimal, usually 1/8 inch or less, to highlight the size of your tiles and create a sleek appearance.
Consistent spacing ensures clean, professional results and prevents uneven gaps. When choosing grout colors, pick shades that complement the tile textures. For smooth tiles, matching grout makes surfaces look seamless, while contrasting grout adds definition.
For textured tiles, consider grout colors that fill the spaces evenly without emphasizing irregularities. Proper spacing also helps prevent cracking or tile shifting over time. Use spacers carefully and regularly check for uniformity during installation.
Ultimately, thoughtful grout choices and precise spacing help highlight the size and texture of your tiles, creating a modern, cohesive shower wall.
Common Mistakes to Avoid When Using Big Shower Tiles
When you’re installing big shower tiles, one of the biggest mistakes to watch out for is inconsistent spacing. If the gaps between tiles aren’t even, it can make the whole surface look off and less polished. Nobody wants a shower that looks crooked or sloppy, right?
Also, it’s super important to pay attention to the levelness of the surface. If the surface isn’t perfectly flat, the tiles might crack or shift over time—that’s just asking for trouble later on. And don’t forget about using the right adhesive and applying it properly. If you skimp on that, your tiles could loosen or even fall off, which nobody wants happening in their shower!
Inconsistent Tile Spacing
Have you ever noticed uneven gaps between tiles in a shower? This often happens when tile spacing isn’t carefully managed, especially with larger tiles.
Poor spacing disrupts the sleek look you’re going for and can make the grout seem mismatched if the color isn’t chosen carefully. To avoid this, ensure consistent spacing during installation.
Think about grout width and how it complements your tile and grout color choices. Use spacers correctly and double-check alignment regularly to stay on track.
Remember, inconsistent spacing can make repairs tricky later, so precision from the start is essential. Use the right-sized spacers for uniform gaps, and keep spacers in place until the grout sets.
Matching the grout color to the tile helps create a seamless look. Regularly check tile alignment during installation to keep everything looking perfect.
Ignoring Surface Levelness
Before you start, make sure to check the wall surface carefully for levelness. Proper surface levelling is key to avoiding future issues like cracking or tiles coming loose.
Use the right adhesion techniques, like good-quality tile backer boards and strong thinset mortar, to create a flat, stable surface. Skipping this step can cause tiles to sit unevenly or develop gaps over time.
Always measure and fix any irregularities before you install. With careful leveling and solid adhesion, you’ll get a smooth, professional finish that lasts.
Overlooking Proper Adhesive Use
Using the correct adhesive is essential to keep your big shower tiles securely in place and looking professional. Choosing the right adhesive depends on your tile size and the surface material.
If you don’t select the proper one, tiles can slip or crack over time. Surface prep is just as important—make sure the wall is clean, dry, and level.
Using mismatched or low-quality adhesive can cause uneven bonding, which might lead to costly repairs. Always pick an adhesive rated for large format tiles.
Be sure to mix the adhesive according to the manufacturer’s instructions. Don’t skip surface prep, as it helps improve adhesion.
Finally, use a notched trowel suitable for bigger tiles to ensure even coverage and a better bond.
Creative Layout Ideas and Patterns for Large Tiles
Large tiles give you a great chance to create eye-catching patterns that boost your space’s design. You can try out different layouts to make a dramatic impact.
For example, a herringbone pattern adds visual interest by breaking up uniformity. Mixing colors with thoughtful coordination can make your shower feel lively or sophisticated, depending on your choices.
Play around with patterns to see what lifts your shower walls. You might emphasize features with pattern variations or opt for a seamless, monochromatic look. Large tiles let you be creative—whether you stick to traditional styles or push boundaries.
Here’s a quick look at some layout ideas:
| Classic Grid | Diagonal Layout | Subway Style | Herringbone | Random Placement |
|---|---|---|---|---|
| Clean, simple | Dynamic & modern | Timeless | Elegant & stylish | Unique, eclectic |
Your pattern choices help shape your shower’s personality, so have fun experimenting!
How to Maintain and Clean Big Shower Tiles for Long-Lasting Beauty
To keep your big shower tiles looking their best, regular cleaning is key. Since their size makes dirt or soap scum more visible, it’s important to wipe down the surfaces often. Use a gentle, non-abrasive cleaner and a soft cloth or sponge after each use.
Periodically, reseal your tiles to keep their protective layer intact. This helps prevent water from seeping in and reduces the risk of mold growth, keeping grout lines strong.
Make it a habit to wipe down tiles daily to remove soap scum and excess moisture. For a deep clean, mix white vinegar with water—avoid harsh chemicals.
Every 1-2 years, reseal the tiles to maintain the sealant and prevent mold. Also, keep your shower well-ventilated to lower humidity and mold risks.
Following these tips will keep your large tiles looking glossy, mold-free, and durable, so your shower stays beautiful and functional for years to come.
Frequently Asked Questions
Can Large Tiles Be Used in Small or Awkwardly Shaped Shower Spaces?
Yes, you can use large tiles in small or awkwardly shaped shower spaces, but it’s important to choose your design options carefully. Using bigger tiles can create a seamless look that makes the shower feel more spacious.
Opt for tiles with minimal grout lines to avoid clutter, and pick light colors to brighten up the area. With proper planning, big tiles will complement your shower’s shape without overwhelming it, giving you a clean, modern look.
How Do I Prevent Grout Haze With Big Tiles in My Shower?
To prevent grout haze with big tiles, seal the tiles before you start grouting. This helps reduce haze buildup and keeps things cleaner during the process.
After grouting, act quickly and wipe the tiles with a damp sponge to remove any excess grout. If needed, use a grout haze remover to do a thorough cleaning.
Regularly sealing both the tiles and grout will help keep haze from forming in the first place. It also makes cleanup easier later on.
Always follow the instructions on sealing and cleaning products so you’re using them correctly and safely.
Are There Specific Adhesives Recommended for Large Shower Tiles?
You’re in luck—when installing large shower tiles, skip the gimmicks and use a high-quality, thin-set adhesive specifically designed for big tiles. Look for epoxy or polymer-modified varieties.
These adhesive types provide better bonding and prevent sagging that can ruin your tile pattern. Think of it as giving your tiles the sturdy foundation they deserve.
This way, those sleek, clean tile patterns stay perfect and your shower remains stunning.
What Is the Typical Installation Time Difference for Large Versus Small Tiles?
Installing larger tiles usually takes longer than smaller ones because they need precise placement and longer curing times. This extra time can add up during installation.
You should factor in the additional time for proper alignment and adhesive setting, which can affect the overall longevity of your tile. Keep in mind, larger tiles might cost more for materials but could save time since there are fewer grout lines to finish.
Balancing installation time and costs is important to ensure your shower looks great and lasts longer.
How Do I Handle Uneven or Textured Bathroom Walls When Installing Big Tiles?
Dealing with uneven or textured walls can feel like trying to tame a wild jungle gym, but don’t worry—you can do it. Start by thoroughly preparing your wall, filling in gaps and sanding rough patches so everything’s smooth.
Next, use a high-quality primer to help create a flat surface. Before installing big tiles, make sure to apply waterproofing carefully—it’s key to ensuring your tiles stick well and stay in place.
This way, even if your walls are tricky, your tiles will end up looking sleek and professional, giving your shower that polished finish you want.
Conclusion
Choosing the right big tiles can elevate your shower to new levels of style and sophistication. They transform an ordinary space into a stunning focal point that’s both eye-catching and durable.
With a bit of planning, selecting the right materials, and exploring creative layout options, your shower will look incredible and stand the test of time. Big tiles can make your shower feel more spacious and modern.
And the best part? A well-designed shower with larger tiles becomes a true sanctuary of elegance. It’s a beautiful, lasting space that shines brighter than even the most luxurious spas—showcasing your impeccable style and commitment to quality.