How to Determine if All Shower Rough-In Valves Are the Same
Many homeowners find themselves overwhelmed when trying to ensure their shower rough-in valves match before starting a repair or upgrade. You’re not alone—figuring out if all your shower rough-in valves are the same can feel tricky, especially with different models and brands.
To determine if all your shower rough-in valves are the same, start by comparing their size, connection types, and internal components. Measure the distance between inlets and outlets, check for matching threading or fittings, and look for compatible cartridge and trim styles.
Examine labels or model numbers, and verify that materials meet safety standards. If you’re unsure, more detailed inspection tips can help guarantee your upgrades or repairs go smoothly.
Key Takeaways
- Measure the distance between inlet and outlet ports to make sure they match across different rough-in valves. This helps ensure compatibility during installation.
- Compare connection types like threaded, slip-fit, or compression to verify they will work well with your existing plumbing.
- Check the valve dimensions and pressure ratings against the manufacturer’s specifications to ensure they meet your needs.
- Inspect handle and trim styles to see if they provide consistent control and match your bathroom’s aesthetic.
- Confirm the rough-in size, whether 1/2 inch or 3/4 inch, lines up with your current plumbing setup for a proper fit.
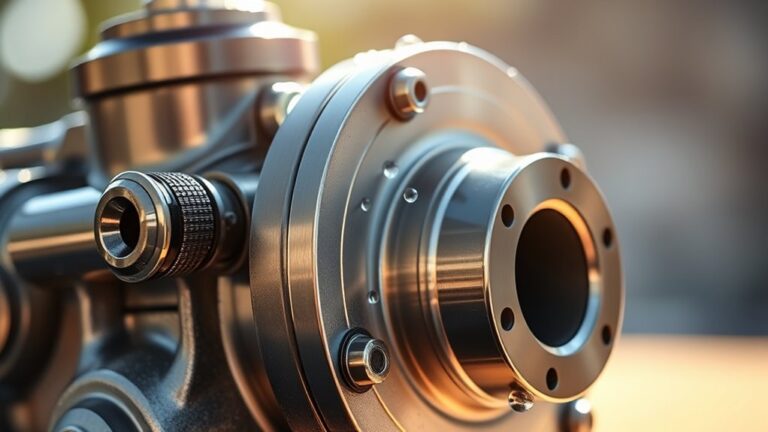
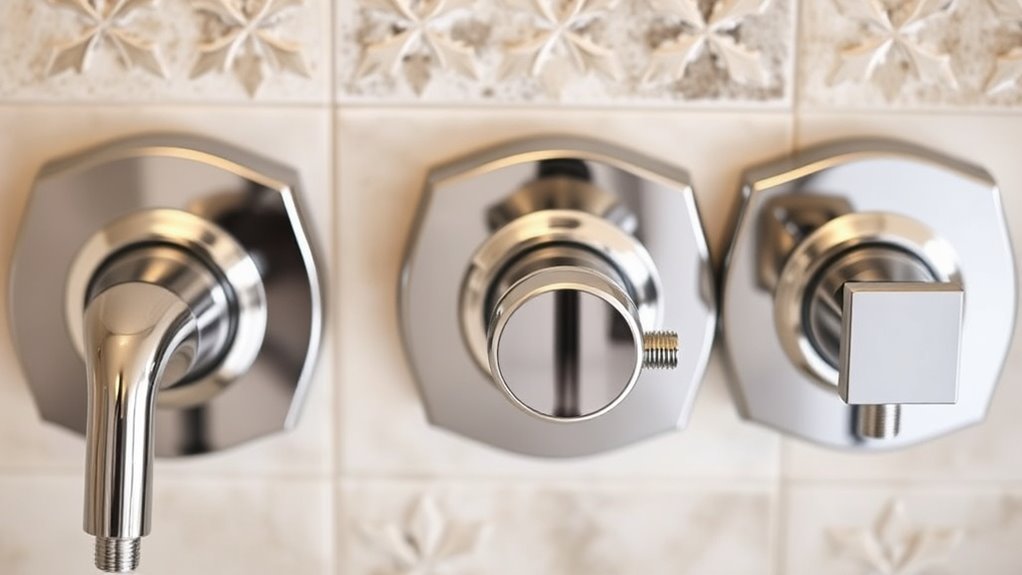
How to Identify the Type of Shower Rough-in Valve You Have
To identify the type of shower rough-in valve you have, start by locating the valve behind the wall. Once you find it, take a look at its shape and connections.
Start by locating the hidden shower valve and examining its shape and connections for identification.
If the valve has a single, round control knob, it’s likely a pressure balance valve. This type keeps the water pressure steady, no matter what other fixtures are running.
If you see a larger, rectangular or dual-control valve, it could be a thermostatic or diverter valve. These offer precise temperature controls and can handle multiple functions.
Check the tile patterns around the shower, too. Uneven or cracked tiles might mean there have been previous updates, which could affect valve compatibility.
Knowing your water pressure is also helpful. Some valves are designed for high-pressure systems, while others work better with low pressure.
Finally, carefully inspect the valve’s body and handle setup. These details help you figure out its type and what will work for future replacements.
Getting this right ensures you pick the correct upgrade or repair, avoiding surprises later on.
What Are the Key Measurements for Matching Shower Valves
Matching a new shower valve to an existing setup requires taking precise measurements to verify compatibility. First, measure the shower dimensions, including the distance between the water inlet and outlet ports, to confirm the new valve will fit securely. This helps prevent leaks and installation issues.
Next, check the water pressure your home provides. Some valves are designed for specific pressure ranges, and mismatched pressure can affect performance. Knowing the flow rate can also guide your selection to guarantee your shower maintains adequate water volume.
Be sure to note the size of the existing rough-in, whether it’s 1/2 inch or 3/4 inch, as this influences water flow and valve size. Finally, confirm the valve’s connection type—whether it’s a standard slip-fit, thread, or compression—to match your plumbing setup exactly.
Taking these measurements ensures you select a shower valve that fits properly and functions smoothly.
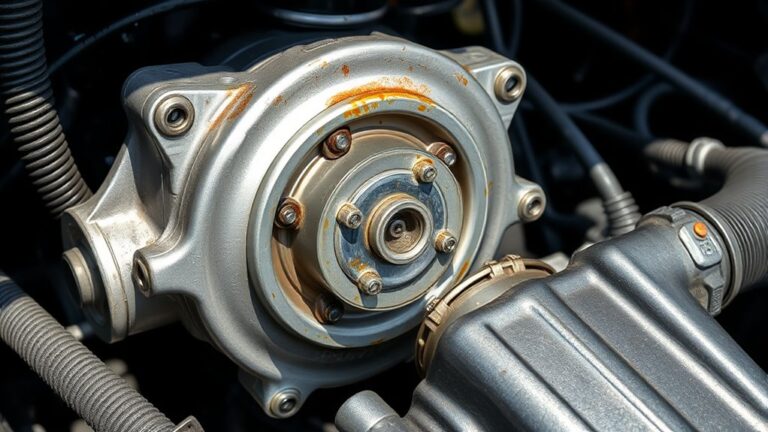
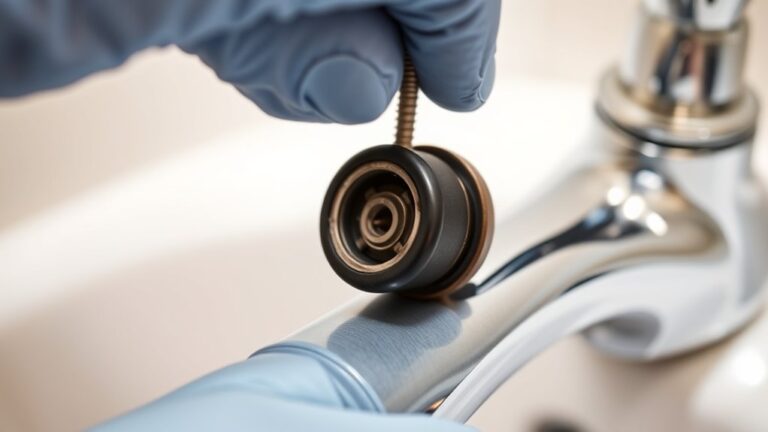
Tools and Techniques for Inspecting Your Shower Valve
Inspecting your shower valve accurately requires the right tools and techniques to spot key features and potential issues.
First, use a multimeter or a digital pressure gauge to check water flow and pressure consistency.
Remove the valve cover carefully to examine internal components for corrosion, wear, or damage that could affect temperature control and water flow. Use a flashlight for better visibility.
Then, manipulate the handle to see how smoothly it moves and if the temperature control responds effectively.
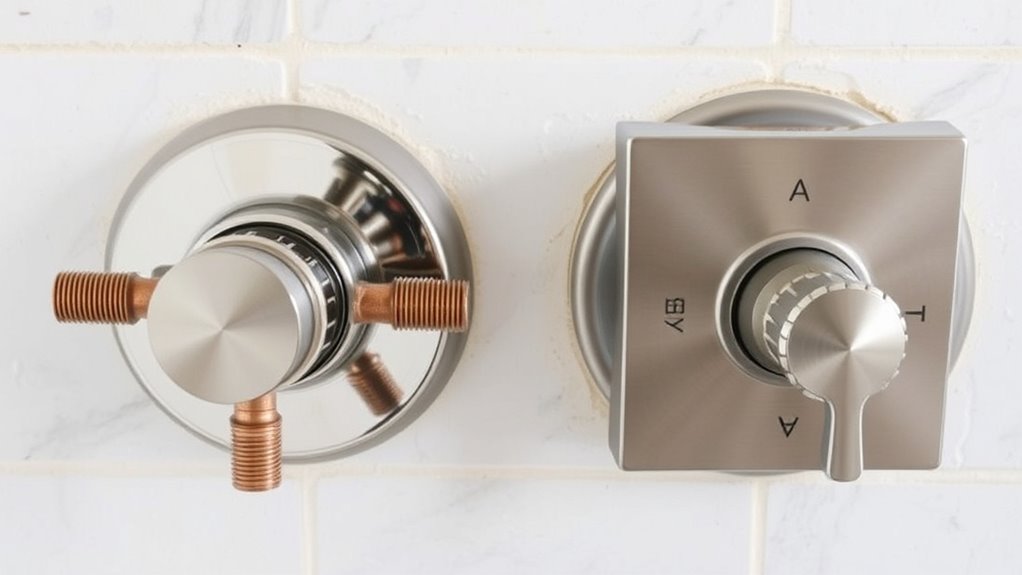
How to Compare Your Current Valve With Replacement Options
Once you’ve checked your current shower valve and understand its condition, compare it directly with the replacement options. Start by making sure the new valve matches your existing plumbing diagram and that the connection types line up.
Next, consider the valve’s size and whether it’s compatible with your water heater system. Mismatched parts can cause pressure issues, so it’s important to get a good fit. Also, look at the control type—whether it’s a single handle or dual handles—and choose what suits your preferences.
Ensure the replacement valve matches your water heater system and choose your preferred control style for optimal performance.
Evaluate the material of the replacement valve to ensure it’s durable and resistant to corrosion. If your setup is part of a larger plumbing system, confirm the new valve works seamlessly with it.
Finally, compare the product specifications with your current valve to spot any differences or similarities. This will help you pick a replacement that fits well, works properly, and keeps your shower performing at its best.
Checking If Your Valve Connections Are Compatible
Before installing a new shower rough-in valve, it’s important to check if its connections will fit your existing plumbing. Using incompatible connections can cause leaks, water pressure problems, or other issues.
Look at the connection types—whether they’re threaded, soldered, or compression fittings—and compare them with your current setup. Also, make sure the valve materials match your plumbing to avoid corrosion or leaks over time.
Use this table to compare your existing connections with potential replacements:
| Feature | Existing Valve | New Valve |
|---|---|---|
| Connection Type | Threaded/Soldered/Compression | Threaded/Soldered/Compression |
| Valve Material | Brass/Stainless Steel/Copper | Brass/Stainless Steel/Copper |
| Water Pressure | Moderate/High/Low | Moderate/High/Low |
| Connection Size | ½ inch/¾ inch | ½ inch/¾ inch |
| Compatibility Notes | Compatible/Needs Adapter | Compatible/Needs Adapter |
Matching these details helps ensure your valve connections will be compatible and reliable.
Signs That Your Rough-in Valve May Not Match New Parts
If the way your valve is set up seems off or doesn’t match up with the new parts, that might mean they’re not compatible. Sometimes, you’ll notice that installing the new components feels awkward or tricky, and the existing pipes might not line up quite right either. Keep an eye out for these kinds of signs—they can clue you in on whether your rough-in valve needs a different match or maybe even a full replacement.
Inconsistent Valve Configurations
Installation height discrepancies can cause issues like difficulty turning on or controlling water temperature. If the new parts don’t align with existing connections, repairs can become tricky, leading to leaks or reduced performance.
Check the positioning of the valves—if they’re at different heights or angles, it’s a sign they aren’t compatible. These configuration mismatches can affect your shower’s functionality and make future upgrades harder.
Pay close attention to how components fit together, and confirm that the valve setup matches the original specifications to ensure everything works properly.
Unusual Installation Difficulties
These issues can be frustrating, and forcing parts together could damage your valve or plumbing. Aesthetic considerations matter too; if the new valve doesn’t align with your shower trim or doesn’t sit flush against the wall, that’s a sign the rough-in isn’t compatible.
Such difficulties suggest you’re working with incompatible hardware, which can make the installation harder or cause leaks later. Addressing these signs early saves headaches down the line and helps ensure your shower works properly and looks clean.
Compatibility With Existing Pipes
Spotting signs that your rough-in valve doesn’t match your existing pipes can save you from headaches during installation.
Mismatched pipes can cause leaks, poor water flow, or an unattractive look. Check for irregular connections, mismatched diameters, or incompatible thread types.
If you notice pipe fittings don’t line up properly or need adapters, your rough-in may not fit perfectly. Here’s a quick comparison:
| Existing Pipes | New Rough-In Valve |
|---|---|
| Different diameters | Will cause water flow issues |
| Incompatible threads | Difficult to connect |
| Unusual bends | Impact aesthetic design |
| Rusted or corroded | Risk of leaks |
| Mismatched pipe material | Aesthetic inconsistencies |
Matching these elements ensures a seamless installation and ideal water flow without sacrificing aesthetic appeal.
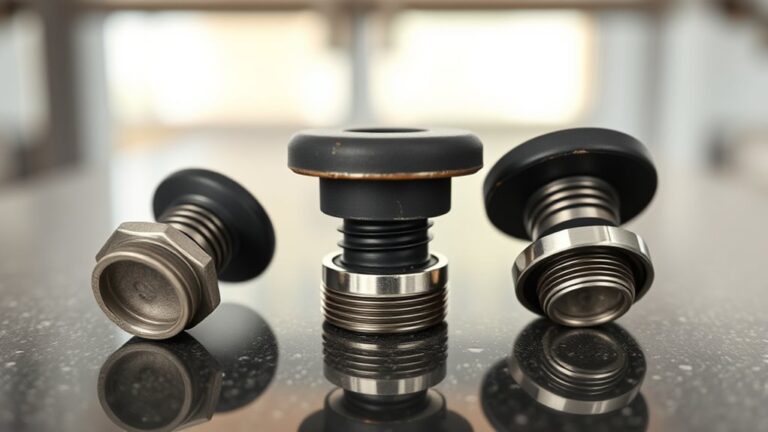
How to Verify Cartridge, Trim, and Handle Compatibility
When you’re getting ready to replace parts, it’s really important to make sure everything will fit and work smoothly together. That means checking the compatibility of the cartridge, trim, and handle before you start.
First, take a look at the cartridge. You want to make sure it’s the same type as your valve. If it doesn’t match, it won’t fit or work properly. Next, look at the trim and handle. They should be designed specifically for your model or brand of faucet. Mixing parts from different brands or models can lead to installation problems and might even damage your faucet.
Compatibility of Cartridge Types
Verifying the compatibility of cartridge types is essential to ensure your shower components work smoothly together. Start by checking the cartridge’s look to make sure it matches your existing trim and handle.
Different cartridges can change both the appearance and how your shower functions, so confirming they align helps keep your shower’s style intact. Also, check the water pressure capabilities of the cartridge to make sure it can handle your desired flow rate without problems.
Mismatched cartridges might cause inconsistent water temperature or pressure issues, so it’s important to compare their dimensions with your current one to ensure a proper fit. Paying attention to these details helps make sure your new shower parts work well together, giving you a consistent, practical, and attractive shower experience.
Ensuring Trim and Handle Match
Making sure the trim and handle match your cartridge is crucial for both looks and proper function of your shower. Compatibility impacts water temperature control and pressure regulation, helping everything operate smoothly and safely.
To verify a match, check the model number, brand, and specifications. Pay attention to how the handle adjusts water temperature and pressure, and if the trim fits securely over the valve.
Use the table below to compare key features:
| Feature | Compatibility Check |
|---|---|
| Cartridge type | Same brand, model, or universal adapter |
| Handle design | Fits securely on trim and cartridge |
| Trim dimensions | Correct size for a smooth fit |
| Water temperature | Properly regulates and balances heat |
| Pressure regulation | Ensures consistent flow and control |
Matching these parts ensures your shower works safely, functions properly, and looks polished.
Identifying Model and Brand Compatibility
Matching your shower components starts with figuring out the model and brand of your current cartridge, trim, and handle. This step is important because different brands and models often have unique looks, making them incompatible with others.
Check for labels, serial numbers, or logos on your hardware to identify the brand. You can also look at the installation location to see if the trim and handle fit well without needing modifications.
Pay attention to the cartridge’s size and shape because those details determine if new parts will work. Visiting the manufacturer’s website or talking to a professional can also confirm if your current parts match a certain model.
Getting these details right helps prevent costly mistakes and makes sure your shower renovation looks cohesive and smooth.
Should You Replace the Whole Rough-in Valve or Specific Parts?
Deciding whether to replace the whole rough-in valve or just specific parts depends on a few factors. If your shower’s water pressure is uneven or you notice leaks, replacing the entire valve might be the better choice for long-term reliability.
But if the issue is just a faulty cartridge or seal, swapping out those parts can save you both time and money.
| Situation | Pros | Cons |
|---|---|---|
| Full valve replacement | Fixes multiple issues at once | More expensive, takes longer |
| Replacing specific parts | Cheaper and quicker | Might not solve underlying problems |
| Water pressure problems | Full replacement often best | Not ideal for minor clogging |
| Leaking at the valve | Change parts if leak is small | Consider full replacement if it’s severe |
| Part availability | Choose parts if you can find them | Full valve might be better if parts are outdated |
Pick what’s best based on how serious the problem is and your comfort with doing repairs yourself.
Where to Find Manufacturer Specs and Cross-Reference Models
To find accurate manufacturer specifications and cross-reference models effectively, start by visiting the official websites of the valve brands you’re considering. Look for detailed product pages that list specifications, including water pressure requirements and valve materials.
These details help verify compatibility with your plumbing system and identify differences between models. Manufacturer specs often include diagrams and part numbers, making side-by-side comparison easier.
Cross-referencing models is important if you’re replacing an old valve or matching a new one to existing hardware. Pay attention to water pressure ratings, as some valves handle higher pressures better, and consider valve materials like brass, copper, or plastic that influence durability.
If specs aren’t clear online, contact customer service directly for clarification. This way, you’ll gather accurate data to see if the valves are interchangeable or if you need to buy a compatible model.
Consulting Experts and Resources for Valve Compatibility
Talking to trusted industry pros can really help you figure out if the valves you’re considering are compatible. They have the experience to guide you and make sure everything fits together smoothly during installation. It’s also a good idea to rely on reliable sources like manufacturer guidelines and industry databases—they can help you double-check that your choices are on point. And don’t forget to verify compatibility certification standards to make sure the valves meet all the safety and quality requirements.
Trusted Industry Professionals
When you consult these experts, they can assess your existing rough-in valve and see if it matches the new shower fixture. Their experience helps them spot potential compatibility issues that could impact water flow or pressure.
Relying on their expertise can save you from costly mistakes or replacements down the line. Plus, they stay up-to-date on the latest standards, making sure your installation is safe and effective.
Trusting professionals gives you reliable advice for a smooth, functional shower setup you can count on.
Reliable Resource Sources
Wondering where to find reliable resources for guaranteeing your shower rough-in valve compatibility? Start by consulting trusted industry professionals who understand plumbing codes and water pressure requirements. They can offer expert advice tailored to your setup.
Next, visit reputable plumbing supply stores; the staff there often have extensive knowledge about valve standards and can recommend compatible options. Finally, rely on official manufacturer websites for detailed product specifications and compatibility guides.
These sources help ensure you’re meeting plumbing codes and water pressure standards, reducing the risk of future issues. Connecting with experienced plumbers or reading official product documentation lets you verify if different valves are interchangeable.
Staying informed through these resources gives you confidence in choosing the right rough-in valve for your shower.
Compatibility Certification Standards
To guarantee your shower rough-in valves are compatible, it’s important to understand the role of certification standards. These standards make sure valves meet safety and performance benchmarks, like handling water pressure and durability of materials.
Look for certifications from reputable organizations like ASME or ANSI. They verify that valves can withstand standard water pressure levels without failing.
Certification also confirms that the valve material is suitable for bathroom environments, resisting corrosion and wear over time. By checking these standards and labels, you can ensure your valve works well with your plumbing system.
This verification helps prevent issues like leaks or pressure inconsistencies, giving you a reliable shower experience. Always choose valves with recognized certification markings for peace of mind and maximum performance.
Frequently Asked Questions
How Do I Identify the Model Number on My Shower Valve?
You can find the model number on your shower valve during installation by checking the casing or handle. Manufacturers often place a label or etched code in these spots.
Look for a small sticker, stamped number, or engraved logo nearby. If it’s hard to see, carefully remove the handle using the right tools.
Knowing the exact model helps you find compatible parts and makes maintenance or replacement easier. This way, you avoid unnecessary hassle.
Are All Shower Valves Universal Across Brands?
Not all shower valves are universal across brands. You might think you can swap them effortlessly, but brand compatibility and valve customization matter.
Different brands often design their valves with unique dimensions and connection types, making replacements tricky.
To avoid leaks or installation issues, check your current valve’s model number and verify your new valve matches that, or choose a brand that offers universal models designed for easy compatibility.
What Are Common Compatibility Issues With Shower Rough-In Valves?
Compatibility issues with shower rough-in valves often involve installation challenges and water pressure problems.
You might find it tricky to fit certain valves if they aren’t designed for your plumbing setup. This can lead to leaks or improper function.
Some valves aren’t compatible with your existing water pressure. That can cause weak or inconsistent flow.
Always verify specifications and consult a professional. Doing so helps you avoid these common pitfalls and ensures everything works properly.
Can I Upgrade to a More Advanced Valve Without Replacing the Entire Unit?
Yes, you can upgrade to a more advanced valve without replacing the entire unit, but valve compatibility is key.
Check if the new valve fits your existing rough-in measurements and connection types. Review upgrade options that match your current setup, especially if you want features like thermostatic controls or digital displays.
Consulting a professional plumber helps guarantee seamless integration and maximum performance without unnecessary replacements.
How Often Should Rough-In Valves Be Inspected or Replaced?
Did you know most plumbing experts recommend inspecting rough-in valves annually? It’s a good idea to follow a maintenance schedule to check for leaks, corrosion, or wear.
You should look out for signs like reduced water flow, inconsistent temperature, or corrosion. If you notice any of these, don’t wait—it’s time to replace the valve.
Timely inspection and replacement help ensure your shower stays efficient and safe. This can also prevent costly repairs later on.
Stay proactive to keep your plumbing system in top shape and avoid surprises. Regular check-ups make a big difference!
Conclusion
In your quest to guarantee all shower rough-in valves match perfectly, you’re basically the detective uncovering the mystery of plumbing compatibility!
Double-check measurements and compare manufacturer specs to be sure they align. Don’t hesitate to seek expert advice—your shower’s performance depends on it.
Getting this right isn’t just a small task. It’s the key to avoiding a plumbing catastrophe that could turn your bathroom into a waterfall.
Stay thorough and confident—remember, you’re the boss of your shower setup and ensuring all shower rough-in valves are the same is crucial.