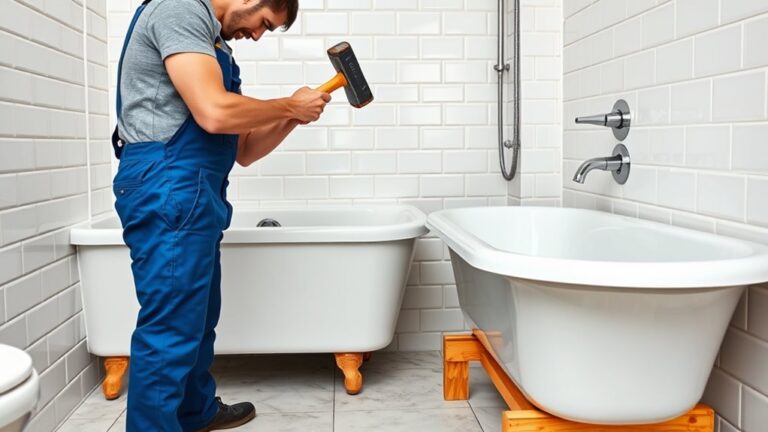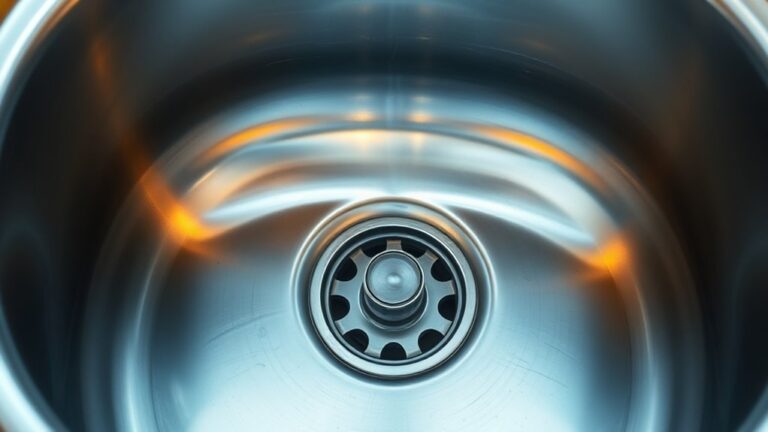
Easy Guide to Breaking Water Pump Bolts on a 2011 GMC Acadia
Dealing with stubborn water pump bolts on your 2011 GMC Acadia can be frustrating, especially if they’re stuck or corroded. Many people struggle with removing these bolts without causing damage or wasting time. You’re not alone—this is a common issue for DIY car enthusiasts and even seasoned mechanics.
To break water pump bolts on your 2011 GMC Acadia, start by disconnecting the battery and letting the engine cool.
Use plenty of penetrating oil on the bolts, allowing it to soak for 15-20 minutes.
Apply gentle heat if needed, then use proper tools to turn the bolts slowly and steadily.
Always tighten to the correct torque during reinstallation.
For detailed tips and techniques, keep exploring these proven methods to make the process smoother.
Key Takeaways
- Apply penetrating oil generously and let it soak to loosen rusted or seized water pump bolts.
- Use heat carefully with a heat gun or small torch to expand the metal and break corrosion bonds.
- Use a correctly sized socket wrench and apply steady, controlled force to prevent damage to the bolts.
- Avoid over-tightening when reassembling. Follow the manufacturer’s torque specs with a torque wrench.
- Clear your workspace, disconnect the battery, and let the engine cool before starting to remove the bolts.
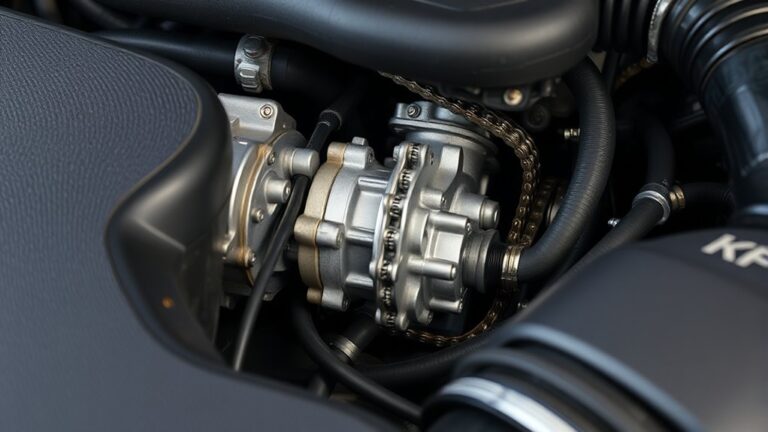
Understanding Why Water Pump Bolts Seize on Your 2011 GMC Acadia
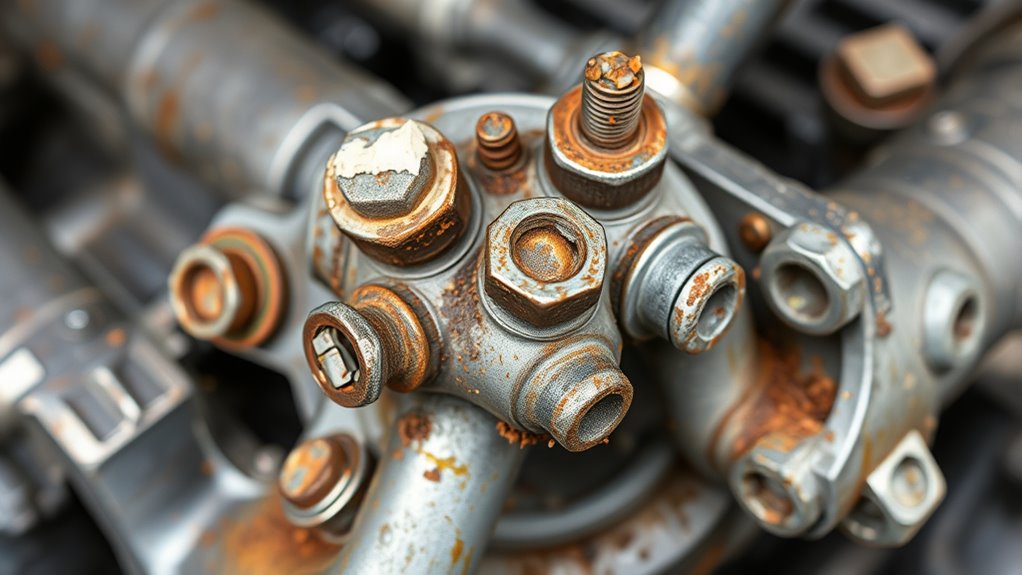
Water pump bolts can seize on your 2011 GMC Acadia because of corrosion and oxidation that build up over time. These issues weaken the bolts, making them tough to remove. The durability of the water pump varies, but constant exposure to moisture and road salt makes corrosion happen faster.
Corrosion and oxidation weaken water pump bolts on your 2011 GMC Acadia, making removal difficult over time.
When bolts corrode, they often get stuck and may even break when you try to take them out. Oxidation creates rust that bonds the bolts tightly to the surrounding metal parts. Over the years, this build-up weakens the bolts and increases the chances of breaking during removal.
Environmental factors like humidity and temperature changes speed up corrosion and oxidation. As bolts weaken, they can’t be turned or removed smoothly, which leads to seizing. To prevent damage to the water pump or its bolts, it’s important to understand how corrosion affects their strength.
Good maintenance habits, like applying anti-seize compounds or rust inhibitors, help protect the bolts’ integrity. This makes future removal easier and keeps the water pump working reliably, ultimately extending its lifespan.
Tools and Supplies You Need to Remove Water Pump Bolts
To successfully remove water pump bolts on your 2011 GMC Acadia, you’ll need a specific set of tools and supplies designed for the task. Start with a socket set that includes different sizes, preferably metric, to access all bolts efficiently.
A breaker bar can provide extra force, especially on stubborn, seized bolts. You’ll also need a penetrating oil like WD-40 or PB Blaster, which helps loosen rusted or stuck bolts and prevents damage to the water pump gasket.
A flat-head or Phillips screwdriver is useful for removing clips or auxiliary parts. Have a drain pan ready to catch coolant leaks, and make sure you have clean rags for cleanup.
Don’t forget to wear protective gloves and goggles for safety. Using the right tools minimizes damage and helps prevent wrenching or stripping bolts, making the removal process smoother and reducing the risk of damaging the water pump or causing future coolant leaks.
Preparing Your Engine and Workspace for Safe Bolt Removal
Before you get started, take a moment to tidy up your workspace. Clearing the area helps prevent accidents and makes the whole process smoother. It’s also a good idea to gather all the tools you’ll need beforehand—trying to hunt them down in the middle of the job can be frustrating. And don’t forget, safely disconnect the battery first to avoid any electrical mishaps.
Clear Workspace Area
Making sure your workspace is clear and organized is key before trying to remove a water pump bolt. A tidy area helps prevent accidents and makes it easier to find your tools quickly.
Remove any clutter or obstacles that could get in your way. Protect surrounding surfaces with paint protection to avoid damage from debris or spills.
A clean workspace also helps you see fluid flow better inside the engine, which can help spot leaks or issues. Keep the area well-lit and ventilated for safety.
Clearing space around the engine bay gives you easy access and allows you to work efficiently. An organized, protected, and well-lit area creates a safe foundation for removing stubborn bolts and prevents delays or damage.
Gather Essential Tools
Gathering the right tools is essential to safely and efficiently remove the water pump bolt from your GMC Acadia. You’ll need a socket set, including various sizes, to handle different bolt diameters during water pump installation.
A breaker bar or long-handled wrench can give you an extra advantage for stubborn bolts. Make sure to have penetrating oil ready to loosen rusted or stuck bolts.
Before starting, check the engine temperature. It’s best to work after the engine has cooled to prevent burns and make bolt removal easier. A flashlight or work light will help you see clearly in tight spaces.
Disconnect Battery Safely
Disconnecting the battery is an important step to avoid electrical shorts or sparks while working on your GMC Acadia’s water pump. Doing it properly keeps you safe when handling electrical parts and prevents damage.
First, turn off the engine and make sure the vehicle is completely shut down. Locate the battery afterward. Use a wrench to disconnect the negative terminal first, then the positive terminal.
This order helps reduce sparks or electrical shorts during your work. Remember to keep the terminals separate and stored safely to avoid accidental contact. Here’s a quick reference:
| Step | Action | Safety Tip |
|---|---|---|
| Turn off engine | Shut off the vehicle completely | Avoid electrical shocks |
| Disconnect negative | Loosen negative terminal clamp | Prevent electrical shorts |
| Disconnect positive | Loosen positive terminal clamp | Keep workspace safe |
| Store securely | Keep terminals apart and covered | Protect from accidental contact |
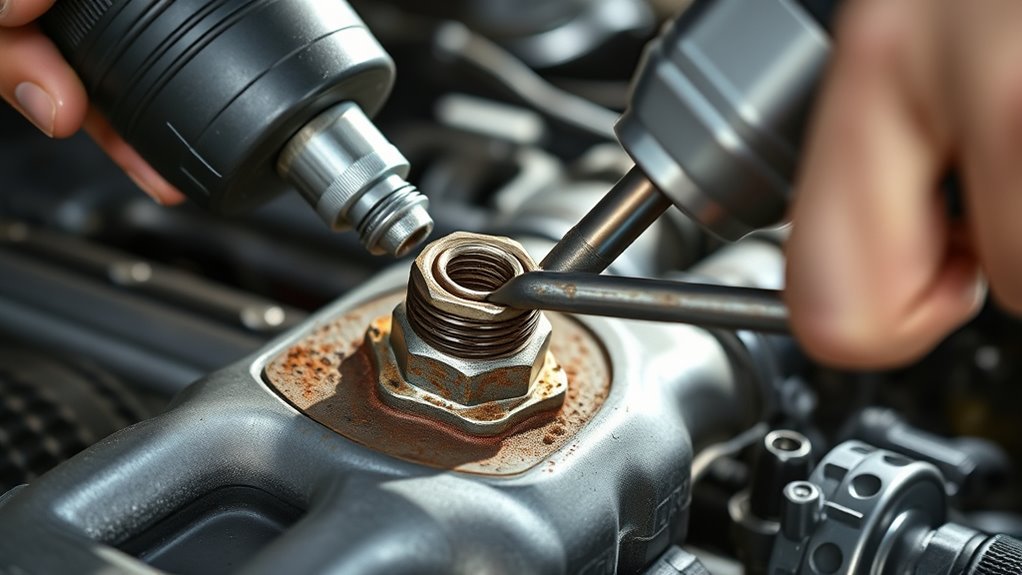
How to Apply Penetrating Oil Effectively to Loosen Stuck Bolts
To loosen stuck bolts effectively, you need to apply penetrating oil carefully and strategically. Start by cleaning the area around the bolt to remove dirt and rust, which can hinder the oil’s effectiveness.
Spray a generous amount of penetrating oil directly onto the bolt, focusing on areas affected by corrosion. Make sure you cover the entire circumference of the bolt’s head and threads.
Allow the oil to soak in for at least 10-15 minutes. If the bolt is severely corroded, reapply the oil and let it sit longer, even overnight if needed.
The penetrating oil works by seeping into rust and corrosion, breaking down the bolt’s grip and easing removal. Patience is key—rushing can cause stripped bolts or more damage.
Is It Time to Use Heat? When and How to Apply It Safely
When penetrating oil alone doesn’t loosen stubborn bolts, applying heat can be a helpful next step. Heating the area around the water pump bolt causes the metal to expand, which can help break the rust or corrosion bond.
Make sure the engine is cool enough to handle safely before applying heat. Use a heat gun or small propane torch and target the bolt and surrounding areas carefully.
Be careful not to apply direct flame to plastic or rubber parts, as these can melt or get damaged. Applying heat evenly helps loosen the bolt without warping nearby components.
After heating for a few minutes, let the bolt cool slightly before trying to turn it. This controlled heat application can loosen stuck water pump bolts more effectively and reduce the risk of breaking them.
Remember to always prioritize safety and patience when using heat in automotive repairs.
Tips for Loosening Rusted or Seized Bolts Without Damage
Loosening rusted or seized bolts without causing damage takes a bit of patience and the right techniques. First, spray a rust penetrant like WD-40 or PB Blaster onto the bolt and let it soak for a few minutes, or even overnight if you can. This helps break down rust and makes the bolt easier to turn.
Be sure to turn the bolt slowly, avoiding excessive force that could strip the threads or break it. Using the correct size wrench or socket distributes pressure evenly and reduces the chance of damage. If the bolt is still stubborn, gentle tapping with a rubber mallet can help loosen corrosion buildup.
Remember, keeping the bolt threads clean and applying preventive measures against corrosion in future repairs can make a big difference. This will not only extend the life of your components but also make removing bolts much easier next time.
Patience paired with these techniques is the key to loosening seized bolts without damaging them.
The Right Way to Use Force and Avoid Stripping Bolts
Using the right force is essential to prevent stripping bolts, especially when working with older or rusted ones. Bolt corrosion can weaken threads, making them more prone to damage if you apply too much force.
Always check the torque specifications for your 2011 GMC Acadia’s water pump bolts. Using the correct torque helps you avoid overtightening or under-tightening them.
A torque wrench is your friend here. It helps you apply even pressure, reducing the risk of damage. Avoid impact wrenches or screwdrivers that can deliver sudden, excessive force.
When bolts resist, try applying penetrating oil and give it some time to loosen the corrosion. Patience is key.
If you face extreme resistance, stop and reassess. Forcing the bolt can damage threads and make repairs more complicated.
Troubleshooting When Bolts Won’t Budge: What Are Your Options?
If your water pump bolts refuse to loosen despite applying proper force, it’s important to explore alternative troubleshooting options first. This helps avoid damaging the bolt or surrounding parts.
Bolt corrosion is often the main culprit, making bolts stick even when you try to loosen them. Applying penetrating oil, like WD-40, can help. Be patient and wait at least 15-20 minutes for it to work.
Make sure your tools are the right size and type. Using the wrong tools can strip the bolt or reduce your grip, making the problem worse. A socket set with a breaker bar or impact wrench can give you extra leverage.
But be careful with force—excessive pressure can damage the bolt or nearby parts. If the bolt is really stubborn, gently tapping the handle of your tool with a hammer can help break up rust or corrosion.
Reinstalling and Properly Tightening Water Pump Bolts to the Correct Torque
After successfully removing the stubborn water pump bolts, the next step is to reinstall the pump and tighten the bolts to the correct torque. Proper water pump maintenance guarantees the gasket is replaced correctly to prevent leaks.
Use a torque wrench and follow the manufacturer’s specifications to avoid over-tightening. Over-tightening can crack the pump or strip threads, so be careful.
Start by hand-tightening the bolts evenly. Then, gradually tighten them in a crisscross pattern to ensure even pressure. Refer to the table below for the proper torque specifications and tightening sequence:
| Step | Action | Torque Specification |
|---|---|---|
| 1 | Hand-tighten bolts | N/A |
| 2 | Tighten bolts in sequence | 18 ft-lb (24 Nm) |
| 3 | Final torque check | 18 ft-lb (24 Nm) |
| 4 | Recheck all bolts | Confirm proper tightness |
| 5 | Replace gasket if new | Guarantee a proper seal |
This process guarantees peak water pump performance and helps prevent future leaks.
Common Mistakes to Avoid When Removing and Installing Water Pump Bolts
When you’re taking out or putting in water pump bolts, it’s easy to make a few mistakes that can cause problems down the line. One common mistake is over-tightening the bolts. If you tighten them too much, you risk stripping the threads or even breaking the bolts, which can really complicate things later on.
Another thing to watch out for is using the wrong tools. If you grab the wrong size socket or wrench, you might damage the bolts or even the surrounding parts. That’s why it’s so important to pick the right tools for the job.
Over-Tightening Risks
Over-tightening water pump bolts can cause immediate damage or lead to long-term issues that are hard to fix. When you torque the bolts too tightly, you risk damaging the water pump itself or cracking the housing. This can lead to water pump failure and cause coolant leaks and overheating, which can compromise the entire coolant system.
Excessive tightening can also distort the bolt threads or the mounting surface, making future removal difficult. Remember, the manufacturer’s torque specifications are set to guarantee proper sealing without causing damage.
Always use a torque wrench and stick to the recommended settings to prevent overstressing parts. Proper tightness helps maintain the integrity of the coolant system and avoids costly repairs down the line.
Incorrect Tool Usage
Using the correct tools is essential to avoid damaging water pump bolts during removal or installation. Using the wrong size socket or an inappropriate screwdriver can strip bolt heads or cause slippage, making removal difficult or leading to more damage.
Be sure to use tools specifically designed for automotive work, like a quality socket wrench set with the right size socket. Using improper torque or makeshift tools can also cause bolts to break or strip.
Avoid applying excessive force, which increases the risk of damaging bolts and surrounding parts. Always match your tools to the task for a secure grip and proper leverage.
This careful approach helps prevent costly mistakes and makes water pump removal and installation much smoother.
Frequently Asked Questions
Can I Remove Water Pump Bolts Without Disconnecting the Radiator?
You can remove water pump bolts without disconnecting the radiator, but it’s a bit tricky. To make it easier, you might want to drain some coolant first to prevent spills and create some space.
Be careful with the bolt threads—forcing the pump out can damage them or cause leaks. Doing a coolant flush beforehand helps clear out debris, which reduces the risk of contamination when removing or putting the pump back in.
What Safety Precautions Should I Take During Bolt Removal?
When removing water pump bolts, prioritize safety by wearing personal protective equipment like gloves and safety glasses.
Follow tool safety procedures carefully, making sure your tools are in good condition and used correctly to prevent accidents.
Keep your workspace organized and free of clutter, and avoid distractions. Staying alert is key.
Use protective gear and follow safety protocols to minimize risks, protect yourself, and make the bolt removal process smoother and safer.
Are Special Tools Needed for Seized Bolts on My GMC Acadia?
Yes, you’ll need special tools like a bolt extractor for seized bolts on your GMC Acadia. If the bolts are stubborn, try knocking techniques with a hammer and punch to loosen rust or corrosion.
A bolt extractor grips the damaged head, making removal easier without damaging the surrounding components. Using these tools and methods helps prevent further damage.
This way, you can successfully remove even the most stubborn bolts without causing extra issues.
How Long Should Penetrating Oil Sit Before Trying to Loosen Bolts?
You should let the penetrating oil sit for at least 15 to 30 minutes to effectively loosen seized bolts caused by corrosion and poor oil penetration.
If the bolts are still stubborn, try applying more oil and wait another 30 minutes or even overnight. Patience is key here.
Giving the oil enough time to penetrate deep into the threads makes it much easier to loosen the bolts and helps prevent damage.
Is It Necessary to Replace Damaged Bolts After Removal?
Did you know that over 60% of damaged bolts need replacement to ensure proper function?
It’s really important to check the damage carefully after removing a bolt.
If you see threading issues, corrosion, or deformation, you should definitely consider replacing the bolt.
Damaged bolts can compromise the water pump’s integrity, which might lead to leaks or even failure.
So, proper damage assessment is key.
Replacing damaged bolts will save you time and help prevent future engine problems.
Conclusion
Sometimes, removing stubborn water pump bolts feels like a test of patience, but with the right tools and techniques, you can succeed.
Remember, a little extra care and the right approach can turn a frustrating task into a simple one. Like life’s toughest moments, it’s often about knowing when to step back, apply the right pressure, and trust that the right solution will come.
Stay patient—your perseverance will pay off, especially when you’re tackling water pump bolt removal on a 2011 GMC Acadia.