How to Check if All Shower Heads Have the Same Thread
If you’ve ever struggled with mismatched shower heads or leaks after installation, you’re not alone. Many people find it tricky to ensure all their shower fittings are compatible, especially when replacing or installing new heads.
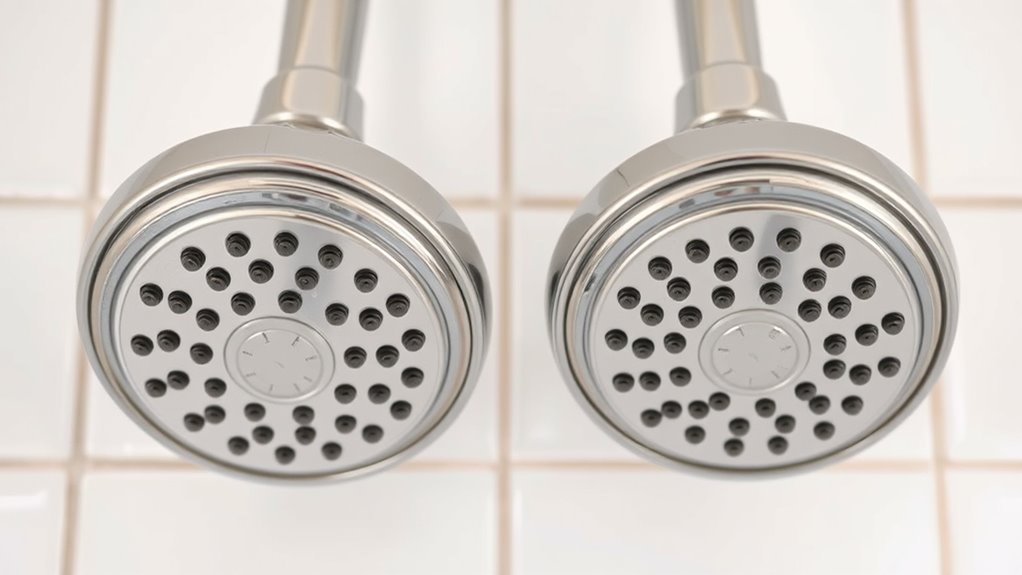
Checking if all your shower heads have the same thread is a crucial step to avoid hassles down the line.
To check if all your shower heads have the same thread, remove each one and measure their thread diameter and pitch using tools like a caliper or thread gauge. Keep the threads clean and free of debris before measuring, and compare your results with common sizes like ½ or ¾ inch.
Accurate measurements help ensure compatibility and prevent leaks.
If you want to learn more about matching and troubleshooting, there’s plenty more to investigate.
Key Takeaways
- Remove all shower heads and look closely at their threads for size, pitch, and standard markings like NPT or G1/2.
- Use a caliper to measure each shower head’s thread diameter for accuracy.
- Check if the thread pitch and type match across all fittings by using a thread gauge.
- Compare your measurements to common standards like G1/2 or G3/4 to see if they’re compatible.
- Make sure the threads are clean and free of debris before measuring for the most accurate results.
Why Matching Shower Head Threads Is Important
Matching shower head threads is essential because incompatible threads can prevent you from properly attaching the new head, leading to leaks or a loose fit. If the threads don’t match, water can escape at the connection, causing water wastage and damage to your bathroom fixtures.
Correct threading ensures a tight seal, which helps maintain ideal water pressure and water flow. When your shower head fits snugly, it directs water efficiently, making your shower more enjoyable.
Mismatched threads can result in reduced water flow or uneven spray patterns, making your shower less effective. To avoid frustration, always check that the threads on your shower pipe and new head align precisely.
A proper match means no leaks, consistent water pressure, and steady water flow that makes every shower more comfortable. Focusing on matching threads ensures your shower setup functions smoothly and prevents costly repairs down the line.
How to Remove Your Shower Head for Inspection
To inspect your shower head, you’ll need to remove it from the pipe. Start by turning off the water supply to prevent leaks. Use a cloth or towels around the connection to avoid scratching your fixtures.
Turn off water, protect fixtures, then carefully loosen and remove your shower head for inspection.
Grab a wrench or adjustable pliers, and carefully loosen the shower head by turning counterclockwise. If it’s stuck due to mineral buildup or old sealant, apply a bit of penetrating oil and let it sit for a few minutes before trying again.
Removing the shower head allows you to check for water filtration buildup and assess its condition. During shower maintenance, cleaning or replacing internal parts becomes easier once it’s detached.
Inspect the threads for corrosion or damage, and clean any debris or mineral deposits. Putting it back on, verify the threads are dry, then tighten securely to avoid leaks.
Proper removal simplifies inspection and ensures your shower system functions efficiently, supporting better water filtration.
What Tools Do You Need to Measure Thread Size?
If you want to measure your shower head threads accurately, there are a few basic tools you’ll want to have on hand. An adjustable wrench is really handy for threading your shower head, and a thread gauge or a caliper can help you get the precise measurements. These tools are great for figuring out the exact size and pitch of the threads so you know you’re getting the right fit.
It’s also a good idea to identify the thread standards, like NPT or other types, to make sure everything will work together smoothly. Knowing these details can save you a lot of hassle when shopping for replacements or fittings.
Suitable Measuring Tools
When measuring your shower head’s thread size, using the right tools is key for accuracy. Proper tools help ensure you get precise measurements, which are essential for checking if different shower heads will fit.
The main tools you’ll need are a Vernier caliper, a thread gauge, and a ruler or tape measure. The caliper gives you precise measurements of the thread diameter and pitch, making your readings more accurate.
A thread gauge quickly identifies the thread type and size to confirm compatibility. If you don’t have a detailed tool, a ruler or tape measure can offer a rough measurement, perfect for initial checks.
Using these tools helps you gather reliable data on thread size and pitch. This makes it easier to match shower heads correctly and avoid any fitting issues.
Accurate measurements save you time and hassle down the line by preventing mismatched connections.
Identifying Thread Standards
Since figuring out the right thread standard is key to making sure your shower head fits properly, you’ll need some specific tools to compare and verify the thread types. A digital caliper or a thread gauge works best for accurate measurements, helping you find the diameter and pitch of the threads.
You might also want a Phillips or flat-head screwdriver if you need to remove the shower head to access the connections. When checking the threads, think about your bathroom decor and water-saving goals.
Choosing the right fit prevents leaks, which helps save water and keeps everything looking good. Keep a measurement chart handy so you can compare your findings with standard thread sizes.
Getting accurate measurements ensures your shower head is compatible, your bathroom looks nice, and you’re supporting eco-friendly water use.
How to Measure Your Shower Head’s Thread Diameter and Pitch
Sure! Here’s the modified version with a more conversational tone:
—
Want to figure out your shower head’s thread size? No problem! First off, grab a ruler or a caliper—you’ll want something precise but easy to handle. Start by measuring across the threads to get the diameter. Just place the tool straight across and note the measurement—that’s your thread diameter.
Once you’ve got that, it’s time to figure out the pitch. Basically, the pitch is how far apart the threads are when you twist them. To find this, count how many threads you see over a specific length, like one inch, and then see what that means for your shower head.
With these measurements, you’ll know exactly the right replacement or accessory to get. It’s pretty straightforward, just takes a little patience!
Tools Needed for Measurement
You’ll need some specific tools to accurately measure your shower head’s thread diameter and pitch. Proper tools help guarantee precise measurements, especially when dealing with thread corrosion that can obscure details or color matching issues on older fixtures.
Here’s what you’ll need:
- Caliper or ruler – for precise measurement of the diameter.
- Thread gauge or pitch gauge – to determine the thread pitch accurately.
- Magnifying glass – to inspect threads closely, especially if thread corrosion has affected their appearance.
These tools help you avoid mistakes and get accurate readings, making it easier to find matching replacement parts or confirm uniform thread sizes across multiple shower heads.
Step-by-Step Measurement Process
Measuring your shower head’s thread diameter and pitch accurately is really important to ensure a proper fit for replacement parts. If you don’t measure correctly during maintenance, you might end up with leaks or lower water pressure.
Start by wrapping a ruler or caliper around the base of the shower head to find its diameter. Then, use a thread gauge or a small ruler to check the pitch, which is the distance between the threads. Count the number of threads per inch or millimeter to get this measurement.
Make sure the threads are clean and free of debris to get an accurate reading. Compare your measurements to standard sizes like ½ inch or ¾ inch.
This step-by-step process helps you choose compatible replacement heads, maintain optimal water pressure, and keep your shower working efficiently. Accurate measurement makes installation easier and leads to long-lasting results.
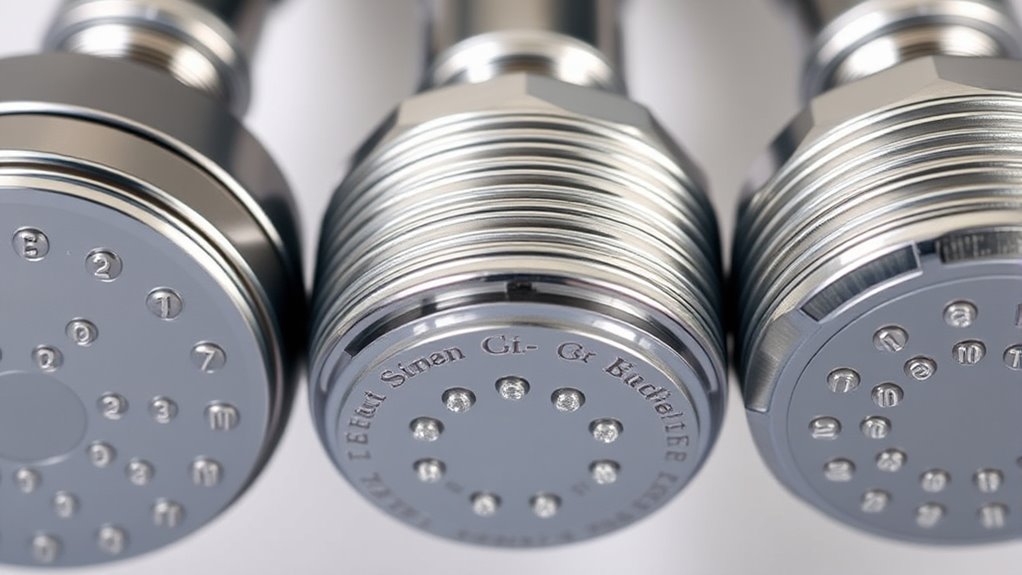
Using a Thread Gauge to Find the Exact Thread Size
Using a thread gauge is the most accurate way to determine the exact thread size of your shower head. This tool lets you measure the thread diameter and pitch precisely, ensuring your replacement parts will fit.
When using the gauge, follow these measurement techniques. First, insert the gauge into the shower head’s threaded opening, choosing the closest fit. Make sure it slides in smoothly without forcing it.
Check for a snug fit—if it’s too tight or loose, try a different size. Once it fits perfectly, record the measurement, noting both the diameter and pitch.
A thread gauge helps you avoid guesswork and makes sure you get an exact match for your shower head. It’s especially handy to verify if all your fixtures share the same thread size or if replacements will fit correctly.
This technique is quick, reliable, and reduces errors. It gives you confidence when shopping for compatible parts or troubleshooting your plumbing issues.
How to Compare Thread Sizes Across Multiple Shower Heads
When comparing thread sizes across multiple shower heads, it’s important to use a consistent method so you can spot any differences accurately. Start by removing each shower head and taking a close look at their threads. Use a caliper or a thread gauge to measure the diameter of each thread, making sure to take the measurements at the same spot for consistency.
Keep in mind that the thread size can affect water pressure when installing the shower head. Mismatched sizes can cause leaks or reduce water flow. If two shower heads have the same measurement, they’re more likely to fit properly and maintain good water pressure.
It’s a good idea to keep a record of your measurements so you can compare easily later. Matching thread sizes isn’t just about quick installation; it also helps ensure steady water pressure and a secure, leak-free connection across multiple shower heads.
This simple process saves you from guesswork and helps guarantee a secure, leak-free connection every time.
Common Shower Head Thread Sizes and Connectors
Knowing the standard thread sizes and connector types can make your life a lot easier when you’re shopping for a shower head. Most shower heads follow common thread measurements, so you can usually find one that fits just right. But keep in mind, some connectors are designed for specific fittings, which can get a little tricky.
Standard Thread Sizes
Most shower heads feature standardized thread sizes, making installation and replacement straightforward. Knowing these sizes helps assure compatibility with your bathroom decor and keeps water pressure steady.
Common thread sizes include G1/2 inch, which is the most typical and fits most shower arms and fittings. G3/4 inch is used for some high-pressure or rainfall showers.
NPT, or National Pipe Thread, is usually the same as G1/2 but double-check fittings just to be sure. Your shower head usually has a G1/2 inch thread, so replacements are easy.
Confirming thread sizes ensures your new shower head fits securely and prevents leaks. This keeps your water pressure consistent and your bathroom looking and functioning its best.
Connector Types and Compatibility
Are you aware of the different connector types that guarantee your shower head fits securely? Shower heads use various connector types, making compatibility key for bathroom fixtures and plumbing upgrades.
Common connectors include the standard Aussie or NPT threading, usually ½ inch in size, which fits most residential shower heads. Some shower heads feature swivel connectors or specialized fittings designed for specific bathroom fixtures.
When upgrading or replacing shower heads, it’s important to check the connector type to ensure compatibility. Using mismatched connectors can lead to leaks or loose fittings, so matching the thread size and type is crucial.
Always verify if your installation requires a universal connector or a specific one tailored for your bathroom fixtures. Proper compatibility ensures a secure fit and reliable function for your shower system.
Tips for Ensuring You Pick the Right Thread Compatibility
Ensuring you pick the right thread compatibility starts with checking the existing threads on your shower head or pipe. To do this accurately, consider these tips:
Start by inspecting and measuring your existing shower head or pipe threads carefully.
- Use a thread gauge to measure the existing threads, making sure they match exactly.
- Clean the tips of your current shower head or pipe with a brush and vinegar to remove mineral buildup, which can hide thread details.
- Test water pressure after installing the new shower head to see if the fit isn’t restricting flow. This can signal mismatched threads or improper installation.
These steps help you pick the right thread size and type. Proper cleaning prevents debris from blocking or damaging threads, helping maintain good water pressure.
Double-checking compatibility before screwing in new fixtures avoids leaks or damage, saving you time and money. Staying precise and clean during this process guarantees a secure fit for better performance.
Troubleshooting Fitting Issues When Threads Don’t Match
When threads don’t match, it can be frustrating to install a new shower head or repair a fitting without leaks or damage. To troubleshoot, start by examining the threads carefully—look for cross-threading or debris that could prevent proper fitting.
If they’re mismatched, avoid forcing the connection, as this can cause damage. Instead, consider using a thread adapter to match different sizes or types. Applying plumber’s tape, also known as Teflon tape, can help create a better seal and improve fitting performance.
This not only guarantees a secure connection but also helps prevent leaks, saving water. During DIY repairs, always double-check thread compatibility before forcing parts together. If you encounter persistent issues, it’s worth researching compatible fittings or consulting plumbing guidelines.
Proper troubleshooting saves you time, reduces waste, and keeps your water fixtures efficient. It helps you avoid unnecessary repairs and supports water conservation efforts.
When to Consult a Professional for Shower Head Fittings
Sometimes, despite your best efforts, stubborn fitting issues or leaks might mean it’s time to call in a pro. If you’re dealing with incompatible threads, water pressure problems, or bathroom design quirks that make DIY tricky, bringing in an expert can save you a lot of hassle.
When stubborn leaks or fitting issues arise, calling a professional can save you time and prevent damage.
Consider seeking professional help if you notice uneven water pressure after installing multiple shower heads, which could point to threading or plumbing issues. It’s also smart to get help if you’re unsure about how your bathroom design affects installation or if DIY fixes haven’t stopped persistent leaks or damage.
A plumber or specialist can evaluate these problems safely and efficiently. They’ll ensure your shower head fits properly and that water flows smoothly, saving you time and preventing damage.
When in doubt, reaching out to an expert is the best move. It guarantees your shower head setup is safe, works well, and integrates seamlessly with your bathroom.
Frequently Asked Questions
Can Different Shower Heads With the Same Thread Size Fit Together?
Yes, different shower heads with the same thread size can generally fit together, but only if they’re compatible. Make sure to check the thread size to see if it matches.
Even if the thread sizes are the same, it’s important to verify that the design and connection type are compatible. This helps prevent leaks and ensures a secure fit.
Always double-check compatibility before installing new shower heads to avoid any issues.
Do Thread Sizes Vary Between Brands or Models?
Thread sizes can vary between brands and models, so it’s important to check for compatibility. Brand differences might influence the thread standard, but many follow common ones like NPT or BSP.
Always measure the thread size or look at the product specifications to make sure your shower head will fit your existing shower arm.
Matching thread standards and double-checking compatibility helps prevent leaks and ensures a secure, proper fit.
Are There Universal Adapters for Mismatched Shower Head Threads?
You wonder if universal adapters exist for mismatched shower head threads. The answer is yes!
These adapters are designed to fit a wide range of thread sizes and types, making your task easier.
They act as perfect solutions for thread mismatches, so you can quickly connect your shower head without hassle.
No matter the brand or model differences, just grab one and you’re all set for a hassle-free upgrade.
How Do I Identify if My Shower Fitting Is Damaged?
To identify if your shower fitting is damaged, look for water pressure issues like inconsistent flow or reduced pressure. These can signal a problem.
Check for corrosion or mineral buildup around the fitting. These signs show wear and could be affecting your shower.
Inspect the threads for any signs of damage or cracks. Damaged threads can lead to leaks and worsen the problem.
Damage might also affect how well the fitting resists corrosion. If you notice rust or deterioration, it’s probably time to replace it to keep things flowing smoothly.
Is It Safe to Replace Shower Head Threads Myself?
Yes, you can safely replace shower head threads yourself if you handle installation safety properly. Carefully turn off the water, use appropriate tools, and follow manufacturer instructions.
Be cautious of corrosion risks by inspecting existing threads for rust or damage before replacing. Taking these precautions helps prevent leaks, water damage, and injuries.
If you’re uncertain, consulting a professional ensures your DIY project stays safe, smooth, and successful.
Conclusion
Now that you know how to check the thread sizes on your shower heads, you’re all set to avoid fitting headaches.
Remember, if the threads don’t match up perfectly, it’s better to address it early rather than letting the problem grow.
Sometimes, a quick fix is all you need to keep everything flowing smoothly.
Stay proactive, and your shower setup will stay in top shape, making sure those rejuvenating showers never lose their spark.
And when it comes to checking if all shower heads have the same thread, a little effort now saves you hassle later.